- Preheat the Oven
Preheat your oven to 350°F (175°C) and grease a 9x13 inch baking pan.
- Mix Dry Ingredients
In a bowl, whisk together the flour, baking powder, baking soda, salt, cinnamon, nutmeg, and ginger.
- Combine Wet Ingredients
In another bowl, mix the granulated sugar, brown sugar, and vegetable oil. Add the eggs, pumpkin puree, and vanilla extract, and mix until well combined.
- Combine Mixtures
Gradually add the dry ingredients to the wet ingredients, stirring until just combined. If desired, fold in nuts or chocolate chips.
- Bake
Pour the batter into the prepared baking pan and spread evenly. Bake for 25-30 minutes, or until a toothpick inserted in the center comes out clean.
- Cool
Allow the bars to cool completely in the pan on a wire rack.
- Make the Frosting
In a bowl, beat together the cream cheese and butter until smooth. Gradually add the powdered sugar and vanilla extract, mixing until creamy.
- Frost the Bars
Once the bars are completely cool, spread the cream cheese frosting evenly over the top. Cut into squares and serve.
- Calories:200 kcals
- Fat:10 grams
- Proteins:2 grams
- Carbohydrates:28 grams
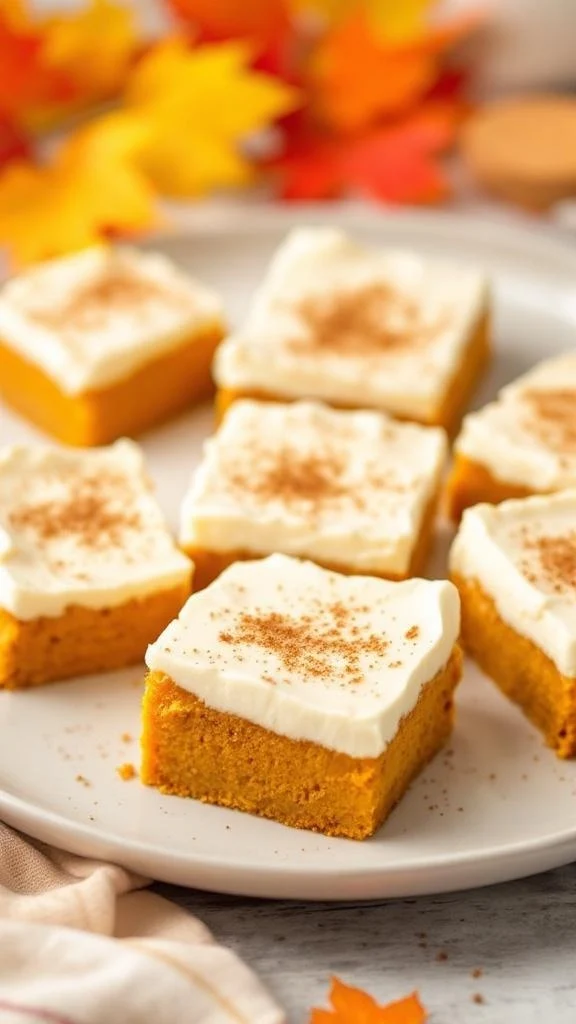
This pumpkin bars recipe is about to become your secret weapon for autumn entertaining, and I’m not being dramatic here. We’re talking about perfectly spiced, incredibly moist bars topped with the creamiest cream cheese frosting that’ll have people begging for the recipe. You know those desserts that disappear in minutes at potlucks? These are exactly that, except everyone will be convinced you spent hours in the kitchen when really, it’s surprisingly simple.
I used to think pumpkin desserts were limited to pie season, but these bars changed my entire perspective. They’re easier than pie, more portable than cake, and somehow taste even better the next day (if they last that long). Now they’re my go to whenever I need something that looks impressive but doesn’t require advanced baking skills or a culinary degree.
The first time I made these pumpkin bars, I was trying to find something festive to bring to a friend’s dinner party. The house smelled absolutely incredible while they were baking, and my kids kept circling the kitchen like little vultures waiting for them to cool. When I finally cut into them and took that first bite with the cream cheese frosting? Total game changer moment right there.
Why This Recipe is Awesome
Let me break down exactly why these pumpkin bars deserve a permanent spot in your recipe collection. First of all, they’re incredibly forgiving. Baking can be intimidating, but this recipe practically holds your hand through the whole process. The batter comes together easily, there’s no complicated techniques, and you’d have to really try hard to mess these up.
The texture situation here is absolutely perfect. You get this moist, tender crumb that’s not too dense but not too cake like either. It’s that sweet spot between brownie and cake that makes every bite feel indulgent without being heavy. And that cream cheese frosting? It adds this tangy richness that balances out the sweetness beautifully.
What really makes me excited about this pumpkin bars recipe is how it captures all those cozy fall flavors without being overwhelming. The combination of cinnamon, nutmeg, and ginger creates this warm spice profile that screams autumn comfort. But it’s not so spice forward that it turns off people who aren’t huge pumpkin spice fans.
The portability factor is huge too. These bars travel well, they’re easy to serve, and they look beautiful arranged on a platter. No need for fancy plating or individual servings. Just cut them into squares, and you’re ready to go. Perfect for bake sales, office parties, or whenever you need to feed a crowd without stressing about presentation.
The Story Behind Pumpkin Bars
Pumpkin bars have their roots firmly planted in American home baking traditions, where resourceful cooks looked for ways to use up that abundant fall harvest. Unlike pumpkin pie which requires pastry skills and careful timing, bars offered a simpler way to enjoy all those wonderful pumpkin flavors. The sheet pan format made them perfect for feeding large groups, which is probably why they became such a hit at church potlucks and family gatherings.
My personal journey with pumpkin bars started when I was trying to impress my new in laws at my first Thanksgiving with them. I wanted to contribute something homemade but was terrified of attempting pie from scratch. My grandmother suggested these bars, promising they were foolproof. She was right, but she didn’t mention that they’d become the most requested dessert at every family gathering from that point forward.
I remember standing in her kitchen watching her mix the batter with such casual confidence. She told me the secret was using real pumpkin puree and not being shy with the spices. She also insisted on cream cheese frosting rather than the powdered sugar glaze some recipes call for. That tangy frosting, she explained, was what elevated these from good to absolutely crave worthy.
Over the years, I’ve made these pumpkin bars more times than I can count. Some batches were for special occasions, others were just because I was craving something sweet and comforting on a random Tuesday. I’ve experimented with different add ins, tweaked the spice levels, and even tried various frosting techniques. But the core of this recipe remains exactly as my grandmother taught me.
What I love most about this pumpkin bars recipe is how it brings people together. There’s something about the aroma of pumpkin and spices baking that makes everyone gravitate toward the kitchen. It’s become my signature dish, the thing people associate with me at gatherings. And honestly? That feels pretty special.
Essential Equipment & Kitchen Tips
A 9×13 inch baking pan is your foundation here. I prefer metal pans for more even browning, but glass works fine if that’s what you have. Just be aware that glass pans can take a bit longer to bake, so adjust your timing accordingly. Line the pan with parchment paper for easy removal, or at least grease it really well to prevent sticking.
Your mixing bowls matter more than you might think. You need at least two medium sized bowls, one for wet ingredients and one for dry. Having them clearly separated before you start mixing makes the whole process so much smoother. I learned this the hard way after trying to wing it and ending up with lumpy batter.
A good whisk is essential for getting those dry ingredients properly combined. You want to make sure the baking powder, baking soda, and spices are evenly distributed throughout the flour. Clumps of spice or leavening agents will create uneven results, and we’re not going for that rustic, unpredictable vibe here.
For the frosting, an electric mixer makes life so much easier. You could do it by hand, but getting that light, fluffy texture requires some serious arm power. A hand mixer works perfectly fine, you don’t need a fancy stand mixer unless you already have one. Just make sure everything is properly softened first, or you’ll burn out your mixer motor.
Pro Chef Secrets & Advanced Techniques
Here’s where I’m going to share the insider knowledge that takes these pumpkin bars from homemade to bakery quality. First secret: use pure pumpkin puree, not pumpkin pie filling. The pie filling has added spices and sugars that throw off the carefully balanced flavors in this recipe. Plus, you lose control over the spice levels, which is half the fun of baking.
Room temperature ingredients are crucial for the right texture. When your eggs and pumpkin puree are cold, they don’t incorporate smoothly with the other ingredients. This creates a dense, heavy texture instead of that light, moist crumb we’re going for. Take everything out of the fridge about 30 minutes before you start baking.
The mixing method matters more than most people realize. When you combine the wet and dry ingredients, mix until just combined. Overmixing develops the gluten in the flour, which creates tough, chewy bars instead of tender ones. A few small lumps are perfectly fine and will bake out in the oven.
Here’s a pro tip for perfect frosting: beat the cream cheese and butter together first before adding any sugar. This creates a smooth, lump free base. Then add the powdered sugar gradually, about a third at a time, beating well between additions. This prevents that powder explosion all over your kitchen and gives you much better control over the consistency.
For extra flavor depth, I like to toast my spices in a dry pan for about 30 seconds before adding them to the dry ingredients. This wakes up the essential oils and creates a more complex, aromatic flavor. Just be careful not to burn them, or you’ll end up with bitter bars.
Common Mistakes to Avoid
The biggest disaster I see with pumpkin bars is using pumpkin pie filling instead of pure pumpkin puree. I know the cans look similar, and it seems like they should be interchangeable, but they’re really not. The pie filling is already sweetened and spiced, which throws off the entire recipe. Always read the label carefully before you buy.
Don’t frost these bars while they’re still warm. I know the temptation is real, trust me. But warm bars will melt your frosting into a soupy mess that slides right off. Let them cool completely, even if it means waiting an extra hour. Your patience will be rewarded with beautiful, perfectly frosted bars.
Overbaking is another common mistake that’ll leave you with dry, crumbly bars instead of moist, tender ones. Start checking around the 25 minute mark, even if your recipe says 30 minutes. Every oven runs differently, and it’s better to slightly underbake than overbake. The toothpick should come out clean or with just a few moist crumbs clinging to it.
Measuring flour incorrectly can throw off your entire recipe. Don’t scoop directly from the bag with your measuring cup. This packs the flour down and gives you way more than you need. Instead, fluff up the flour, spoon it into your measuring cup, and level it off with a knife. This might seem fussy, but it makes a real difference.
Not greasing your pan properly is a rookie error that’ll leave you fighting to get the bars out in one piece. Either line the pan with parchment paper leaving some overhang for easy lifting, or grease it really well with butter or cooking spray. Don’t skip this step and hope for the best.
Alternatives & Substitutions
Let’s talk about making this pumpkin bars recipe work with whatever’s in your pantry. Can’t find pumpkin puree? Sweet potato puree works surprisingly well and creates a similar texture and color. The flavor is slightly different but still delicious in its own right. Butternut squash puree is another option that works in a pinch.
The spice situation is pretty flexible based on your preferences. Don’t like ginger? Leave it out or replace it with more cinnamon. Want more warmth? Add a pinch of ground cloves or allspice. I’ve even made these with pumpkin pie spice blend when I was feeling lazy, using about 2 teaspoons to replace all the individual spices.
For the oil, you can substitute with melted butter for a richer flavor, or even melted coconut oil if you’re into that tropical hint. Applesauce works as a lower fat alternative, though your bars will be slightly less tender. Use the same amount as the oil called for.
Egg substitutes work if you’re dealing with allergies or dietary restrictions. Each egg can be replaced with a flax egg (1 tablespoon ground flaxseed mixed with 3 tablespoons water, let sit for 5 minutes). The texture will be slightly different but still good.
For the frosting, you can make it dairy free using vegan cream cheese and butter substitutes. I’ve also done a maple cream cheese frosting by adding 2 tablespoons of maple syrup and reducing the powdered sugar slightly. The maple flavor pairs beautifully with the pumpkin and spices.
Flavor Variations & Creative Twists
Once you’ve mastered the basic pumpkin bars recipe, there’s so much room for creativity. One of my favorite variations is adding a cream cheese swirl directly into the batter before baking. Mix 4 ounces of cream cheese with 1/4 cup sugar and an egg, drop spoonfuls over the batter, then swirl with a knife. It creates this beautiful marbled effect and adds extra richness.
For chocolate lovers, try folding in a cup of chocolate chips into the batter. The combination of chocolate and pumpkin is way better than it sounds. Semi sweet chips work great, but dark chocolate takes it to another level with that slight bitterness balancing the sweetness.
My fall spice version includes adding 1/4 cup of chopped crystallized ginger and a handful of toasted pecans. The ginger adds these little bursts of spicy sweetness, while the pecans bring crunch and earthiness. It’s like autumn exploded in your mouth in the best possible way.
Want something a bit more indulgent? Try a salted caramel version. Drizzle caramel sauce over the cream cheese frosting and sprinkle with flaky sea salt. The sweet and salty combination is addictive, and it looks incredibly fancy with minimal extra effort.
For holiday gatherings, I sometimes do a spiced rum variation by adding 2 tablespoons of rum to the batter and using rum extract in the frosting instead of vanilla. It’s sophisticated without being overwhelming, perfect for adult gatherings where you want something a bit more grown up.
Serving Suggestions & Pairings
These pumpkin bars are incredibly versatile when it comes to serving occasions. For casual family dinners, just cut them into squares and serve on a simple plate. No fuss, no fancy presentation needed. They’re delicious enough to stand on their own without any extra decoration.
If you’re taking them to a party or potluck, consider cutting them into smaller squares for easier grab and go serving. Arrange them on a platter lined with parchment paper, and maybe dust the top with a light sprinkle of cinnamon for visual appeal. People love desserts they can eat with their hands without needing plates and forks.
Coffee and these bars are a match made in heaven. The slightly bitter notes in coffee balance the sweetness perfectly, making them ideal for breakfast or afternoon snack time. Yes, I said breakfast. Don’t judge me. A warm mug of coffee and a pumpkin bar on a cool fall morning is basically self care.
For a more elegant presentation, serve them with a dollop of whipped cream and a light dusting of cinnamon on individual dessert plates. Add a few candied pecans on the side, and suddenly your simple bars look restaurant worthy. It’s all about the plating when you want to impress.
These also pair wonderfully with vanilla ice cream for a more decadent dessert option. The cold, creamy ice cream against the spiced pumpkin creates this incredible temperature and texture contrast. It turns a simple bar into something that feels special and celebratory.
Storage & Reheating Guide
Proper storage is key to keeping these pumpkin bars fresh and delicious for as long as possible. Once they’re completely cooled and frosted, store them in an airtight container at room temperature for up to 2 days. Any longer than that, and you’ll want to refrigerate them because of the cream cheese frosting.
In the refrigerator, these bars stay good for about 5 to 7 days. The texture actually improves after a day or two as the flavors meld together and the moisture distributes evenly throughout. I usually pull them out of the fridge about 15 minutes before serving so they’re not ice cold, which brings out the flavors more.
For longer storage, these pumpkin bars freeze beautifully. You can freeze them already frosted or unfrosted, depending on your preference. If freezing with frosting, let them freeze solid on a baking sheet first, then wrap tightly in plastic wrap and aluminum foil. They’ll keep for up to 3 months.
To thaw, move them from the freezer to the refrigerator the night before you want to serve them. This slow thawing prevents condensation from making everything soggy. If you froze them unfrosted, you can make fresh frosting while they’re thawing for that just made taste.
Individual wrapping is a game changer for grab and go convenience. Wrap each bar in plastic wrap after they’re completely cool, then store them all in a freezer bag. This way you can pull out just one or two at a time without thawing the whole batch. Perfect for lunch boxes or when you need a quick sweet fix.
Nutritional Benefits & Health Notes
While these pumpkin bars are definitely a treat, they do offer some nutritional benefits thanks to the pumpkin. Pumpkin is rich in vitamin A, which supports eye health and immune function. It’s also a good source of fiber, which helps with digestion and keeps you feeling satisfied longer.
The spices in this recipe bring more than just flavor. Cinnamon has been shown to help regulate blood sugar levels, while ginger has natural anti inflammatory properties. Nutmeg contains antioxidants that support overall health. Sure, you’re not eating these bars for their health benefits, but it’s nice to know they’re not completely devoid of nutritional value.
Using real ingredients like pumpkin puree, eggs, and butter means you’re getting actual nutrition rather than a bunch of artificial additives and preservatives. When you bake from scratch, you control exactly what goes into your food, which is always a win in my book.
FAQ (Frequently Asked Questions)
Can I use fresh pumpkin instead of canned pumpkin puree?
You absolutely can! Roast a sugar pumpkin, scoop out the flesh, and puree it until smooth. Just make sure to drain any excess liquid through a fine mesh strainer, as fresh pumpkin tends to be more watery than canned. It takes more effort, but the flavor is fantastic if you’re feeling ambitious.
Why did my pumpkin bars turn out dry?
This usually happens from overbaking or measuring too much flour. Make sure you’re measuring flour correctly by spooning it into the measuring cup and leveling it off. Also, start checking for doneness at the 25 minute mark. Every oven is different, and yours might run hotter than mine.
Can I make these without the cream cheese frosting?
Sure! They’re still delicious without frosting, though I’d argue the cream cheese frosting really makes them special. You could do a simple powdered sugar glaze instead, or even just dust the top with powdered sugar for something lighter.
How do I know when the bars are done baking?
Insert a toothpick into the center of the pan. It should come out clean or with just a few moist crumbs clinging to it. If you see wet batter, give them a few more minutes. The edges will also start pulling away slightly from the sides of the pan.
Can I double this pumpkin bars recipe?
Of course! Just use two 9×13 inch pans or one large sheet pan. Keep in mind that baking time might vary slightly depending on the pan size you use. Sheet pans will bake faster because the batter is spread thinner.
What’s the difference between pumpkin puree and pumpkin pie filling?
Pumpkin puree is just cooked, mashed pumpkin with nothing added. Pumpkin pie filling has sugar, spices, and sometimes other additives already mixed in. For this recipe, you want pure pumpkin puree so you can control the flavoring yourself.
Can I make these bars ahead of time?
Yes! These actually taste better the next day as the flavors develop. You can bake them up to 2 days ahead and store them covered at room temperature. Frost them the day you plan to serve for the freshest frosting, or frost ahead and refrigerate.
Why is my frosting too runny or too thick?
Temperature is usually the culprit here. If it’s too runny, your cream cheese and butter were too soft. Pop it in the fridge for 15 minutes to firm up. If it’s too thick, add a tablespoon of milk or cream and beat until smooth.
Can I add other mix ins like nuts or chocolate chips?
Absolutely! Chopped walnuts or pecans add great texture and flavor. Chocolate chips work wonderfully too. Fold in about 1/2 to 1 cup of your chosen mix in right before pouring the batter into the pan.
How should I cut these bars for the cleanest slices?
Use a sharp knife and wipe it clean between cuts. For really clean edges, refrigerate the frosted bars for about 30 minutes before cutting. The cold frosting will cut more cleanly without smearing all over your knife.
Troubleshooting Guide
If your pumpkin bars sank in the middle after baking, you probably opened the oven door too early or too often. The sudden temperature change causes the structure to collapse before it’s fully set. Try to resist peeking until at least 20 minutes into baking, and when you do check, be quick about it.
Bars that are gummy or undercooked in the center usually need more time in the oven. They might look done on top but still be raw underneath. Make sure you’re checking the center with a toothpick, not just the edges. If the toothpick comes out with wet batter, give them another 5 minutes and check again.
If your frosting separated and looks curdled, your ingredients were probably at different temperatures. The cream cheese needs to be at the same temperature as the butter for them to emulsify properly. To fix it, try beating it on high speed for a few minutes. The friction will warm everything up and help it come together.
Bars that stick to the pan despite greasing are frustrating but fixable. Next time, line the pan with parchment paper leaving some overhang on the sides. This creates handles you can use to lift the entire batch out once it’s cool. If you’re dealing with stuck bars now, run a thin knife around the edges and use an offset spatula to carefully lift them out.
If your bars taste bland despite using the recommended spices, your spices might be old and have lost their potency. Ground spices typically last about a year before they start losing flavor. Smell your spices before using them. If they don’t have a strong aroma, they won’t contribute much flavor to your baking.
Final Thoughts
There you have it, everything you need to create pumpkin bars that’ll have people convinced you’re some kind of baking wizard. This recipe isn’t about complicated techniques or hard to find ingredients. It’s about taking simple, everyday items and transforming them into something that brings joy to everyone who tastes it.
What makes this pumpkin bars recipe so special is how it captures the essence of fall in every bite. The warm spices, the moist texture, that incredible cream cheese frosting. It all comes together to create something that feels both nostalgic and exciting at the same time.
Don’t stress if your first batch isn’t picture perfect. Baking is as much about the process as it is about the result. Even if they come out a bit uneven or the frosting isn’t perfectly smooth, they’ll still taste amazing. And honestly, homemade treats with a few imperfections have way more charm than anything you’d buy at a bakery.
Now go make these bars and watch them disappear faster than you ever thought possible. Whether you’re baking for a special occasion or just because it’s Tuesday and you deserve something sweet, these pumpkin bars will deliver. Your kitchen will smell incredible, your family will be thrilled, and you’ll have the satisfaction of creating something truly delicious from scratch.