- Preparing Your Workspace
Begin by preheating your oven to 350°F (175°C) and positioning the rack in the center position. This moderate temperature ensures even cooking throughout the casserole without burning the top. Bring a large pot of water to a rolling boil over high heat. Add the tablespoon of kosher salt. The water should taste like the ocean. This is your only opportunity to season the pasta itself, so don't skip it.
Add the elbow macaroni to the boiling water and cook for exactly 6 minutes. That's about 2 minutes less than the package directions suggest. The pasta will continue cooking in the oven, so you want it quite firm at this stage. What Italians call "molto al dente." Stir occasionally to prevent sticking. When the timer goes off, immediately drain the pasta in a colander and drizzle with olive oil. Toss gently to coat, which prevents clumping while you prepare the sauce. Set aside but don't rinse. The starch on the pasta helps the sauce adhere better.
- Creating the Perfect Cheese Sauce
Now comes the crucial sauce making process. In your heavy bottomed saucepan, melt the butter over medium heat until it's completely liquefied and just beginning to foam. Add the flour all at once and immediately begin whisking vigorously. You're creating what's called a roux, which will thicken your sauce. Continue whisking constantly for about 2 to 3 minutes. The mixture will look like wet sand initially, then become smooth and paste like. Cook until it turns a light golden color and smells slightly nutty. This cooks out the raw flour taste that can ruin your sauce.
Here's where timing becomes critical. While continuously whisking, slowly pour in the room temperature milk in a steady stream. I cannot stress enough how important it is to whisk constantly during this step. If you stop whisking, lumps will form immediately. The mixture will seem thin at first, but keep whisking. As it heats, you'll feel it thickening gradually. This process takes about 5 to 7 minutes over medium heat. The sauce is ready when it coats the back of a spoon and you can draw a line through it with your finger that doesn't immediately run together.
Once the base sauce has thickened properly, reduce the heat to low and stir in the heavy cream. Add the salt, pepper, garlic powder, cayenne pepper, and dry mustard powder. Stir well to distribute the seasonings evenly throughout the sauce. Now comes the most satisfying part: adding the cheese. Remove the pan from heat entirely before adding cheese. This prevents the proteins in the cheese from seizing up and becoming grainy.
Add the cheddar, Gruyère, and fontina in three separate additions. Stir thoroughly after each addition until the cheese melts completely and the sauce becomes silky smooth. Taste your sauce at this point and adjust seasoning if needed. It should taste slightly over seasoned because the pasta will dilute it somewhat. The sauce should be quite fluid, thinner than you think it should be. Remember, it will thicken considerably as it bakes and the pasta absorbs liquid. If it seems too thick, whisk in a bit more milk now.
- Assembling the Casserole
Pour the drained pasta into a large mixing bowl and add the cheese sauce. Using a large spoon or silicone spatula, gently fold everything together until every piece of pasta is coated with sauce. You want to be thorough but gentle to avoid breaking the pasta. Transfer this glorious mixture into your prepared 9x13 inch baking dish. Spread it evenly across the bottom. Shake the dish gently to settle everything and eliminate air pockets.
For the topping, combine the panko breadcrumbs, melted butter, Parmesan cheese, and parsley in a medium bowl. Mix thoroughly with a fork until all the breadcrumbs are coated with butter. They should look like wet sand. Sprinkle this mixture evenly over the entire surface of the mac and cheese. Don't press it down. Just let it sit on top loosely. This allows it to get crispy rather than soggy.
- The Baking Process
Cover the baking dish tightly with aluminum foil and place it in the preheated oven. Bake covered for 20 minutes. This initial covered baking allows the interior to heat through completely and the flavors to meld without the top burning. After 20 minutes, carefully remove the foil and continue baking for an additional 15 minutes uncovered. The top should turn deep golden brown and you'll see the edges bubbling vigorously.
For an extra crispy top, turn on the broiler for the last 2 to 3 minutes. Watch it carefully because things can go from perfect to burnt very quickly under the broiler. Remove from the oven when the top is deeply golden and crispy, and the edges are bubbling energetically.
This is important: let it rest for 10 minutes before serving. I know this is torture when it smells so incredible, but this resting time allows the sauce to thicken properly. If you dig in immediately, it will be soupy. After 10 minutes, it will have the perfect creamy but not runny consistency.
- Calories:485 kcals
- Fats:26 grams
- Proteins:21 grams
- Carbohydrates:42 grams
Baked Mac and Cheese became my culinary obsession on a rainy November afternoon when I attempted to recreate my grandmother’s legendary recipe from memory alone. Standing in her kitchen as a child, I watched her layer those perfectly cooked elbow macaroni with what seemed like an endless stream of melted cheese. The aroma that filled her small farmhouse kitchen was intoxicating. Rich, buttery scents mixed with sharp cheddar made my mouth water before I even took my first bite. She never wrote down her recipe, and after she passed, I spent years trying to capture that exact combination of creamy interior and crispy, golden top that defined her version.
My first attempt was a disaster. The sauce broke, the pasta was mushy, and the top barely browned. Refusing to give up, I kept trying. After dozens of trials, adjusting ratios, testing different cheese combinations, and perfecting my béchamel technique, I finally achieved it. That moment when I pulled the bubbling casserole from the oven and saw the perfectly golden, crispy top crackling around the edges actually made me tear up. The first bite transported me right back to grandmother’s kitchen. Since then, I’ve made this recipe hundreds of times, refining it further with each iteration. It’s become my most requested dish at every family gathering and potluck.
The Rich Cultural Heritage of Baked Mac and Cheese
The journey of macaroni and cheese from Italian pasta dishes to American comfort food classic is fascinating. While pasta and cheese combinations have existed in Italian cuisine for centuries, the modern baked version we know today emerged in America during the 18th century. Thomas Jefferson famously served a pasta dish with Parmesan cheese at the White House after encountering it in France and Italy. The truly American baked macaroni and cheese, with its creamy sauce and breadcrumb topping, developed throughout the 19th century.
This dish became deeply embedded in African American culinary traditions, where it evolved into the soul food staple we recognize today. The Southern tradition particularly emphasizes a custard style preparation with eggs, creating an incredibly rich and creamy texture. Different regions developed their own variations. New England versions often include lobster, while Southern iterations might incorporate hot sauce or mustard powder. The introduction of processed cheese products in the 1930s made mac and cheese accessible to more families, though nothing compares to making it from scratch with real cheese.
Throughout my research and travels, I’ve discovered that nearly every culture has its own interpretation of pasta with cheese. Italian cacio e pepe and Swiss älplermagronen come to mind. The American baked version holds a special place in my heart because it represents comfort, family, and tradition in their most delicious form.
Essential Equipment and Tools
Creating perfect Baked Mac and Cheese requires some key equipment pieces that significantly impact your final result. First and foremost, you’ll need a large stockpot, at least 6 quarts, for cooking the pasta. I use my All Clad stainless steel stockpot because it heats evenly and has enough room for pasta to move freely without sticking. A heavy bottomed saucepan is absolutely critical for making the cheese sauce. I prefer my 4 quart Le Creuset enameled cast iron saucepan because it distributes heat perfectly and prevents scorching.
The heavy bottom is essential because it allows you to cook the roux properly without burning. A proper whisk makes all the difference when creating smooth, lump free sauce. I recommend a balloon whisk rather than a flat whisk because it incorporates ingredients more efficiently. You’ll need a good box grater or food processor with a grating attachment. I personally love my Microplane box grater with different size options. The medium holes work perfectly for most cheeses. If you’re grating large quantities, a food processor saves considerable time and effort.
The baking dish is another crucial consideration. A 9×13 inch ceramic or glass baking dish works beautifully and provides enough surface area for that coveted crispy top. I prefer ceramic because it retains heat wonderfully and creates more even browning. Pyrex glass dishes work well too, though they sometimes require a few extra minutes in the oven. Make sure your dish is at least 2 to 3 inches deep to accommodate all that cheesy goodness without bubbling over.
A reliable instant read thermometer helps ensure your sauce reaches the proper temperature without breaking. Keeping a heat resistant silicone spatula handy makes combining the pasta and sauce much easier. I’ve learned through experience that cheap spatulas can melt into your beautiful creation, so invest in quality. Aluminum foil is necessary for the initial baking stage. It prevents the top from browning too quickly before the center heats through completely.
Professional Tips and Advanced Techniques
Temperature control separates good mac and cheese from transcendent mac and cheese. Never let your cheese sauce boil once you’ve added the cheese. Boiling causes the proteins to separate and create a grainy, broken sauce. When making your roux, medium heat is crucial. Too high and the flour burns. Too low and it doesn’t cook properly. I’ve learned to judge roux readiness by smell as much as sight. It should smell toasty and nutty, not raw or burnt.
The pasta cooking time is another critical element that home cooks often overlook. Seriously undercook your pasta. I aim for about 60 to 70% of the package time. The pasta continues cooking in the sauce and oven, and overcooked pasta turns mushy and falls apart. The starch on unrinsed pasta helps the sauce cling better and creates better overall texture. I made the mistake of rinsing pasta for years before understanding this principle.
The Double Crisp Method
For restaurant quality presentation, I’ve developed a technique I call the “double crisp method.” After the initial baking, I broil briefly, then let the dish rest. Just before serving, I broil again for 1 to 2 minutes. This creates an incredibly crispy top while maintaining a hot, creamy interior. Reserving about a cup of pasta cooking water before draining gives you an insurance policy. If your sauce becomes too thick, a splash of pasta water loosens it perfectly while adding helpful starch.
Cheese grating technique matters more than most people realize. Use the large holes on your box grater and grate from the long side of the cheese block using steady, even strokes. Cold cheese grates more easily and creates fluffier shreds that melt more evenly. If cheese sits at room temperature too long, it becomes oily and difficult to grate. I usually grate my cheese while the pasta water is heating.
Advanced Layering Technique
One advanced technique I’ve perfected is layering for special occasions. Instead of mixing everything together, I create three layers: pasta, sauce, breadcrumbs, then repeat. This creates multiple crispy layers throughout the casserole rather than just on top. It requires extra time but produces an incredibly impressive result that makes people think you’re a professional chef.
Timing coordination for entertaining is crucial. You can prepare everything up to the point of baking, then refrigerate for up to 24 hours. When baking from cold, add 10 to 15 minutes to the covered baking time. You can fully bake it, let it cool completely, and then reheat covered at 325°F until heated through. The texture won’t be quite as perfect as fresh, but it’s still delicious and saves tremendous stress when hosting.
Flavor Profile and Sensory Experience
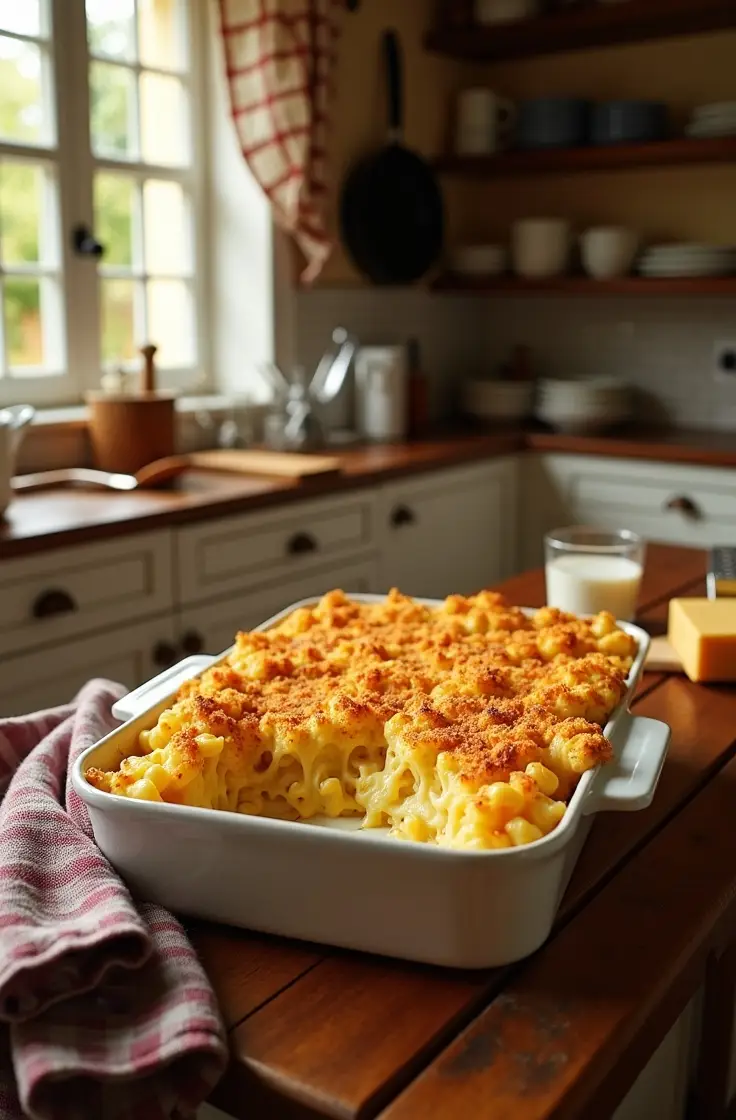
The first encounter with properly made Baked Mac and Cheese is a revelation for all your senses. As you approach the dish fresh from the oven, the aroma hits you first. That irresistible combination of toasted butter, caramelized cheese, and subtle nuttiness from the Gruyère fills the room. The visual presentation is equally stunning. That deep golden brown top with darker, crispier edges creates beautiful contrast against the creamy interior visible along the sides of the dish.
Breaking through the crispy breadcrumb topping with your serving spoon releases a wave of steam carrying even more aromatic intensity. The topping shatters satisfyingly, revealing the creamy, stretchy interior beneath. When you lift a serving onto a plate, the cheese sauce creates those beautiful strings that pull from the main dish to your plate. A sign of perfect cheese to pasta ratio.
The first bite delivers an incredible textural contrast. Your teeth break through that crunchy, buttery topping first, then sink into the tender pasta coated with luxuriously creamy sauce. The pasta itself maintains just enough firmness to provide structure without being mushy. The cheese sauce envelops each piece completely, creating that perfect creamy mouthfeel. The sharp cheddar provides the familiar, tangy flavor that defines mac and cheese, while the Gruyère adds complexity and depth that keeps you coming back for another bite to identify those subtle nutty notes.
Temperature plays a fascinating role in the flavor experience. Served hot, the cheese is molten and intensely flavorful. The butter in the topping is aromatic, and the overall effect is richly indulgent. As it cools slightly to warm, the flavors meld together more and the texture becomes even creamier. Some people actually prefer it at this slightly cooler temperature because the individual cheese flavors become more distinct. The balance of salt, fat, and umami creates that addictive quality that makes it nearly impossible to stop at one serving.
Seasonal variations also affect the experience surprisingly. In winter, the dish feels warming and comforting, perfect for cold evenings. During summer, it can be slightly lighter if you reduce the cream and increase the milk ratio. The consistent thread across all temperatures and seasons is that combination of creamy and crispy, familiar and sophisticated, simple and complex all at once.
Serving Suggestions and Food Pairings
Baked Mac and Cheese is substantial enough to serve as a main course, yet it also functions beautifully as a side dish depending on your menu planning. For a complete comfort food meal, I often pair it with my slow cooked BBQ pulled pork or honey glazed ham. The richness of the mac and cheese complements smoky, slightly sweet meats perfectly. Crispy fried chicken alongside mac and cheese creates that classic Southern combination that never fails to satisfy.
When serving this as a main dish, balance is essential. A bright, acidic salad cuts through the richness beautifully. My go to is a simple arugula salad with lemon vinaigrette, cherry tomatoes, and thinly sliced red onions. The peppery arugula and tart lemon provide necessary contrast that prevents palate fatigue. Roasted or grilled vegetables like asparagus, green beans, or broccoli add color and freshness to your plate. I particularly love roasted Brussels sprouts with balsamic glaze served alongside. The caramelization and acidity complement the creamy cheese wonderfully.
Beverage Pairings That Work
For beverage pairings, I’ve experimented extensively and discovered some unexpected winners. A crisp, unoaked Chardonnay works beautifully because its acidity cuts through the richness while its body matches the dish’s weight. A lighter red like Pinot Noir provides earthy notes that complement the Gruyère. For beer lovers, a malty brown ale or amber lager balances the cheese beautifully without overwhelming the subtle flavors. Hard cider offers wonderful apple notes that create interesting flavor combinations with the sharp cheddar.
Bread service might seem redundant with pasta, but crusty artisan bread or garlic bread for soaking up any extra cheese sauce is absolutely worthwhile. When serving for special occasions, I sometimes add gremolata, a mixture of fresh parsley, lemon zest, and garlic, sprinkled over individual portions just before serving. This bright, fresh garnish adds professional polish and cuts through richness with aromatic freshness.
For family style service, I present the casserole dish on a large wooden cutting board surrounded by small herb sprigs for visual appeal. Individual plating works wonderfully too. Use a large serving spoon to scoop generous portions onto warm plates, ensuring each serving gets plenty of that crispy top. A final sprinkle of chopped fresh parsley or chives adds color and freshness to the presentation.
Recipe Variations and Creative Adaptations
Over the years, I’ve developed numerous successful variations that maintain the spirit of classic Baked Mac and Cheese while offering exciting new flavor profiles. My “Lobster Mac and Cheese” adds chunks of cooked lobster meat folded into the pasta before baking, along with a tablespoon of Old Bay seasoning in the sauce. This luxurious version is perfect for special celebrations and tastes remarkably similar to versions I’ve enjoyed at upscale restaurants.
For spice lovers, my “Buffalo Chicken Mac and Cheese” incorporates shredded rotisserie chicken tossed with buffalo wing sauce, crumbled blue cheese in addition to the cheddar, and celery salt in the sauce. Top it with crushed blue cheese chips instead of regular breadcrumbs for incredible flavor. This variation has become my most requested version for game day gatherings.
Dietary Adaptations That Actually Work
Dietary adaptations require some adjustments but work surprisingly well. For a gluten free version, substitute gluten free pasta (I prefer Barilla or Jovial brands) and use a gluten free flour blend for the roux. Rice flour works particularly well because it creates similar thickness without grittiness. Gluten free panko or crushed cornflakes create excellent crispy toppings.
Creating a vegetarian version is simple since the base recipe already is vegetarian. For vegan adaptations, you’ll need more substantial changes. Use vegan butter, a cashew cream base instead of dairy milk, and nutritional yeast combined with vegan cheese alternatives. I’ve tested Miyoko’s Creamery and Violife brands with good success. The texture won’t be identical, but it’s still delicious. Adding smoked paprika and extra nutritional yeast helps replicate that cheesy umami flavor.
Baked Mac and Cheese Variations Worth Trying
Regional variations inspire interesting experiments. A “Southern Style” version incorporates a beaten egg mixed into the sauce before baking, creating a custard like texture, plus hot sauce and mustard for tang. A “New England” adaptation adds chunks of lobster or crab meat and uses white cheddar exclusively. A “Tex Mex” interpretation includes pepper jack cheese, diced green chiles, cumin, and crushed tortilla chip topping.
Seasonal ingredient swaps keep the dish interesting throughout the year. In autumn, I add roasted butternut squash cubes and sage to the pasta before baking. Winter welcomes caramelized onions and crispy bacon bits. Spring inspires a lighter version with peas, fresh herbs, and lemon zest. Summer calls for fresh corn kernels, diced tomatoes, and basil.
Scaling this recipe works well in both directions. For smaller portions, halve everything and use an 8×8 inch baking dish. The cooking time reduces by about 5 minutes. Doubling the recipe for large gatherings works perfectly. Use two 9×13 inch dishes rather than one huge pan to ensure even cooking. I’ve successfully made this for 50 people by preparing five pans simultaneously.
Creative Uses for Leftovers
Leftover transformation ideas abound. Form cold mac and cheese into patties, bread them, and pan fry for incredible mac and cheese cakes. Stuff it into jalapeños, coat with breadcrumbs, and bake for amazing appetizers. I’ve even used leftovers as a filling for grilled cheese sandwiches, creating an absolutely decadent meal.
Troubleshooting and Problem Solutions
The most common issue I encounter is grainy or broken cheese sauce, which occurs when the sauce gets too hot after adding cheese or when you use pre shredded cheese. If your sauce looks separated or grainy, immediately remove it from heat and whisk in a tablespoon of cold milk. Continue whisking vigorously. Sometimes the sauce comes back together. Prevention is easier than cure: always remove the pan from heat before adding cheese and use freshly grated cheese.
Dry mac and cheese results from insufficient sauce or overbaking. The pasta to sauce ratio should be generous. The mixture should look almost soupy before baking. Remember, the pasta absorbs liquid and the dish thickens considerably during baking. If you’ve already baked it and it’s too dry, pour ½ cup of hot milk or cream around the edges, cover with foil, and return to the oven for 10 minutes. The liquid will absorb throughout the dish.
Fixing Common Texture Issues
Soupy mac and cheese usually means your base sauce wasn’t thick enough before adding cheese. The sauce should coat the back of a spoon heavily before you add the cheese. If your baked mac and cheese is too soupy, don’t panic. Return it to the oven uncovered and bake for an additional 10 to 15 minutes. The excess liquid will evaporate and the sauce will thicken. Next time, cook your roux longer and ensure the béchamel reaches proper thickness before adding cheese.
Burnt breadcrumb topping while the interior remains cold indicates your oven temperature is too high. Reduce to 325°F and extend cooking time, or use the foil tent method throughout baking, removing it only for the final 10 minutes. Positioning your rack too high in the oven causes the top to brown too quickly. Use the center rack position for even heat distribution.
Mushy pasta ruins the entire dish and unfortunately cannot be fixed after baking. Prevention is crucial: cook pasta 2 minutes less than package directions, and if you’re making it ahead, reduce cooking time even further. The pasta continues cooking during baking and reheating. I’ve learned to err on the side of undercooked pasta. It’s always better than mushy.
Clumpy pasta that sticks together in the casserole happens when you don’t mix the sauce and pasta thoroughly or when you let the pasta sit too long before adding sauce. Work quickly after draining pasta, toss with a little olive oil, and combine with sauce while both are still warm. If clumps form, gently separate them with your spoon while folding in the sauce.
Bland flavor usually means insufficient seasoning or using mild cheese. Remember to season your pasta water generously and taste your sauce before combining with pasta. It should taste slightly over seasoned on its own. Using a combination of sharp cheddar and aged cheeses rather than mild versions creates more robust flavor. Don’t forget the dry mustard and cayenne. These small additions significantly impact the overall taste.
Baked Mac and Cheese Storage and Meal Preparation Strategy
Proper storage ensures your Baked Mac and Cheese remains delicious even as leftovers. Allow the casserole to cool to room temperature, but don’t leave it out longer than 2 hours for food safety. Cover the baking dish tightly with plastic wrap or transfer portions to airtight containers. Stored this way, mac and cheese keeps beautifully in the refrigerator for 3 to 4 days. The sauce thickens considerably when cold, which is actually beneficial. It reheats to perfect consistency.
Reheating requires gentle care to maintain creamy texture. For individual portions, microwave on 50% power in 1 minute intervals, stirring between each interval. Add a splash of milk before reheating to restore creaminess. For larger portions, cover with foil and reheat in a 325°F oven for 20 to 25 minutes until heated through. Remove the foil for the last 5 minutes to re crisp the topping. I’ve found that reheating in the oven produces better results than microwave, though it takes longer.
Freezing Strategies That Work
Freezing works surprisingly well for this recipe. I freeze both unbaked and baked versions successfully. For unbaked, prepare everything up to the point of baking, cover tightly with plastic wrap and then aluminum foil, and freeze for up to 3 months. Bake from frozen, adding 15 to 20 minutes to the covered cooking time. For already baked mac and cheese, cool completely, wrap well, and freeze up to 2 months. Thaw overnight in the refrigerator before reheating.
My meal prep strategy for busy weeks involves making a double batch on Sunday. I portion it into individual containers with tight fitting lids. Each container provides a satisfying lunch or dinner that reheats perfectly at work or home. Having these ready to eat portions prevents the temptation to order takeout during hectic weeknights.
For advance preparation before entertaining, I prepare the entire casserole the morning of serving, refrigerate it, and bake it fresh before dinner. This approach means it comes to the table piping hot with that perfect crispy top. The prep work is done when you’re not stressed, but the final product tastes freshly made. Just remember to add 10 minutes to the covered baking time when starting from cold.
Container selection matters for optimal storage. I prefer glass containers with snap lock lids because they don’t absorb odors or stain. For freezing, heavy duty aluminum pans with cardboard lids work excellently and can go straight from freezer to oven. Avoid flimsy containers that crack when frozen. Proper labeling with dates prevents the mystery of unlabeled containers in your freezer.
Nutritional Benefits and Health Insights For Baked Mac and Cheese
While Baked Mac and Cheese is undeniably indulgent, it does provide significant nutritional value when enjoyed as part of a balanced diet. The cheese contributes substantial protein, approximately 21 grams per serving, along with calcium essential for bone health. Dairy products provide vitamin B12, phosphorus, and riboflavin that support various bodily functions. The pasta contributes complex carbohydrates that provide sustained energy.
Modifying this recipe for health conscious preferences is entirely possible without completely sacrificing flavor. Substituting half the whole milk with unsweetened almond or oat milk reduces calories and fat by about 15%. Using reduced fat cheese decreases fat content, though I recommend keeping at least some full fat cheese for proper melting and flavor. Incorporating whole wheat pasta increases fiber content significantly, from about 2 grams to 6 grams per serving.
Boosting Nutritional Value
Adding vegetables strategically boosts nutritional value while maintaining the comfort food appeal. I’ve successfully incorporated steamed broccoli florets, roasted cauliflower, or sautéed spinach into the pasta before baking. These additions increase vitamin and mineral content while adding volume that naturally reduces calorie density. Vegetables add color and textural variety that makes the dish more visually appealing.
Portion control is realistically the most effective approach to enjoying this dish as part of healthy eating. One generous serving alongside a large salad and vegetable side creates a balanced meal. The protein and fat content actually provide satiety that prevents overeating later. I’ve learned that having a smaller portion of the real, full fat version satisfies more than a larger portion of a heavily modified low fat version that doesn’t taste quite right.
The preparation method affects nutritional content somewhat. Baking rather than making stovetop mac and cheese doesn’t require additional butter or oil for finishing, which can reduce overall fat slightly. Using a combination of stronger flavored cheeses means you can actually use slightly less total cheese while maintaining intense flavor. This small reduction creates meaningful calorie savings across the entire dish.
Integration into various dietary patterns depends on individual goals. For active individuals or athletes, this carbohydrate and protein combination works well as a recovery meal. For those monitoring sodium intake, reducing added salt and using low sodium cheese helps significantly. The flexibility of this recipe allows adaptation to most dietary needs while preserving the essential character that makes mac and cheese so beloved.
Family and Entertainment Adaptations
Making Baked Mac and Cheese friendly for everyone requires minimal adaptation since most people already love this dish. Using milder cheeses like mild cheddar and Monterey Jack instead of sharp cheddar and Gruyère appeals more to sensitive palates. Omitting the cayenne pepper and reducing the black pepper creates a gentler flavor profile. Elbow macaroni is familiar and easy to eat with spoons, which people of all ages appreciate.
Interactive cooking opportunities make this recipe perfect for family bonding. Everyone can safely grate cheese (under supervision with appropriate tools), measure ingredients, stir the pasta, and especially enjoy mixing the breadcrumb topping. My nieces and nephews love sprinkling the topping over the casserole. They feel tremendous pride watching “their” dish bake. These experiences create positive food memories and teach valuable cooking skills.
Scaling for Large Gatherings
For entertaining large groups, I’ve developed an efficient system. I prepare two or three pans simultaneously using the same sauce batch divided among multiple baking dishes. This approach is more practical than making one enormous pan that’s difficult to handle and doesn’t cook evenly. Offering one traditional version and one variation (like bacon or buffalo chicken) gives guests options and makes everyone happy.
Make ahead timeline for stress free hosting begins two days before serving. Day one: shop for ingredients. Day two morning: grate all cheese and prepare breadcrumb topping, then store separately. Day two afternoon: cook pasta, make sauce, combine everything, and assemble in baking dish. Cover and refrigerate overnight. Day of serving: remove from refrigerator 30 minutes before baking to take the chill off, then bake according to directions with added time for cold start. This strategy means you’re not frantically cooking while guests arrive.
Allergy and dietary restriction accommodations require careful planning but are entirely achievable. For dairy sensitivities, use dairy free alternatives throughout, though inform guests that texture and flavor will differ from traditional versions. For gluten concerns, gluten free pasta and flour work excellently. Keep detailed ingredient lists available for guests with restrictions. Knowing exactly what’s in the dish provides peace of mind.
Impressive Presentation Ideas
Presentation ideas for special occasions elevate mac and cheese from casual to impressive. Individual servings baked in mini cast iron skillets or ramekins look restaurant quality and allow guests to have their own perfect crispy topped portion. For holidays, I sometimes use shaped pasta like shells during summer or festive shapes during Christmas. Garnishing each portion with microgreens or edible flowers creates stunning visual impact.
Cost effective scaling for large groups focuses on smart shopping. Buying cheese blocks from warehouse stores rather than supermarkets saves 30 to 40%. Store brand pasta, butter, and milk work perfectly well. Save money on these basics and splurge on good cheese. Making your own breadcrumbs from day old bread instead of buying panko reduces costs further. These strategies allow you to serve quality comfort food to crowds without breaking your budget.
Seasonal and Special Occasion Variations
The beauty of Baked Mac and Cheese lies in its remarkable adaptability to different seasons and celebrations throughout the year. During autumn, I transform this dish by incorporating roasted butternut squash cubes and crispy sage leaves fried in brown butter. The sweetness of the squash complements the sharp cheddar beautifully, while sage adds an earthy, sophisticated note perfect for Thanksgiving gatherings. Adding a pinch of nutmeg to the cheese sauce creates warmth that embodies fall flavors. I’ve served this version at numerous Thanksgiving dinners where it competes admirably with traditional sides.
Winter holidays call for richer, more indulgent preparations. For Christmas dinner, I create a “Holiday Mac and Cheese” featuring truffle oil drizzled over the finished dish and chunks of ham leftover from holiday meals. The truffle elevates this comfort food to celebration worthy status. During Super Bowl parties, I prepare a “Loaded Baked Potato Mac and Cheese” with crispy bacon bits, sour cream dollops, and chive garnish that always disappears first from the buffet table.
Spring and Summer Adaptations
Spring brings lighter adaptations that celebrate fresh ingredients. I incorporate blanched asparagus tips, fresh peas, and lemon zest into the pasta before baking. The bright green vegetables add visual appeal and freshness that feels appropriate as weather warms. Using a combination of fontina and fresh mozzarella creates a lighter, stringier cheese pull that feels less heavy than winter versions. Fresh herbs like basil, parsley, and chives mixed into the breadcrumb topping add aromatic brightness.
Summer modifications acknowledge that sometimes you want comfort food even in warm weather. I reduce the heavy cream by half and increase milk to lighten the sauce. Sweet corn kernels cut fresh from the cob add summery sweetness and pop of color. Cherry tomatoes roasted until bursting with flavor bring acidity that cuts through richness. I sometimes skip the oven entirely and finish this under the broiler for just 5 minutes to avoid heating the kitchen excessively.
Birthday celebrations at my house always feature mac and cheese because it’s universally loved by people of all ages. For kids’ parties, I use cookie cutters to cut the baked casserole into fun shapes after it cools slightly, though this creates lots of delicious “scrap” pieces that adults happily devour. Baking individual portions in colorful silicone muffin cups creates perfect single serving “mac and cheese muffins” that children find exciting.
Elegant Occasions and Special Events
Wedding receptions and rehearsal dinners increasingly feature elevated versions of comfort foods, and mac and cheese fits perfectly into this trend. I’ve catered several events where I served lobster mac and cheese in elegant white ramekins with microgreens on top. The familiar comfort combined with luxurious ingredients and refined presentation satisfies guests beautifully. New Year’s Eve calls for decadent versions. My champagne mac and cheese incorporates actual champagne into the sauce and tops with caviar for midnight elegance.
Weather appropriate modifications ensure year round enjoyment. During heat waves, I prepare the components but serve at room temperature as a pasta salad variation, adding extra vinegar and lemon juice for brightness. During winter storms, I make extra large batches because nothing provides comfort during power outages like creamy, cheesy pasta. It reheats easily on the stovetop if necessary.
Traditional timing and cultural occasions vary across communities. In African American culinary traditions, mac and cheese holds sacred status at Sunday dinners, family reunions, and especially funerals where it provides edible comfort during difficult times. I’ve learned to respect these traditions by maintaining classic preparation methods for such occasions rather than experimenting with unusual variations. The familiar, perfect execution matters more than innovation in these meaningful contexts.
Frequently Asked Questions About Baked Mac and Cheese Recipe
Can I make this recipe ahead of time?
Absolutely, and I actually recommend it for entertaining purposes. You can prepare the entire casserole up to 24 hours in advance, cover it tightly with plastic wrap and refrigerate. When you’re ready to bake, remove it from the refrigerator about 30 minutes before cooking to take the chill off, which ensures more even heating. Add approximately 10 to 15 minutes to the covered baking time since you’re starting from cold. You can prepare all components separately as well. Cook the pasta, make the sauce, and prepare the topping, then store them in separate containers. Combine and bake the day you need it. This method gives you the freshness of day of preparation with most of the work completed in advance. I’ve used both approaches countless times with excellent results. The key is not assembling everything too far in advance because the pasta will continue absorbing sauce in the refrigerator. If you prepare it more than 24 hours ahead, consider adding a bit more milk to compensate for this absorption.
What substitutions work best for key ingredients?
Cheese substitutions require careful consideration because different cheeses melt differently. If you can’t find Gruyère, substitute with additional fontina or try Emmental cheese which has similar nutty characteristics. For cheddar alternatives, Colby or Monterey Jack work well, though they’re milder and you might want to increase the amount of Parmesan for more flavor punch. Milk substitutions are trickier. Whole milk is really optimal, but 2% milk works if you increase the heavy cream slightly to maintain richness. For the pasta, any short tubular shape works beautifully. I particularly love cavatappi, shells, or rigatoni because they hold sauce exceptionally well in their ridges and curves. Gluten free pasta requires no other adjustments to the recipe beyond using gluten free flour for the roux. Avoid using pre shredded cheese regardless of your other substitutions. It simply doesn’t melt properly and creates grainy texture that ruins the dish. The anti caking agents prevent that smooth, creamy consistency you’re looking for. If you absolutely must use pre shredded cheese, add a tablespoon of cornstarch to help it melt more smoothly, though fresh grated is always superior.
How do I know when it’s perfectly cooked?
Visual and textural cues tell you everything you need to know. The breadcrumb topping should be deep golden brown, not pale beige, which indicates undercooking, but not dark chocolate brown either, which means it’s burnt. Around the edges, you should see vigorous bubbling with the sauce creating small, foamy bubbles where it meets the side of the dish. When you insert a knife into the center and pull it out, it should feel hot against your wrist immediately. The internal temperature should reach 160°F if you want to check with an instant read thermometer. After removing from the oven, the casserole should jiggle slightly when you shake the pan. Not slosh like liquid, but have a gentle, barely there movement. This indicates creamy sauce that will set to perfect consistency during the 10 minute rest period. Trust this rest time because it’s absolutely crucial for proper texture. The starches in the pasta need those minutes to fully absorb and stabilize the sauce. If you serve immediately, it will look soupy on the plate. After resting, each serving should hold its shape while remaining luxuriously creamy inside.
Can this recipe be doubled or halved?
This recipe scales beautifully in both directions with minimal adjustments. For halving, use all ingredients at half quantities and bake in an 8×8 inch or 9×9 inch square baking dish. Reduce the covered baking time to 15 minutes and uncovered time to 12 to 15 minutes since the smaller volume heats through more quickly. Check for doneness using the visual cues mentioned above. The smaller surface area means less crispy top per serving, which some people actually prefer. For doubling, I strongly recommend making two separate 9×13 inch pans rather than one massive pan. The reason is simple: a very deep pan won’t cook evenly, resulting in burnt edges and cold center. Two pans cook uniformly and give you flexibility. Serve one and freeze one, or serve both for large gatherings. You can use the same sauce batch divided between two pans, which actually saves time compared to making two separate sauce batches. I’ve successfully made up to six pans simultaneously for large events by making multiple sauce batches. Just be sure you have enough oven space and plan your timing accordingly. Tripling or quadrupling requires careful organization but works perfectly for feeding crowds.
What’s the best way to store leftovers?
Proper storage dramatically affects how good your leftovers taste. Let the mac and cheese cool to room temperature first, but don’t exceed two hours to maintain food safety standards. Transfer portions to airtight containers. I prefer glass with snap lids because they don’t absorb odors or stain like plastic sometimes does. Refrigerated, it keeps beautifully for 3 to 4 days. The sauce will thicken considerably when cold, which is normal and actually beneficial for reheating. For reheating individual portions, add a splash of milk, cover loosely, and microwave on 50% power in one minute increments. Stir between each interval until heated through. This gentle approach prevents the sauce from breaking or the edges from drying out. For larger portions, oven reheating produces superior results. Cover with foil, heat at 325°F for 20 to 25 minutes until hot throughout, then remove foil and broil briefly to re crisp the top. The broiler step makes a huge difference in restoring that textural contrast between crispy topping and creamy interior. Avoid reheating the same portion multiple times, as this degrades texture and increases food safety risks. Each reheating cycle causes the pasta to absorb more moisture and become softer.
Can I freeze this dish?
Freezing works wonderfully for both unbaked and fully baked mac and cheese. For unbaked, prepare everything up to the baking step, wrap the dish tightly with plastic wrap followed by aluminum foil, label with the date, and freeze up to three months. You can bake directly from frozen. Just add 20 to 25 minutes to the covered baking time and check for doneness using an instant read thermometer in the center. For already baked mac and cheese, cool it completely first, then wrap tightly and freeze up to two months. Thaw overnight in the refrigerator before reheating for best results. I’ve found that unbaked freezes slightly better because the pasta doesn’t have that second cooking exposure that can make it slightly softer. Freezing in portion sized aluminum containers creates ready made meals you can pull out individually. This is incredibly convenient for busy weeknights when you want homemade comfort food without any effort. The breadcrumb topping may lose some crispness after freezing, but a quick broil at the end restores most of that textural contrast. For best results, consider adding the breadcrumb topping fresh after thawing rather than freezing it on top. This extra step ensures maximum crispiness.
What if I don’t have specific equipment?
Fortunately, this recipe is quite forgiving regarding equipment. If you don’t have a whisk, a wooden spoon works for making the sauce, though you’ll need to stir more vigorously to prevent lumps from forming. Without a box grater, you can use a food processor with the grating blade, or buy pre grated cheese as a last resort. Be aware it won’t melt as smoothly due to anti caking agents. If you lack a 9×13 inch baking dish, use a different size and adjust timing accordingly. An 8×8 inch pan will be deeper and need slightly longer cooking, while a larger shallow dish cooks faster. Cast iron skillets work beautifully for rustic presentation and actually conduct heat wonderfully for even cooking. Without panko breadcrumbs, make your own by pulsing regular bread in a food processor until coarse crumbs form. You can use crushed crackers, cornflakes, or even potato chips for the topping. I’ve even used crushed potato chips in a pinch, which creates an unconventional but delicious salty, crunchy topping that guests always ask about. The point is that perfect equipment helps but isn’t essential. Good technique and quality ingredients matter far more than having exactly the right tools.
How can I make this healthier?
Healthier modifications are definitely achievable while maintaining delicious flavor. Start by using half whole milk and half unsweetened almond or oat milk, which reduces calories and fat by about 15% with minimal taste impact. Substitute whole wheat pasta for added fiber. The nutty flavor actually complements cheese nicely and most people don’t even notice the difference. Reduce the butter to 3 tablespoons instead of 4, and use 2% milk instead of whole milk. Incorporate vegetables like steamed broccoli, roasted cauliflower, or sautéed spinach to increase nutrient density and add volume without many calories. Using stronger flavored aged cheeses means you can reduce the total cheese quantity by about 25% while maintaining intense flavor. Your taste buds perceive the same intensity with less actual cheese. Replace half the heavy cream with Greek yogurt for tanginess and extra protein. The slight tang actually complements the cheese beautifully. For the topping, use whole wheat panko or make breadcrumbs from whole grain bread. These modifications collectively reduce calories to approximately 350 per serving while boosting protein, fiber, and micronutrients substantially. You’re still getting that comfort food satisfaction but with better nutritional balance.
What went wrong if common problems occur?
Troubleshooting starts with identifying the specific issue. If your mac and cheese turned out grainy, the sauce got too hot after adding cheese. Next time, remove from heat completely before adding cheese and add it in small batches. If it’s dry, you didn’t use enough sauce or overbaked it. Add a cup of milk or cream next time and check 5 minutes earlier. You want the mixture to look almost soupy before baking. If it’s soupy, your base sauce wasn’t thick enough before adding cheese. Cook the béchamel longer until it heavily coats the spoon before adding any cheese. Burnt top with cold center means your oven was too hot or positioned too high. Reduce temperature to 325°F and use the center rack for even heat distribution. Mushy pasta results from overcooking initially. Remember to drastically undercook by 2 minutes next time since it continues cooking in the oven. Bland flavor indicates insufficient seasoning or using mild cheeses. Taste the sauce before combining with pasta and adjust seasoning. Use aged, sharp cheeses rather than mild versions for more robust flavor. Clumpy pasta means it sat too long before mixing with sauce. Work quickly and toss drained pasta with oil immediately. Most problems are easily fixable for next time with these adjustments. Don’t get discouraged if your first attempt isn’t perfect.
Can this be made gluten free, vegan, or dairy free?
Absolutely, though each requires specific adaptations. For gluten free, use your favorite gluten free pasta. I recommend Barilla or Jovial brands because they hold up well during baking and have good texture. Substitute the all purpose flour with a gluten free flour blend or rice flour in equal amounts for the roux. Rice flour works particularly well because it thickens similarly without adding grittiness. Use gluten free panko or make breadcrumbs from gluten free bread for topping. The result is virtually indistinguishable from the original version. For dairy free, replace butter with plant based butter (I like Earth Balance or Miyoko’s), use unsweetened cashew cream or oat milk for the liquid base, and substitute nutritional yeast combined with dairy free cheese alternatives. Miyoko’s and Violife brands melt reasonably well. The texture won’t be identical to dairy cheese, but it’s still creamy and delicious. Add smoked paprika and extra nutritional yeast to boost the cheesy, umami flavor that nutritional yeast provides naturally. For vegan, follow the dairy free adaptations. The key is using high quality plant based alternatives rather than cheap substitutes, which make tremendous difference in the final result. I’ve served these variations to guests with dietary restrictions who were genuinely thrilled with how good they tasted. They weren’t just “good for being dairy free.” They were genuinely delicious on their own merits.
Final Reflections and Reader Encouragement
Throughout my years of making Baked Mac and Cheese, I’ve come to realize this dish represents something far more meaningful than just pasta and cheese combined. It embodies comfort, tradition, celebration, and connection in their most delicious, tangible form. Every time I pull a bubbling, golden casserole from the oven, I’m transported back to my grandmother’s kitchen and simultaneously creating new memories for the next generation. This recipe has been served at birthday parties, holiday gatherings, difficult days requiring edible comfort, and triumphant celebrations alike.
If you’re approaching this recipe for the first time, I want you to feel confident and excited rather than intimidated. Yes, making a proper cheese sauce requires attention and technique, but it’s absolutely achievable for cooks at any skill level. Follow the steps carefully, trust the process, and know that even if your first attempt isn’t perfect, it will still be delicious. I’ve made this recipe so many times that I could probably make it in my sleep, yet I still feel that little thrill of anticipation watching it bake and that surge of satisfaction when I see that perfect golden top emerge from the oven.
The true magic of this recipe is how it brings people together around the table. I’ve witnessed countless moments where a simple serving of mac and cheese sparked conversations, laughter, and connection. Food has this remarkable ability to communicate love and care in ways words sometimes cannot. When you make this dish for your family or friends, you’re not just feeding them. You’re creating an experience, a memory, a moment of comfort and joy.
I genuinely hope you’ll make this Baked Mac and Cheese your own. Try my version first to understand the foundation, then experiment with variations that speak to your taste preferences and dietary needs. Maybe you’ll discover your signature variation that becomes your family’s tradition. Perhaps this will become your reliable contribution for potlucks and gatherings. Possibly it will simply become the recipe you turn to when you need the edible equivalent of a warm hug.
Please don’t hesitate to experiment, make mistakes, and learn from them. Every great cook has served dishes that didn’t turn out perfectly, and those experiences teach us invaluable lessons. Your kitchen is your laboratory, and cooking should be joyful exploration rather than stressful perfection. This recipe is forgiving and adaptable. It wants you to succeed.
I’d absolutely love to hear about your experience making this Baked Mac and Cheese. Did you try any variations? What did your family think? Did you encounter any challenges or discover any tricks I haven’t mentioned? Your feedback helps me understand how recipes work in real kitchens with real cooks, and it builds our community of people who believe that good food makes life better. Share your stories, ask your questions, and know that I’m genuinely interested in your cooking journey.
This recipe deserves a permanent place in your repertoire because it’s versatile, reliable, crowd pleasing, and deeply satisfying to make and eat. Whether you’re cooking for everyday family dinners or special celebrations, Baked Mac and Cheese delivers comfort and deliciousness that transcends age, background, and occasion. It’s the dish that makes everyone at the table smile, ask for seconds, and feel cared for. That’s the real magic, not just in the creamy sauce or crispy topping, but in the warmth and connection it creates.
So gather your ingredients, preheat that oven, and embark on creating your own perfect Baked Mac and Cheese. Trust the process, embrace the experience, and most importantly, enjoy every creamy, cheesy, comforting bite. Happy cooking.