- Preparing the Buttermilk Marinade (Day Before)
Start by whisking together all the marinade ingredients in a large mixing bowl. The buttermilk should be cold from the refrigerator, which helps keep everything food safe. Next, add the chicken pieces one at a time, making sure each piece gets completely coated. Press the chicken down gently to get it fully submerged in the buttermilk mixture. Transfer everything to a large zip top bag or covered container. Give the bag a gentle massage to distribute the marinade evenly around all the chicken pieces. Stick it in the refrigerator for at least 4 hours, though overnight gives you way better results. The acid in the buttermilk will slowly break down tough muscle fibers while pumping flavor deep into the meat.
- Preparing the Seasoned Flour (Day of Cooking)
Combine all flour mixture ingredients in a large shallow dish. Whisk everything together thoroughly to make sure the spices are evenly distributed. Go ahead and taste the mixture; it should be well seasoned but not overwhelmingly salty. This seasoning level will calm down once it coats the chicken. Sift the mixture to get rid of any lumps that could create uneven coating. Set up a second dish with plain flour for any touch-up dredging that might be necessary during the process.
- Setting Up the Frying Station
Heat oil in your Dutch oven to exactly 325°F (163°C). This temperature is the sweet spot I discovered through tons of testing. Higher temperatures will burn the coating before the chicken cooks through. Lower temperatures create greasy, soggy disasters. Position your thermometer so you can watch the temperature constantly. Oil temperature will jump around as you add chicken pieces, so staying aware becomes absolutely crucial for success. Set up your wire rack and sheet pan setup near the stove for immediate draining.
- Dredging Process
Remove chicken pieces from the buttermilk marinade one at a time. Let excess marinade drip off briefly, but don't shake it off completely; those clinging bits create extra crispy nuggets in the coating. Then dredge each piece thoroughly in the seasoned flour mixture. Press the flour coating firmly onto the chicken surface. Make sure every little crevice and fold gets coated completely. Don't handle the pieces too much, though, which can create tough spots in the coating. Place coated pieces on a clean plate until you're ready to start frying.
- Frying Process
Add chicken pieces to the hot oil carefully, skin side down first. Don't crowd the pot; fry a maximum 4 pieces at once to keep the oil temperature steady. The oil should bubble actively around each piece, which tells you the temperature is right. Fry for 12 to 15 minutes on the first side without moving the pieces around. This patience lets the coating set properly and develop that signature golden color. Keep watching the oil temperature and adjust the heat as needed to maintain 325°F. Flip the chicken pieces using tongs and keep frying for another 10 to 12 minutes. The internal temperature should hit 165°F (74°C) when you check with an instant-read thermometer. The coating should be deep golden brown and sound hollow when you tap it.
- Final Steps
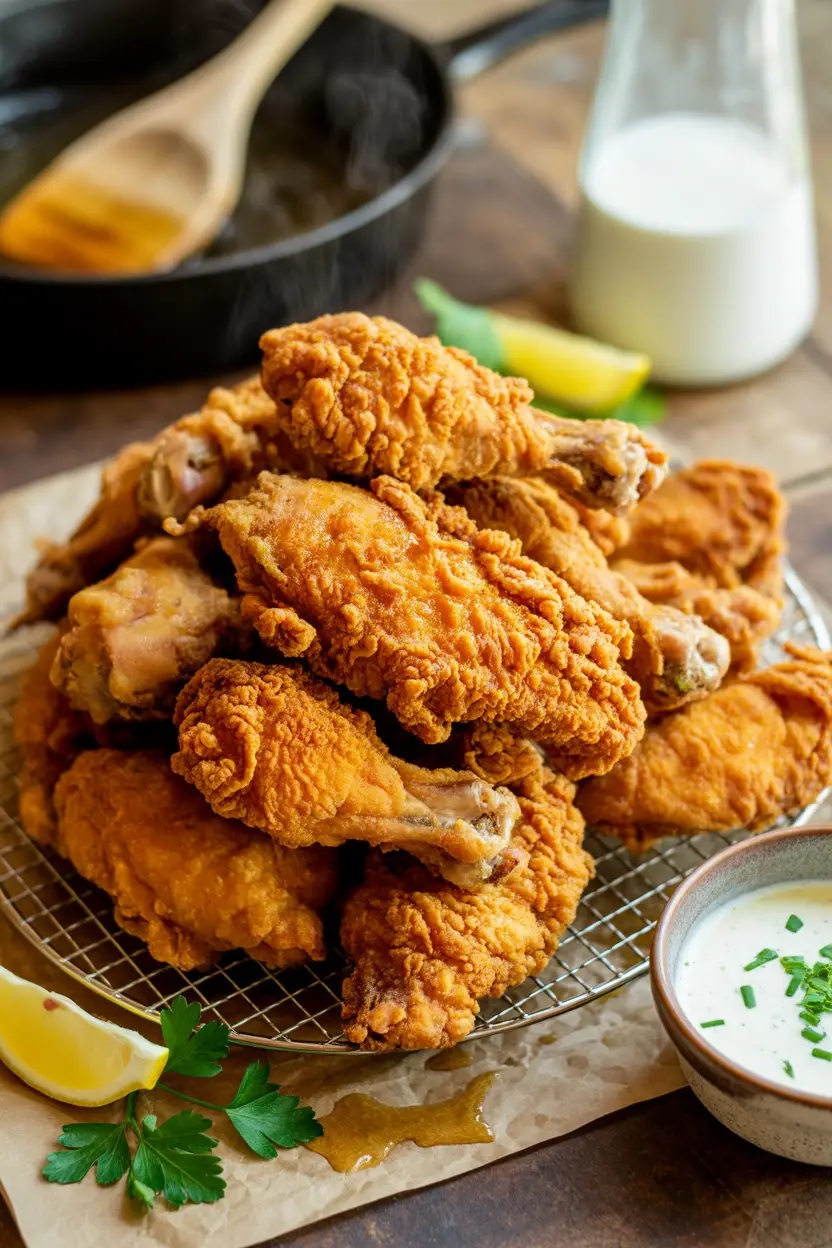
Transfer the finished pieces immediately to the prepared wire rack. Season lightly with salt while the coating is still hot; this helps the seasoning stick properly. Let the pieces rest for 5 minutes before serving, which helps redistribute the juices inside. Keep the oil temperature steady between batches by adjusting the heat as needed. Strain out any loose coating bits that could burn and create bitter flavors in your next batch.
- Calories:485 kcals
- Fat:28 grams
- Proteins:3 grams
- Carbohydrates:22 grams
My grandmother’s buttermilk fried chicken was the dish that first got me hooked on cooking twenty three years ago. I still remember standing on that wobbly step stool in her tiny Alabama kitchen, totally mesmerized by the sizzling oil and watching plain old chicken turn golden brown right before my eight year old eyes. The smell was absolutely incredible… this perfect mix of crispy, seasoned coating and tender, juicy meat dancing around in her cast iron skillet.
My first attempt at recreating this masterpiece? Complete disaster. The coating fell off in sad, soggy chunks. The chicken was burnt on the outside and still clucking on the inside. I almost gave up entirely. But something inside me refused to let that recipe die with my grandmother’s memory.
Over the years, I’ve made this buttermilk fried chicken literally hundreds of times. I’ve played around with different brining tricks, tested every flour combination known to humanity, and tweaked seasoning ratios until I finally nailed that perfect balance. Each epic fail taught me something valuable about temperature control, timing, and the weird science behind getting that coveted crispy exterior.
Today, my buttermilk fried chicken has become absolutely legendary among friends and family. It’s the recipe I’m most proud of conquering. The secret isn’t just the buttermilk marinade, but understanding how each ingredient plays nicely with the others. When you nail it, you’ll hear that satisfying crunch with every single bite, followed by incredibly moist, flavorful meat that practically melts off the bone.
This isn’t just about following a recipe though. It’s about connecting with a tradition that goes back generations. Every time I make this dish, I swear I can feel my grandmother’s presence guiding my hands. The satisfaction of achieving that perfect golden brown color and hearing people gasp with delight when they take their first bite never gets old.
Cultural Background & Recipe Origins
Buttermilk fried chicken is basically America’s comfort food royalty, with roots planted firmly in Southern culinary tradition. Originally, this technique came about because people were practical back in the 18th and 19th centuries. Buttermilk was just hanging around as a byproduct of making butter. Turns out, the acidic properties of buttermilk were absolutely perfect for making tough chicken tender while adding this amazing tangy flavor.
The dish really took off thanks to African American cooks who turned simple ingredients into pure culinary magic. These incredibly talented people developed all the techniques we still worship today… the careful seasoning, that perfect oil temperature, and the timing that transforms boring chicken into comfort food heaven. They figured out that buttermilk’s acidity would break down proteins, creating incredibly tender meat underneath that signature crispy coating.
Different regions across the South have their own special twists that tell fascinating stories. In Louisiana, cooks throw in cayenne and paprika for some serious heat. Kentucky folks prefer keeping things simple with herbs and black pepper. Virginia cooks sometimes sneak honey into their marinades. But that buttermilk foundation stays the same no matter where you go.
During my travels across the South researching this recipe, I discovered that every family guards their secrets like state treasures. Some swear by overnight brining. Others insist on double dredging techniques. I learned that old school cooks often used lard for frying, which created this incredibly rich flavor that modern oils just can’t touch.
The industrial revolution changed buttermilk fried chicken from special occasion food to everyday grub. But the artisanal approach that my grandmother practiced requires patience, skill, and really understanding your ingredients. This traditional method produces results that those mass produced versions could never dream of matching.
Essential Equipment & Tools
Successfully pulling off buttermilk fried chicken requires specific equipment that I’ve tested extensively over the years. First and foremost, you absolutely need a heavy bottomed Dutch oven or cast iron skillet. I personally swear by Lodge Cast Iron’s 6 quart Dutch oven, which maintains steady temperatures and distributes heat evenly. Plus, the high sides prevent dangerous oil spattering that could turn your kitchen into a war zone.
A reliable candy thermometer becomes your best friend during frying. I worship Taylor Precision thermometers for their accuracy and quick response times. Digital probe thermometers work well, but those old school dial thermometers often give more consistent readings for oil temperature monitoring.
Wire cooling racks positioned over sheet pans create the perfect draining system. This setup lets excess oil drip away while keeping that coating crispy. Never use paper towels… they trap steam and completely destroy that coveted crunch we’ve worked so hard to achieve.
Long handled tongs with good grip become absolutely crucial for safe chicken handling. OXO Good Grips tongs offer excellent control and heat resistance. A slotted spoon works as backup equipment for fishing out any coating pieces that might fall into the oil.
For marinating, glass or food grade plastic containers work best. Metal bowls can react with acidic buttermilk, creating funky off flavors. Make sure your container gives the chicken pieces plenty of room to sit comfortably in the marinade.
A flour sifter helps create uniform coating mixture. A fine mesh strainer works perfectly fine for this job too. The goal is eliminating lumps that could create uneven coating distribution.
Flavor Profile & Sensory Experience
Perfect buttermilk fried chicken delivers this amazing symphony of textures and flavors that evolve with each bite. Initially, your teeth hit that audible crunch of the golden coating… a sound that signals success and builds serious anticipation. The coating should shatter rather than squish, revealing the tender meat hiding underneath.
The first flavor notes combine the tangy brightness from buttermilk marinade with warm spices from the seasoned flour. The buttermilk’s acidity creates this subtle complexity that perfectly balances the richness of the fried coating. You’ll taste hints of garlic and onion powder, followed by gentle heat from cayenne and black pepper.
As you chew, the meat releases incredibly juicy flavors that have been enhanced by the overnight marination process. The buttermilk doesn’t just tenderize… it actually changes the meat’s flavor profile, adding subtle dairy notes that complement rather than hide the chicken’s natural taste. Proper temperature control keeps the meat succulent while the coating stays crispy.
The textural contrast is what makes this dish absolutely amazing. Every bite should give you that satisfying crunch followed immediately by tender, almost silky meat. The coating should never feel heavy or greasy when done properly. Instead, it provides a light, crispy shell that enhances rather than overwhelms the chicken.
Temperature plays a huge role in the eating experience. Served hot, the dish offers maximum contrast between the crispy exterior and steamy interior. Even at room temperature though, properly made buttermilk fried chicken keeps much of its appeal… proof that the preparation technique really matters.
The aromatic experience starts way before the first bite. The combination of fried coating and seasoned meat creates this intoxicating smell that draws people to the kitchen from all over the house.
Serving Suggestions & Food Pairings
Classic Southern sides complement buttermilk fried chicken beautifully, creating a complete comfort food experience. Creamy mashed potatoes with butter and cream provide the perfect neutral backdrop for the chicken’s bold flavors. Buttermilk biscuits echo the dish’s tangy notes while giving you another vehicle for sopping up any leftover flavors.
Coleslaw works as both palate cleanser and textural contrast. The crisp vegetables and acidic dressing cut through the richness of the fried coating. I discovered that adding a touch of buttermilk to the coleslaw dressing creates wonderful flavor harmony across the entire meal.
For drinks, sweet tea remains the traditional pairing, though I’ve found that slightly tart lemonades work equally well. The acidity helps clean your palate between bites. For adult gatherings, crisp lagers or wheat beers provide excellent contrast without competing with the chicken’s flavors.
Seasonal vegetables offer nutritional balance and color contrast. Green beans with almonds, roasted corn on the cob, or sautéed collard greens all work beautifully. These vegetables provide different textures that complement rather than fight with the star attraction.
For fancier presentations, I serve the chicken alongside arugula salad with lemon vinaigrette. The peppery greens and bright dressing create sophisticated flavor combinations while keeping the dish’s comfort food appeal. Roasted fingerling potatoes with herbs offer a refined alternative to traditional mashed potatoes.
Pickles deserve special mention as the perfect sidekick. The sharp acidity and crunchy texture provide ideal palate cleansing properties. I prefer bread and butter pickles for their sweet tart balance, though dill pickles work great for people who like sharper flavors.
Hot sauce options let people customize heat levels according to personal preference. Louisiana style hot sauces complement the Southern theme without overwhelming the carefully balanced flavors we worked so hard to achieve.
Recipe Variations & Creative Adaptations
Nashville Hot variation transforms this classic into a fiery sensation that I perfected after multiple trips to Tennessee. After frying, I brush the hot chicken with a mixture of cayenne pepper, brown sugar, smoked paprika, and hot oil saved from the frying process. This creates a beautifully lacquered appearance with intense heat that builds gradually.
For health conscious folks, I’ve successfully developed an oven fried version that keeps much of the original’s appeal. The key involves using cooking spray and high heat (425°F) with frequent turning. Adding panko breadcrumbs to the flour mixture creates extra crispiness that makes up for the lack of oil frying.
Korean inspired fusion incorporates gochujang into both the marinade and a finishing glaze. The fermented chile paste adds complexity and umami depth that creates exciting flavor combinations. Garnishing with sesame seeds and scallions provides visual appeal and textural interest.
Gluten free versions require careful flour selection for success. I found that a blend of rice flour, potato starch, and almond flour creates acceptable coating texture. The coating behaves differently during frying though, requiring slightly lower temperatures and longer cooking times. Adding xanthan gum helps improve coating adhesion.
Buttermilk herb variations showcase seasonal ingredients beautifully. Fresh rosemary, thyme, and sage in the marinade create sophisticated flavor profiles perfect for autumn entertaining. Summer variations might incorporate fresh basil and oregano for Mediterranean influences.
Spice level modifications allow customization for different palates. For mild versions, I skip cayenne entirely and reduce black pepper quantities. Serious heat lovers appreciate additions of chipotle powder, habanero powder, or even ghost pepper for extreme heat challenges.
Brining variations create different textural experiences. Apple cider brine produces subtle sweetness and enhanced moisture retention. Bourbon brine adds sophisticated flavor notes that adult audiences particularly appreciate.
Troubleshooting & Problem Solutions
Soggy coating is the most common failure in buttermilk fried chicken preparation. This usually happens because of insufficient oil temperature or cramming too many pieces in the pot. When oil temperature drops below 300°F, the coating absorbs oil instead of crisping properly. Adding too many pieces at once causes dramatic temperature drops that create greasy results.
If you notice coating falling off during frying, the problem typically involves insufficient flour adhesion or improper dredging technique. The chicken must keep enough buttermilk moisture for the flour to stick properly. Pressing the coating firmly onto the meat surface helps create mechanical bonds that survive the frying process.
Overcooked exteriors with undercooked insides mean your oil temperature is too high. When oil goes over 350°F, the coating browns too quickly before heat gets through the meat. If the coating looks pale after appropriate cooking times, bump up oil temperature by 10 to 15 degrees for the next batch.
Uneven browning usually comes from inconsistent oil depth or inadequate turning technique. The oil should completely cover each piece by at least one inch. Turn pieces only once during cooking to prevent coating disruption and ensure even heat exposure.
Tough, chewy meat results from inadequate marination time or excessive handling during coating. The buttermilk needs at least four hours to properly tenderize the proteins. Gentle handling during the dredging process prevents unnecessary muscle compression that creates tough textures.
Bland flavors typically mean insufficient seasoning in either the marinade or flour mixture. Remember that much of the seasoning gets diluted during the cooking process. Both components should taste slightly over seasoned when tested individually.
Oil management problems create various issues throughout the cooking process. Monitor temperature continuously and adjust heat accordingly to maintain consistency. Strain the oil between batches to remove any burnt coating particles that could create bitter flavors.
Storage & Meal Preparation Strategy
Proper storage techniques preserve both flavor and texture for several days after cooking. Let the chicken cool completely to room temperature before refrigerating… this prevents condensation that would soften the coating. Store pieces in single layers on wire racks placed over sheet pans, covered loosely with paper towels.
For optimal reheating results, I found that oven methods absolutely crush microwave techniques. Preheat the oven to 375°F and place chicken pieces on wire racks over sheet pans. Heat for 10 to 15 minutes, depending on piece size. This method re crisps the coating while gently warming the meat throughout.
Freezing buttermilk fried chicken requires careful preparation but produces acceptable results for up to three months. Wrap individual pieces tightly in plastic wrap, then place in freezer bags with air removed. Label clearly with preparation dates to ensure optimal quality management.
Make ahead strategies allow stress free entertaining without sacrificing quality. The chicken can be marinated up to 48 hours in advance… longer marination actually improves flavor development. The seasoned flour mixture can be prepared weeks ahead and stored in airtight containers.
For large gatherings, I use a batch cooking system that maintains consistent quality. Prepare all chicken pieces through the coating stage, then fry in small batches to maintain oil temperature. Keep finished pieces warm in a 200°F oven until all batches are complete.
Leftover transformation ideas prevent waste while creating exciting new meals. Cold fried chicken makes excellent sandwich filling, particularly when paired with pickles and spicy mayo. Chopped leftover chicken works beautifully in salads, providing protein and interesting textural elements.
Container selection impacts storage success significantly. Avoid airtight containers that trap moisture and soften coatings. Use containers with slight ventilation or leave covers slightly open to prevent condensation buildup.
Nutritional Benefits & Health Insights
Buttermilk fried chicken provides substantial protein content essential for muscle maintenance and repair. Each serving delivers approximately 35 grams of high quality complete protein containing all essential amino acids. Chicken meat supplies important B vitamins, particularly niacin and B6, which support nervous system function and energy metabolism.
The buttermilk marinade contributes beneficial probiotics that support digestive health, though the cooking process reduces their concentration significantly. The calcium content remains intact though, providing approximately 15% of daily calcium requirements per serving. The acidic properties of buttermilk enhance iron absorption from the meat.
Preparation methods significantly impact nutritional profiles. Traditional frying increases caloric density through oil absorption, with each serving containing approximately 485 calories. The protein to calorie ratio remains favorable compared to many restaurant alternatives. Using healthier frying oils like peanut oil provides beneficial monounsaturated fats.
Portion control strategies help integrate this indulgent dish into balanced eating patterns. A single piece of chicken (approximately 4 ounces) provides adequate protein for most people without excessive caloric intake. Pairing with fiber rich vegetables and whole grain sides creates more nutritionally complete meals.
For health conscious modifications, removing the skin before coating reduces saturated fat content by approximately 40%. The coating still sticks well to skinless pieces, though some textural differences occur. Using low fat buttermilk in marinades reduces overall caloric density without significantly impacting flavor development.
Seasonal considerations affect nutritional planning strategies. During summer months, lighter side dishes help balance the meal’s richness. Winter preparations might include heartier sides that complement the dish’s comfort food appeal while providing additional nutrients.
Family & Entertainment Adaptations
Kid friendly modifications ensure young diners enjoy this classic comfort food without overwhelming their developing palates. I reduce spice levels significantly, eliminating cayenne pepper entirely and using minimal black pepper. Smaller chicken pieces like drumettes or tenderloins prove more manageable for small hands and appetites.
Interactive cooking opportunities create memorable family experiences while teaching valuable culinary skills. Kids can help with marinade mixing, flour seasoning, and coating procedures under careful supervision. These activities develop fine motor skills while building confidence in the kitchen environment.
For large party scaling, I developed efficient systems that maintain quality while managing logistics effectively. The marinade quantities scale directly… simply multiply all ingredients by the desired factor. Frying requires multiple batches regardless of quantity though, so plan adequate cooking time accordingly.
Allergy accommodations require careful ingredient substitutions without compromising essential characteristics. For dairy allergies, coconut milk mixed with lemon juice creates adequate buttermilk substitutes. Gluten free flour blends work reasonably well, though texture differences are noticeable to experienced palates.
Make ahead entertaining strategies reduce stress while ensuring exceptional results. All preparation steps through coating can be completed hours in advance. Store coated pieces on racks in the refrigerator until frying time. This approach also helps manage kitchen timing for complex meals.
Presentation ideas for special occasions elevate this humble dish to celebration worthy status. Arrange pieces on wooden cutting boards with mason jar sides for rustic charm. Garnishing with fresh herb sprigs and colorful pickles creates visually appealing displays that photograph beautifully.
Budget conscious adaptations make this recipe accessible for various economic situations. Purchasing whole chickens and cutting them yourself reduces costs significantly. Buying family packs of pieces during sales and freezing portions helps manage expenses while maintaining quality ingredients.
Seasonal & Special Occasion Variations
Spring celebrations benefit from herb forward variations that showcase fresh seasonal ingredients. Adding chopped fresh chives, parsley, and dill to both marinade and coating creates bright, vibrant flavors perfect for Easter gatherings or graduation parties. Serving with asparagus and new potatoes completes the seasonal theme beautifully.
Summer adaptations focus on heat management and refreshing accompaniments. I often prepare the chicken early in cooler morning hours, then serve at room temperature for outdoor gatherings. Pairing with cold salads, fresh corn, and fruit based sides creates balanced meals perfect for picnics and barbecues.
Autumn versions incorporate warming spices that complement the season’s comfort food cravings. Adding sage, rosemary, and a touch of maple syrup to the marinade creates sophisticated flavors ideal for Thanksgiving alternatives or harvest celebrations. The golden colors echo autumn’s natural palette beautifully.
Holiday adaptations transform this everyday dish into special occasion centerpieces. For Christmas gatherings, I add herbs like thyme and rosemary with subtle cranberry powder for seasonal colors. Elegant presentation on tiered servers with complementary garnishes elevates the visual appeal significantly.
Winter preparations emphasize heartiness and warmth through both ingredients and serving methods. Slightly increasing spice levels provides internal warming, while serving immediately from the fryer ensures maximum comfort on cold days. Pairing with robust side dishes like roasted root vegetables creates satisfying cold weather meals.
Weather considerations affect cooking strategies throughout the year. Summer frying requires excellent ventilation and careful temperature monitoring due to ambient heat. Winter conditions might require slightly longer preheating times and adjusted oil temperatures to compensate for cooler kitchen environments.
Traditional timing for buttermilk fried chicken often centers around Sunday dinners and church gatherings, reflecting its cultural significance in Southern communities. The dish appears frequently at potluck dinners and family reunions where its crowd pleasing nature and portability make it ideal.
Comprehensive FAQ Section
Q: Can I make this recipe ahead of time? Absolutely! Buttermilk fried chicken can be prepped several ways in advance. The marination process actually gets better with extended time… up to 48 hours produces exceptional results. You can also coat the chicken pieces and refrigerate them for up to 4 hours before frying. For complete advance preparation, fry the chicken fully, cool completely, then refrigerate for up to 3 days. Reheat in a 375°F oven for optimal texture restoration.
Q: What substitutions work best for key ingredients? For buttermilk substitutes, combine regular milk with lemon juice or white vinegar (1 tablespoon acid per cup of milk). Plain yogurt thinned with milk creates similar acidity and flavor profiles. If peanut oil isn’t available, vegetable or canola oil work fine, though you’ll notice flavor differences. For flour alternatives, gluten free blends need extra binding agents like xanthan gum for proper coating adhesion.
Q: How do I know when it’s perfectly cooked? Perfect doneness combines visual and temperature cues for reliability. The coating should achieve deep golden brown color, and an instant read thermometer inserted into the thickest part should read 165°F (74°C). The juices should run clear when pierced, and the coating should sound hollow when tapped gently. Properly cooked chicken will feel firm but not hard when pressed lightly.
Q: Can this recipe be doubled or halved? Scaling this recipe works well in both directions with minor adjustments. For doubling, multiply all ingredients proportionally, but fry in multiple batches to maintain oil temperature. When halving, reduce ingredients accordingly while maintaining the same marination time. Very small batches (2 to 3 pieces) may cook faster though, so watch timing carefully and adjust accordingly.
Q: What’s the best way to store leftovers? Store leftover fried chicken on wire racks over sheet pans in the refrigerator, covered loosely with paper towels. This method prevents condensation that would soften the coating. Skip airtight containers initially… use them only after the chicken has cooled completely. Properly stored chicken maintains quality for 3 to 4 days and can be frozen for up to 3 months.
Q: Can I freeze this dish? Buttermilk fried chicken freezes reasonably well with proper technique. Cool completely, then wrap individual pieces in plastic wrap before placing in freezer bags. Remove excess air to prevent freezer burn. Label with dates and use within 3 months for best quality. Thaw in refrigerator overnight, then reheat in a 375°F oven until heated through and coating re crisps.
Q: What if I don’t have specific equipment? While ideal equipment improves results, substitutions work fine. A large, heavy skillet can replace a Dutch oven, though temperature control becomes more challenging. Without a thermometer, test oil temperature by dropping small flour pieces… they should sizzle immediately at proper temperature. Paper towels can substitute for wire racks temporarily, though they may soften coatings slightly.
Q: How can I make this healthier? Several modifications reduce caloric density while maintaining flavor. Remove skin before coating to reduce fat content significantly. Use low fat buttermilk in marinades without flavor impact. Oven frying at 425°F with cooking spray creates acceptable alternatives. Serving smaller portions with abundant vegetables also improves nutritional balance while satisfying comfort food cravings.
Q: What went wrong if common problems occur? Soggy coating usually means insufficient oil temperature or overcrowding during frying. Coating that falls off suggests inadequate flour adhesion… make sure chicken retains enough buttermilk moisture for binding. Tough meat results from insufficient marination time or excessive handling during coating. Bland flavors typically mean under seasoning in either marinade or flour mixture components.
Q: Can this be made gluten free, vegan, or dairy free? Gluten free versions require specialized flour blends containing xanthan gum for proper binding. Rice flour combined with potato starch works reasonably well. For dairy free adaptations, coconut milk with lemon juice substitutes for buttermilk adequately. Vegan versions require plant based protein substitutes like cauliflower or tofu, which create entirely different dishes with different techniques and expectations.
Final Reflections & Reader Encouragement
Creating perfect buttermilk fried chicken is way more than just following a recipe… it’s about connecting with culinary traditions that span generations and cultures. This dish captures the essence of comfort food: transforming simple ingredients into something extraordinary through patience, technique, and genuine care. The skills you develop making this recipe will enhance tons of other cooking adventures.
Don’t get bummed out if your first attempt doesn’t match your expectations perfectly. I’ve made hundreds of batches over the years, and each one taught me something valuable about timing, temperature, or technique. The beauty lies not in immediate perfection, but in the journey of getting better and the joy of sharing delicious food with people you care about.
Remember that cooking should bring pleasure rather than stress. Embrace the process, enjoy the amazing smells, and celebrate small victories along the way. The satisfaction of hearing that perfect crunch and seeing delighted expressions around your dinner table makes every bit of effort worthwhile.
I encourage you to make this recipe your own through experimentation and adaptation. Try different spice combinations, adjust heat levels to your preference, and discover variations that reflect your personal taste. Don’t hesitate to share your experiences and modifications… cooking communities thrive on shared knowledge and mutual encouragement.
This buttermilk fried chicken recipe deserves a permanent spot in your cooking rotation because it delivers consistently impressive results while providing endless opportunities for creativity and personalization. Whether you’re serving family dinners or entertaining guests, this dish creates memorable experiences that extend way beyond the meal itself.
The tradition continues with each batch you make, connecting you to countless cooks who have found joy and satisfaction in this timeless preparation. Welcome to the buttermilk fried chicken club… may your kitchen always smell amazing and your plates always be empty.