

Enjoy your homemade focaccia! It's delicious served warm, at room temperature, or used for sandwiches.
- Mix the dough
In a large bowl, whisk together flour, salt, and yeast. Add warm water and stir with a wooden spoon until no dry flour remains. The dough will be very sticky and shaggy.
- First rise
Cover the bowl with plastic wrap or a damp kitchen towel. Let it rise at room temperature for 12-18 hours. The dough will double in size and be dotted with bubbles.
- Prepare the pan
Pour 2 tablespoons of olive oil into a 9×13 inch baking pan. Use your fingers to coat the entire surface and sides.
- Shape the dough
Gently scrape the dough into the oiled pan. With oiled hands, gently stretch the dough to fill the pan. If it resists, let it rest for 10-15 minutes, then try again.
- Second rise
Cover the pan and let the dough rise for another 2 hours until puffy.
- Preheat
When the second rise is nearly complete, preheat your oven to 450°F (230°C).
- Create dimples
Drizzle the remaining 2 tablespoons of olive oil over the dough. Using your fingertips, press deeply into the dough to create dimples all over the surface.
- Add toppings
Sprinkle with flaky sea salt and add any desired toppings, pressing them gently into the dimples.
- Bake
Bake for 20-25 minutes until golden brown and crisp around the edges.
- Cool
Let the focaccia cool in the pan for 5 minutes, then transfer to a wire rack. For the best texture, allow it to cool for at least 20 minutes before slicing.
- Calories:220 kcal
- Fat :7 grams
- Protein:4 grams
- Carbohydrates:34 grams
This no knead focaccia recipe is about to become your new obsession, and honestly, it should be. Picture this: bakery quality Italian bread with a golden, crispy crust and those signature dimples filled with liquid gold (aka olive oil), all without breaking a sweat or working up those arm muscles kneading dough for twenty minutes.
I’m not kidding when I say this is the bread that converted me from a “store bought is fine” person to someone who gets genuinely excited about yeast bubbles. The beauty of this recipe lies in its simplicity and the magic of time doing all the heavy lifting while you binge watch your favorite show.
You literally mix five ingredients, walk away, and come back to find that science has worked its fermentation magic. No fancy equipment, no kneading technique tutorials on YouTube, just pure bread bliss.
Why This Recipe is Awesome
Let’s be real here, most bread recipes make you feel like you need a culinary degree and biceps of steel. This no knead focaccia recipe laughs in the face of complicated baking. It’s the rebel of the bread world, proving that sometimes the best things in life really are the simplest.
The secret weapon? Time and patience. While other recipes have you working up a sweat, this one lets time develop those complex flavors and that perfect chewy texture. The long, slow fermentation creates bubbles throughout the dough that give you that coveted airy crumb without any of the traditional kneading fuss.
What really sets this apart is the olive oil factor. We’re not talking about a light drizzle here, this bread practically bathes in olive oil, creating that golden, crispy exterior that crackles when you bite into it. Those dimples aren’t just for show; they’re little pools of flavor that make every bite a small celebration.
The versatility is off the charts too. Plain with sea salt? Perfection. Loaded with rosemary and garlic? Chef’s kiss. Cherry tomatoes and herbs? Now we’re talking fancy dinner party vibes. This bread adapts to whatever mood you’re in.
The Story Behind No Knead Focaccia
Focaccia hails from Italy, specifically the Liguria region, where it’s been a staple for centuries. Originally, it was peasant bread, simple, economical, and designed to make the most of basic ingredients like flour, water, salt, yeast, and olive oil. The word “focaccia” comes from the Latin “focacius,” meaning “of the hearth,” because it was traditionally baked on the hearth stones of wood fired ovens.
My first encounter with authentic focaccia was during a trip to a small Italian bakery where I watched the baker create these perfect dimples with his fingertips, explaining that each little depression would hold olive oil and herbs. That moment changed everything for me, I realized bread could be both rustic and elegant, simple yet sophisticated.
Traditional focaccia requires kneading, but the no knead version emerged from the brilliant work of bakers who understood that time could replace elbow grease. Jim Lahey popularized the no knead movement in the early 2000s, proving that long fermentation periods could develop gluten structure naturally through enzymatic action and hydration.
I spent months perfecting this particular version, testing different hydration levels and fermentation times. The breakthrough came when I realized that the key wasn’t just in the technique, it was in understanding that this bread wants to be handled gently and given time to develop its character. Each failed attempt taught me something new about dough behavior and timing.
What makes this recipe special in my kitchen is its forgiving nature. I’ve made it in humid summer kitchens and dry winter conditions, and it adapts beautifully. It’s become my go to for unexpected guests, quiet weekend mornings, and those moments when I need the therapeutic ritual of bread making without the workout.
Essential Equipment & Kitchen Tips
You don’t need a professional bakery setup for this, just a few basic tools that most home cooks already own. Here’s what you’ll actually use:
A large mixing bowl is your best friend here. Glass or ceramic works beautifully because you can watch the dough develop over time. The bowl needs to be big enough to allow the dough to double in size without overflowing like some sort of bread volcano.
A 9×13 inch baking pan creates the perfect thickness and allows for proper heat distribution. Metal pans give you that gorgeous golden bottom, while glass pans let you peek at the browning process. Either works, but metal is my preference for the superior crust development.
Kitchen scale isn’t absolutely necessary, but it’s a game changer for consistency. Flour measurements can vary wildly depending on how you scoop, but weight never lies. If you’re serious about bread (and you should be), investing in a basic digital scale will revolutionize your baking.
Plastic wrap or a damp kitchen towel for covering during rises. The goal is to prevent the surface from drying out while still allowing the dough to breathe slightly. Pro tip: lightly oil whatever covering you use to prevent sticking.
Temperature matters more than you think. Your kitchen’s ambient temperature affects rise times dramatically. In cooler kitchens, fermentation slows down; embrace it. In warmer environments, keep an eye on things to prevent over proofing. The dough is ready when it’s doubled and covered with bubbles, regardless of the exact time.
Pro Chef Secrets & Advanced Techniques
After making this bread countless times, I’ve discovered some insider tricks that separate good focaccia from absolutely transcendent focaccia. These aren’t just tips, they’re the difference between “nice homemade bread” and “where did you buy this amazing focaccia?”
The hydration game is everything. Professional bakers know that high hydration doughs create those beautiful irregular holes in the crumb. Don’t be tempted to add more flour if the dough seems too wet, that stickiness is your friend. It’s what creates the light, airy texture that makes people think you studied at a French culinary school.
Temperature control separates amateur bakers from pros. Water that’s too hot kills yeast; too cool and fermentation crawls. The sweet spot is around 110°F, it should feel comfortably warm on your wrist, like perfect bath water. I keep an instant read thermometer handy because guessing is for amateurs.
The fold technique during shaping is crucial but often overlooked. When transferring to the pan, don’t just dump and spread. Gently coax the dough from underneath, allowing it to stretch naturally. Think of it as encouraging rather than forcing, the dough will tell you when it’s ready to cooperate.
Oil distribution is an art form. That initial coating in the pan isn’t just for non stick purposes, it creates the crispy bottom crust that makes focaccia special. The final drizzle before baking? That’s what creates those golden pools in the dimples. Use good olive oil here; your taste buds will thank you.
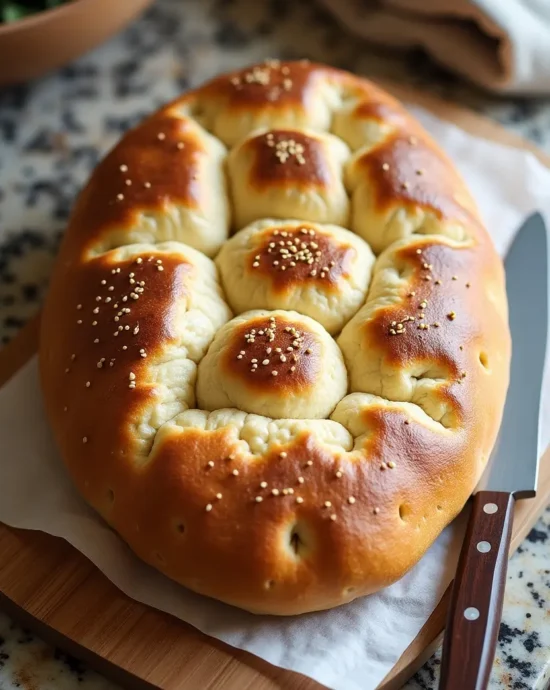
Dimple depth matters more than most people realize. Press firmly, you want to go almost all the way through the dough. Shallow dimples disappear during baking, but proper deep ones create those characteristic pockets that hold olive oil and seasonings. Your fingertips are the perfect tool; no fancy equipment needed.
Common Mistakes to Avoid
Let me save you from the bread baking heartbreaks I’ve witnessed (and experienced firsthand). These mistakes are more common than you’d think, and avoiding them is the difference between focaccia success and kitchen frustration.
Using old yeast is the fastest way to turn your bread dreams into flat, dense disappointment. Yeast has a shelf life, people! If your yeast doesn’t foam and bubble when mixed with warm water, it’s time for a fresh packet. Don’t try to be thrifty here, stale yeast is a recipe killer.
Rushing the first rise because you’re impatient will rob you of flavor and texture. I know 12-18 hours seems like forever, but that slow fermentation is developing complex flavors you simply can’t achieve any other way. Plan ahead and trust the process.
Over flouring the dough because it seems too sticky is a rookie mistake. Resist the urge to add more flour, that wet, slightly unmanageable texture is exactly what you want. Wet hands and a light touch are your best tools for handling high hydration dough.
Skipping the second rise in your eagerness to get bread in the oven will leave you with dense focaccia that tastes more like a thick cracker than proper bread. That final rise in the pan is crucial for developing the light, airy texture.
Using the wrong oil might seem trivial, but cheap vegetable oil instead of good olive oil changes everything. This bread is about celebrating simple, quality ingredients, don’t skimp on the oil that provides most of the flavor.
Baking at the wrong temperature because your oven “runs hot” or you’re second guessing the recipe will mess with the delicate balance between crispy exterior and tender interior. Invest in an oven thermometer if you suspect temperature issues.
Cutting too soon because warm bread smells incredible and your willpower is weak will result in gummy, underdeveloped texture. I know waiting is torture, but that cooling time allows the crumb structure to set properly.
Alternatives & Substitutions
Life happens, and sometimes you need to work with what you’ve got. Here’s how to adapt this recipe without sacrificing the soul of the bread:
Flour substitutions can work, but understand the trade-offs. Bread flour creates a chewier texture thanks to higher protein content, it’s actually my preferred choice when I want extra structure. Whole wheat flour can replace up to half the all purpose flour, but expect denser results and a nuttier flavor. Going full whole wheat requires extra water and patience.
Gluten free versions are possible but require a complete formula overhaul. You’ll need a gluten free flour blend designed for bread, plus xanthan gum for structure. The texture will be different, more cake like than chewy, but still delicious. Expect longer rise times and more fragile handling.
Yeast alternatives exist if you’re in a pinch. Instant yeast can substitute measure for measure, but active dry yeast needs that initial warm water activation. Fresh yeast works beautifully if you can find it, use three times the amount and expect faster fermentation.
Dairy free is built in this recipe is naturally vegan! The olive oil provides all the richness you need. Some people ask about adding milk or butter, but honestly, why mess with perfection? The Italian tradition is dairy free for good reason.
Salt considerations matter more than you think. Table salt, kosher salt, and sea salt have different crystal sizes, affecting both flavor and dough development. If using table salt, reduce the amount slightly. The flaky finishing salt isn’t negotiable, it provides textural contrast and flavor bursts that regular salt can’t match.
Water quality actually impacts bread. If your tap water is heavily chlorinated, it can inhibit yeast activity. Filtered water or letting tap water sit overnight to off gas chlorine can improve results. Distilled water lacks minerals that yeast loves, so tap or filtered is preferred.
Flavor Variations & Creative Twists
Once you’ve mastered the basic version, the world of focaccia becomes your playground. These variations have all been tested in my kitchen and approved by friends who’ve become my unofficial taste testing panel.
Rosemary and sea salt is the classic combination that never gets old. Strip fresh rosemary leaves from stems and press them into dimples before the final rise. The heat releases those piney essential oils that make your kitchen smell like an Italian hillside. Cherry tomatoes halved and nestled cut side down create sweet, concentrated flavor bombs.
Caramelized onion and thyme transforms this into something worthy of a wine bar. Slowly cook sliced onions until golden and jammy, then spread over the dough before the final rise. Fresh thyme leaves scattered on top add an earthy note that pairs beautifully with the sweet onions.
Garlic and herb version involves roasting whole garlic cloves until soft and sweet, then pressing them into dimples along with fresh herbs like oregano, basil, or parsley. The roasted garlic becomes creamy and mild, adding richness without overwhelming sharpness.
Olive and sun dried tomato creates a Mediterranean masterpiece. Use good quality olives (kalamata or castelvetrano) and oil packed sun dried tomatoes for best results. The briny olives and intense tomatoes create complex flavor layers that make this feel like a complete meal.
Seasonal adaptations keep things interesting year round. Spring brings fresh peas and mint, summer offers zucchini blossoms and basil, fall welcomes roasted butternut squash and sage, while winter calls for roasted root vegetables and hearty herbs like rosemary.
Serving Suggestions & Pairings
This focaccia isn’t just bread, it’s a canvas for creating memorable meals and moments. The way you serve it can transform a simple loaf into the centerpiece of any gathering.
Soup companion duty is where this bread truly shines. That crispy crust holds up beautifully for dunking into everything from hearty minestrone to creamy tomato bisque. The olive oil soaked bottom layer adds richness that complements rather than competes with soup flavors.
Sandwich foundation capabilities are seriously underrated. Split horizontally and filled with fresh mozzarella, tomatoes, and basil, it becomes an Italian masterpiece. The dimpled surface holds condiments and dressings without making things soggy.
Wine pairing opens up endless possibilities. The herbaceous notes complement Chianti beautifully, while the olive oil richness stands up to bolder reds like Barolo. For white wine lovers, crisp Pinot Grigio or Vermentino echo the Italian theme perfectly.
Appetizer presentation can be as simple as cutting into squares and arranging on a wooden board with good olive oil for dipping, or as elaborate as topping pieces with whipped ricotta, honey, and fresh herbs for an elegant start to dinner parties.
Storage & Reheating Guide
Proper storage makes the difference between day two bread that’s still amazing and day two bread that’s only good for making breadcrumbs. Here’s how to keep your focaccia at peak deliciousness.
Room temperature storage works for 2-3 days if wrapped properly. Plastic wrap creates a softer crust, while paper bags maintain crispiness but allow faster staling. My preferred method combines both, wrap in paper, then slide into a plastic bag for the best of both worlds.
Refrigerator storage extends life to about a week but changes texture. The cold temperature accelerates staling, so you’ll need to refresh it before eating. Never store unwrapped bread in the fridge, it’ll turn into cardboard faster than you can say “stale.”
Reheating methods can resurrect day old bread beautifully. A 350°F oven for 5-10 minutes wrapped in foil restores moisture, while unwrapped heating re crisps the exterior. Avoid the microwave unless you enjoy rubber textured bread.
Freezing guidelines allow you to enjoy fresh focaccia weeks later. Wrap cooled bread tightly in plastic wrap, then aluminum foil. Properly frozen focaccia keeps for up to three months. Thaw at room temperature, then refresh in a moderate oven.
Nutritional Benefits & Health Notes
While focaccia isn’t exactly health food, it’s not the nutritional villain some people make it out to be. Understanding what you’re eating helps you enjoy it as part of a balanced diet.
Olive oil provides healthy monounsaturated fats that support heart health and help absorb fat-soluble vitamins. The quality matters, extra virgin olive oil contains antioxidants and anti-inflammatory compounds that refined oils lack.
Fermentation benefits from the long rise time make this bread easier to digest than quick rise alternatives. The fermentation process breaks down some of the gluten proteins and creates beneficial compounds that support gut health.
Portion awareness is key to enjoying bread without guilt. A reasonable serving is about 1/8 of the total recipe, which provides energy for active lifestyles while still leaving room for other nutritious foods.
FAQ (Frequently Asked Questions)
Can I make this without a stand mixer? Absolutely! This recipe is designed for hand mixing. A wooden spoon and some arm muscle are all you need. The wet dough actually mixes more easily by hand than stiffer doughs.
Why is my dough so sticky and hard to handle? That’s exactly how it should be! High hydration dough creates the light, airy texture we’re after. Use oiled hands and gentle movements rather than fighting the stickiness.
Can I use instant yeast instead of active dry? Yes, but reduce the amount to 1/4 teaspoon since instant yeast is more concentrated. You can mix it directly with the flour without proofing.
What if my kitchen is really cold? Cold temperatures slow fermentation, which isn’t necessarily bad, you’ll just need more time. You can place the bowl in a slightly warm (but turned off) oven with the light on to create a cozy proofing environment.
Can I add cheese to the dough? While not traditional, grated Parmesan mixed into the dough works beautifully. Add about 1/4 cup with the flour. Fresh mozzarella is better as a topping since it releases moisture that can make the dough soggy.
Is it normal for the dough to smell slightly alcoholic? Yes! That’s the fermentation process working. A pleasant, slightly yeasty, wine like aroma is perfect. If it smells sour or unpleasant, something’s gone wrong.
Can I make mini focaccias instead of one large one? Absolutely! Divide the dough between smaller pans and reduce baking time to 15-20 minutes. Individual focaccias are perfect for sandwiches or portion control.
Why didn’t my focaccia rise properly? Check your yeast expiration date first. Old yeast is the most common culprit. Also ensure your water wasn’t too hot (which kills yeast) or too cold (which slows it down dramatically).
Can I prepare this the night before baking? The beauty of this recipe is its flexibility. After the first rise, you can shape it in the pan and refrigerate overnight. Let it come to room temperature and complete the second rise before baking.
What’s the best way to create perfect dimples? Use clean fingertips and press firmly almost to the bottom of the dough. Don’t be gentle, those dimples need to be deep enough to survive the oven spring and hold olive oil.
Troubleshooting Guide
Even experienced bakers occasionally encounter issues. Here’s how to diagnose and fix the most common problems before they ruin your bread dreams.
Dense, heavy texture usually indicates insufficient fermentation time or dead yeast. If your first rise didn’t double the dough and create visible bubbles, start over with fresh yeast. Cold kitchens need more time, patience is key.
Pale, soft crust means your oven temperature was too low or the baking time too short. Focaccia needs high heat to create that golden, crispy exterior. If your oven runs cool, increase the temperature by 25°F and extend baking time.
Gummy, undercooked interior happens when you rush the cooling process. I know it’s tempting to cut into warm bread, but the interior continues cooking and setting as it cools. Wait at least 20 minutes, your patience will be rewarded.
Burnt bottom, raw top suggests your oven’s bottom element is stronger than the top. Move your rack to the upper third of the oven and consider using a light colored pan that doesn’t absorb heat as aggressively.
Dough springs back when shaping means the gluten needs more time to relax. Cover and let it rest 15-30 minutes, then try again. Fighting resistant dough only leads to tough bread.
Disappeared dimples after baking indicate they weren’t deep enough initially or the dough was over proofed. Next time, press more firmly and watch for signs of over rising like a very wobbly, fragile surface.
Final Thoughts
There’s something deeply satisfying about pulling a golden, aromatic focaccia from your own oven. This no knead focaccia recipe proves that the best things in life don’t always require the most effort, sometimes they just need time, patience, and quality ingredients.
What started as a simple curiosity about bread making has become a weekly ritual in my kitchen. There’s therapy in the gentle mixing, anticipation in the long rise, and pure joy in that first bite of warm, olive oil soaked bread. The fact that it impresses dinner guests is just a bonus.
Don’t be surprised if this becomes your signature bread. Friends will start requesting it, family gatherings will feel incomplete without it, and you’ll find yourself planning meals around when you can start the dough. That’s the magic of really good bread, it brings people together.
Now go impress someone (or yourself) with your new culinary skills. You’ve earned it!


