- Preheat the Oven
Preheat your oven to 350°F (175°C).
- Prepare the Apples
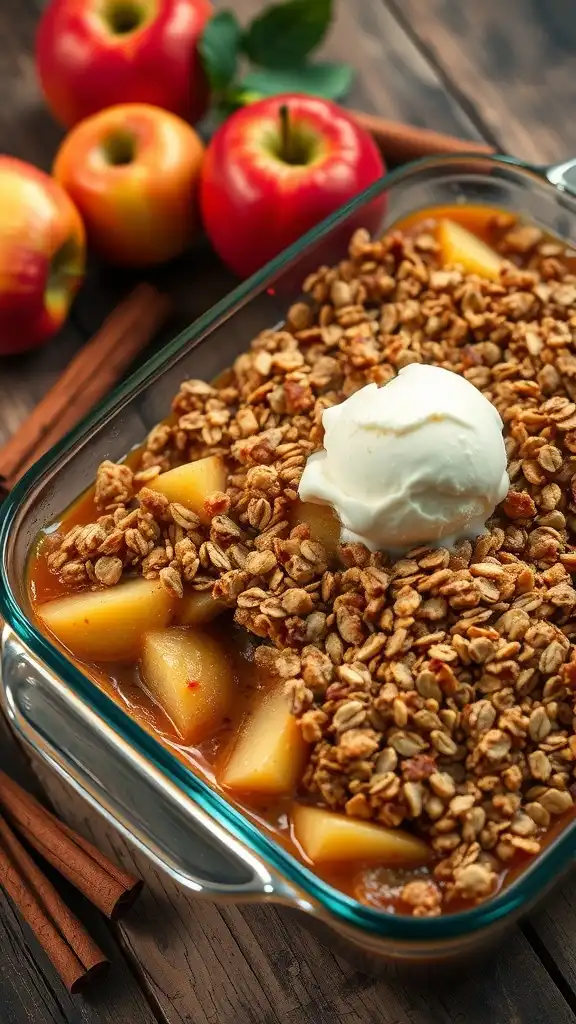
In a large bowl, combine the sliced apples, granulated sugar, cinnamon, and lemon juice. Mix well and transfer to a greased 9x13-inch baking dish.
- Make the Topping
In another bowl, combine the rolled oats, flour, brown sugar, and salt. Add the diced cold butter and mix until the mixture resembles coarse crumbs.
- Assemble
Sprinkle the oat topping evenly over the apple mixture in the baking dish.
- Bake
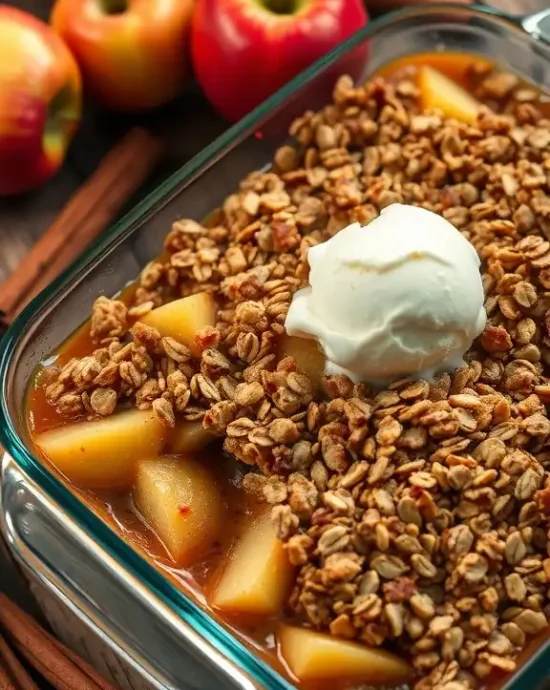
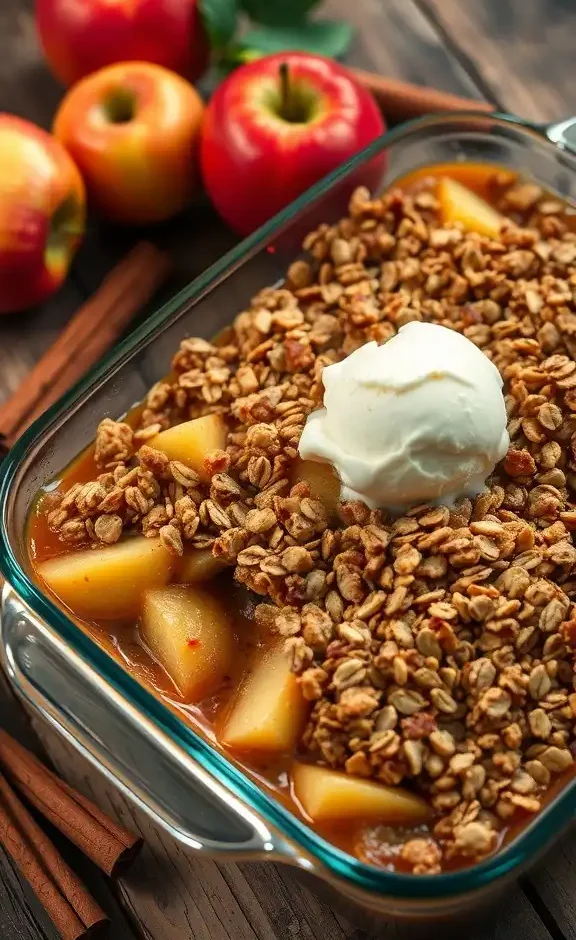
Bake in the preheated oven for 30-40 minutes, or until the apples are bubbling and the topping is golden brown.
- Serve
Allow to cool slightly before serving warm, preferably with a scoop of vanilla ice cream.
Understanding the nutritional profile of this apple crisp recipe helps you make informed decisions about how it fits into your overall eating plan while maximizing the health benefits of its wholesome ingredients.
- Calories:250 grams
- Fat:10 grams
- Proteins:2 grams
- Carbohydrates:38 grams
Apple crisp recipe devotees know there’s something absolutely enchanting about the way this dessert transforms your entire house into a cozy autumn sanctuary. Picture walking into a kitchen where cinnamon and butter mingle with the sweet aroma of tender baked apples, creating an atmosphere that instantly makes everyone feel at home.
I’ve been perfecting this particular recipe for nearly two decades, and it’s become the dessert that family members specifically request for holidays, potlucks, and those random Tuesday nights when we all need a little extra comfort. What started as my grandmother’s basic recipe has evolved into something that consistently delivers that perfect balance of tender spiced apples and gloriously crispy oat topping.
The magic happens when you bite through that golden, crunchy surface to discover the warm, cinnamon-kissed apples underneath. Every forkful delivers different textures and temperatures that somehow work together in perfect harmony. This isn’t just dessert, it’s edible happiness that brings people together around the table.
My friends always assume this recipe must be complicated because it tastes so incredible, but honestly, it’s one of the most forgiving desserts you can make. Even beginning bakers can create something that looks and tastes like it came from a fancy bakery.
Why This Apple Crisp Recipe Is Pure Genius
Let me explain exactly what makes this apple crisp recipe so special compared to every other version floating around the internet. First, the apple preparation technique ensures you get perfectly tender fruit that doesn’t turn to mush during baking. Coating those apple slices with just the right amount of sugar and lemon juice creates this incredible balance where the natural tartness shines through while the sweetness complements rather than overwhelms.
The oat topping is where this recipe really shows its brilliance. Most apple crisp recipes either give you a topping that’s too sweet, too bland, or falls apart when you try to serve it. This version creates these beautiful, substantial clusters that hold together while still being tender enough to cut through easily with a fork.
The Secret Ingredient Balance
What people don’t realize is how the brown sugar in the topping works with the granulated sugar on the apples to create layers of sweetness. Brown sugar has molasses content that adds depth and richness, while the white sugar helps draw out the apple juices to create that gorgeous bubbling effect you see around the edges.
The cold butter technique is absolutely crucial for achieving that perfect crumbly texture. When you work cold butter into the dry ingredients, it creates these little pockets that steam during baking, resulting in a topping that’s both crispy and tender.
Cinnamon appears in just the right amount to enhance the apple flavor without making everything taste like a candle. Too many recipes go overboard with spices, but this version lets the apples be the star while the cinnamon provides gentle warmth and complexity.
Foolproof Technique
This recipe forgives almost every mistake you can make. Slice your apples a little thick? They’ll still cook perfectly. Mix the topping a bit too much? Still delicious. Forget to check the timer and leave it in five minutes longer? Usually just means extra golden color that everyone will love.
The 350°F temperature is ideal because it cooks the apples through completely while giving the topping enough time to develop that beautiful golden color. Higher temperatures risk burning the top before the apples are tender, while lower temperatures can result in a soggy topping.
The Story Behind Apple Crisp Recipe Perfection
Apple crisp has been comfort food royalty in American kitchens since the colonial era, when settlers adapted traditional English crumble recipes using ingredients they could easily obtain in the New World. Oats were plentiful and affordable, making them the perfect base for a dessert topping that could stretch expensive ingredients like butter and sugar.
My journey with this particular apple crisp recipe began during my first apartment cooking disaster phase about twenty years ago. I had volunteered to bring dessert to a friend’s dinner party, thinking how hard could apple crisp possibly be? Turns out, pretty hard when you don’t know what you’re doing.
Learning From Kitchen Disasters
That first attempt was spectacularly awful. The apples turned to applesauce, the topping burned black on the edges while remaining raw in the center, and the whole thing tasted like someone had dumped a container of cinnamon onto disappointment. Everyone was polite about it, but I saw the looks exchanged across the table.
Pride wounded, I became obsessed with figuring out where I’d gone wrong. I researched dozens of recipes, tested different apple varieties, experimented with oat ratios, and eventually discovered that most apple crisp failures come from either too much liquid or incorrect temperature management.
The Breakthrough Moment
The breakthrough came when I realized that different apple varieties release different amounts of juice during baking. Using a mix of apples, some tart and firm like Granny Smith, others sweet and tender like Honeycrisp, created this incredible complexity of flavor and texture that single-variety recipes just can’t match.
Adding lemon juice wasn’t just about preventing browning, it was about balancing the sweetness and helping the apples hold their shape during the long baking process. That small amount of acid works magic on the fruit, intensifying flavors while maintaining structure.
The cold butter revelation changed everything. Room temperature butter creates a paste-like mixture that bakes into a dense, cake-like layer rather than the crispy, crumbly topping we’re after. Cold butter, worked in just until you get pea-sized pieces, creates the texture dreams are made of.
Family Recipe Evolution
Over the years, this recipe has become our family’s signature dessert. Each holiday gathering features at least two pans because we learned the hard way that one pan disappears before everyone gets seconds. Cousins, friends, and neighbors have all requested the recipe, and watching their faces light up when they taste their first homemade batch never gets old.
The recipe has survived potluck disasters, college dorm adaptations, and even my nephew’s attempt to make it in a toaster oven. Each variation taught us something new about the fundamentals that make this dessert so special.
What I love most about this apple crisp recipe’s story is how it brings people together. Every time someone makes it, they’re participating in this wonderful tradition of comfort food that spans generations and creates new memories.
Apple Selection Strategy
The apple varieties you choose will make or break this dessert. Granny Smith apples provide that essential tartness and hold their shape beautifully during baking. Honeycrisp adds natural sweetness and creates interesting texture variations. Braeburn, Jonagold, and Northern Spy also work wonderfully if you can find them.
Avoid Red Delicious apples completely, they turn to mush and have very little flavor. Golden Delicious can work in a pinch but aren’t ideal. The key is choosing apples that maintain some firmness after baking while contributing complementary flavors.
Fresh lemon juice serves multiple purposes beyond preventing browning. The acid helps break down tough apple fibers while intensifying the natural fruit flavors. Bottled lemon juice works, but fresh provides brighter, more complex results.
Topping Component Breakdown
Rolled oats create the signature texture that makes apple crisp different from other fruit desserts. Old-fashioned oats work best because they maintain their shape and provide satisfying chewiness. Quick-cooking oats tend to disappear during baking, while steel-cut oats never soften properly.
Brown sugar’s molasses content adds depth and helps create those beautiful caramelized edges that make the topping so irresistible. Light brown sugar works perfectly, though dark brown sugar will intensify the molasses flavor if you prefer more complexity.
All-purpose flour binds everything together while helping create structure in the finished topping. Don’t substitute other flours without understanding how they’ll affect texture and flavor.
Salt might seem like an odd addition to dessert, but it’s absolutely essential for balancing sweetness and enhancing all the other flavors. Without it, the topping tastes flat and one-dimensional.
Cold butter is non-negotiable for proper texture development. The butter needs to be straight from the refrigerator, cut into small pieces that will distribute evenly throughout the mixture. Room temperature butter creates entirely different results.
Essential Equipment & Kitchen Techniques
Creating perfect apple crisp doesn’t require fancy equipment, but having the right tools makes the process much smoother and ensures consistent results every time.
Baking Dish Selection
A 9×13-inch baking dish provides ideal proportions for this recipe. Glass dishes like Pyrex allow you to monitor browning progress, while ceramic dishes retain heat beautifully for serving. Metal pans work fine but can cause more aggressive browning on the bottom.
Make sure your dish has at least 2-inch sides to prevent overflow when the apple juices start bubbling. Shallow dishes can result in messy ovens and uneven cooking.
Preparation Tools
Sharp knives make apple preparation infinitely easier and safer. A good peeler saves time and creates uniform results. Some people prefer apple corers, but a knife works just as well for removing cores and seeds.
Large mixing bowls prevent ingredient spillage and make combining everything much easier. Having two bowls, one for apples and one for topping, streamlines the assembly process.
Mixing Techniques
Pastry cutters create ideal butter incorporation, but two knives or even your fingers work perfectly well. The goal is pea-sized butter pieces that are well-distributed throughout the dry ingredients.
Don’t overmix the topping mixture. Once you achieve that coarse crumb texture, stop working it. Overmixing develops the flour’s gluten, creating tough results instead of the tender crumbs we want.
Temperature Management
Oven thermometers ensure accuracy because many ovens run hot or cold. Consistent temperature is crucial for proper cooking throughout. If your oven has hot spots, rotate the pan halfway through baking.
Preheating is essential, never put the apple crisp into a cold oven. The topping needs immediate heat to begin proper browning, while gradual heating can make apples release too much liquid.
Pro Chef Secrets & Advanced Techniques
After making this apple crisp recipe countless times and experimenting with every variable imaginable, I’ve discovered professional techniques that transform good apple crisp into absolutely extraordinary apple crisp. These small adjustments make enormous differences in the final result.
Apple Preparation Mastery
Uniform slicing ensures even cooking throughout the dessert. Aim for slices about 1/4-inch thick, which provides the perfect balance between maintaining shape and cooking through completely. Thicker slices may not soften properly, while thinner ones can turn mushy.
Let the prepared apples sit for 10-15 minutes after mixing with sugar and lemon juice. This allows the salt to draw out some juices, which you can then drain off if there seems to be excessive liquid. This prevents soggy bottom syndrome that plagues many apple crisps.
Advanced Topping Techniques
Chill your mixing bowl and utensils before making the topping. Cold tools help keep the butter at the ideal temperature throughout the mixing process. This technique is borrowed from pastry making and creates superior texture.
Create different textures within the topping by varying your mixing technique. Work some areas until you get fine crumbs, leave other areas with larger, more substantial pieces. This creates interesting textural variety in the finished dessert.
Temperature and Timing Optimization
Start baking at 375°F for the first 15 minutes, then reduce to 350°F for the remainder of cooking time. This initial high heat jump-starts the browning process while ensuring the apples have enough time to cook through completely.
Cover the edges with foil if they’re browning too quickly while the center needs more time. This prevents burning while allowing complete cooking throughout.
Flavor Enhancement Secrets
Add a pinch of nutmeg or cardamom to the apple mixture for subtle complexity that most people can’t identify but everyone appreciates. These spices complement cinnamon beautifully without overwhelming the apple flavor.
Vanilla extract in the apple mixture, just half a teaspoon, adds incredible depth. Most people won’t recognize it as a separate flavor, but they’ll notice the dessert tastes more complex and satisfying.
Serving Optimization
Let the apple crisp rest for exactly 15 minutes before serving. This allows the juices to thicken slightly while keeping everything warm enough to melt ice cream beautifully. Shorter resting times result in runny juices, while longer times mean reheating becomes necessary.
Warm your serving plates in a low oven before plating. This prevents rapid cooling and ensures each serving stays at the perfect temperature longer.
Common Mistakes to Avoid
Even experienced bakers can stumble when making apple crisp, but most disasters are completely preventable with proper knowledge. Let me share the most common pitfalls and how to avoid them entirely.
Apple-Related Disasters
Using only sweet apples creates one-dimensional flavor that becomes cloying after a few bites. The contrast between tart and sweet apples provides complexity that keeps people coming back for more. Always include at least some Granny Smith apples in your mix.
Cutting apples too far in advance leads to excessive browning and mushy texture, even with lemon juice. Prepare apples no more than 30 minutes before assembly to maintain optimal color and firmness.
Not draining excess apple juices can result in soggy topping and unappetizing texture. If your apple mixture seems very wet after sitting, drain off some liquid before assembly.
Topping Tragedies
Room temperature butter creates dense, cake-like topping instead of the crispy, crumbly texture we want. Cold butter is absolutely essential for proper texture development. Keep butter refrigerated until the moment you need it.
Overmixing the topping develops gluten, creating tough results instead of tender crumbs. Mix just until you achieve that coarse, pebbly texture, then stop immediately.
Insufficient topping distribution leaves some areas of apple exposed, resulting in uneven browning and texture. Make sure every inch of apple surface gets covered for consistent results.
Baking Blunders
Oven temperatures that are too high burn the topping before apples cook through. Too low temperatures create soggy toppings that never develop proper crispness. 350°F provides the ideal balance for most ovens.
Opening the oven door constantly to check progress releases heat and extends cooking time. Trust the timing guidelines and resist the urge to peek until you’re nearing the minimum cooking time.
Not testing for doneness properly can result in undercooked apples or burnt toppings. Apples should be easily pierced with a knife, while topping should be golden brown and firm to the touch.
Serving Mistakes
Serving too hot results in runny juices that make plating messy and uncomfortable eating. That 15-minute resting period is crucial for proper consistency and temperature.
Cold serving plates cause rapid cooling that can make the dessert less enjoyable. Warm plates maintain optimal serving temperature longer and prevent ice cream from melting too quickly.
Alternatives & Substitutions
Real life means sometimes you don’t have every ingredient on hand, or dietary restrictions require modifications. This apple crisp recipe adapts beautifully to accommodate various needs and preferences.
Apple Alternatives
Pears create an elegant variation with similar texture and cooking requirements. Use firm pears like Bosc or Anjou, and reduce sugar slightly since pears tend to be sweeter than apples. The cooking time remains the same.
Mixed stone fruits like peaches, plums, and nectarines work wonderfully during summer months. These fruits release more juice, so add an extra tablespoon of flour to the fruit mixture to prevent excessive runniness.
Dietary Modifications
Gluten-free versions work perfectly by substituting almond flour or gluten-free flour blend for all-purpose flour. Add a pinch of xanthan gum if your blend doesn’t include it to help with binding.
Vegan adaptations require cold vegan butter or coconut oil in place of dairy butter. Make sure your vegan butter is firm, not soft, to achieve proper topping texture. Coconut oil should be solid but not rock-hard.
Sugar Substitutions
Coconut sugar can replace both brown and white sugar with minimal flavor changes. The molasses-like notes complement the apple flavors beautifully. Use the same quantities as called for in the original recipe.
Maple syrup works as a partial sugar substitute, but reduce other liquids slightly to compensate for the additional moisture. Replace up to half the sugar with maple syrup for interesting flavor complexity.
Topping Variations
Nuts add wonderful texture and flavor complexity. Chopped pecans, walnuts, or almonds mixed into the topping create gourmet results. Add about 1/2 cup of your favorite nuts to the basic topping mixture.
Different grains can replace some of the oats for interesting variations. Try adding wheat germ, quinoa flakes, or even crushed cereal for unique textures and flavors.
Spice Modifications
Warming spices like allspice, ginger, or cloves can complement or replace cinnamon. Start with small amounts, as these spices are potent and can easily overwhelm the apple flavors.
Citrus zests add brightness and complexity. Orange zest pairs beautifully with apples, while lemon zest intensifies the tartness. Add just the zest, not the juice, to avoid excess moisture.
Creative Flavor Variations & Seasonal Twists
Once you’ve mastered the basic apple crisp recipe, experimenting with creative variations becomes incredibly fun and rewarding. These adaptations have all been tested extensively and create unique desserts while maintaining the essential apple crisp character.
Seasonal Apple Varieties
Fall brings amazing heirloom apple varieties that create extraordinary flavor combinations. Arkansas Black apples provide intense flavor and hold their shape beautifully. Northern Spy apples offer perfect tartness balance. Newtown Pippins add complexity that most people have never experienced.
Winter storage apples like Winesap and Stayman maintain their flavor through months of storage, making them perfect for holiday desserts when fresh options are limited.
International Flavor Inspirations
French-inspired versions incorporate Calvados or apple brandy into the apple mixture for sophisticated adult flavors. Add just two tablespoons to avoid overwhelming the fruit, and the alcohol cooks off during baking.
Mexican chocolate variations include cinnamon and a tiny pinch of cayenne pepper with the apples, while adding cocoa powder to the topping mixture. The combination creates warmth and complexity that surprises everyone.
Scandinavian influences might include cardamom in both the apple mixture and topping, creating aromatic complexity that pairs beautifully with coffee or tea service.
Texture Adventures
Granola topping variations replace some oats with your favorite granola, creating interesting clusters and flavor combinations. Choose granola with nuts and dried fruits for maximum impact.
Streusel-style toppings incorporate more flour and create cake-like textures that some people prefer to traditional crispy versions. Increase flour to 1 cup and add an extra 2 tablespoons of butter.
Fruit Combination Experiments
Apple-cranberry combinations add tartness and beautiful color. Use dried cranberries, about 1/2 cup, mixed directly into the apple mixture. Fresh cranberries work too but may be quite tart for some palates.
Apple-pear combinations create subtle flavor layering that’s particularly elegant for dinner parties. Use equal amounts of each fruit, selecting firm pear varieties that won’t turn to mush.
Berry additions work wonderfully with apples. Blackberries, blueberries, or raspberries (about 1 cup) mixed with the apples create beautiful color and flavor complexity.
Serving Suggestions & Perfect Pairings
Apple crisp recipe versatility means it works beautifully in numerous serving situations, from casual family dinners to elegant holiday entertaining. Understanding how to present and accompany this dessert elevates the entire dining experience.
Classic Presentation Ideas
Vanilla ice cream remains the gold standard pairing because the cold, creamy texture contrasts perfectly with warm, crunchy apple crisp. High-quality vanilla ice cream makes an enormous difference, the cheap stuff just doesn’t provide the same luxurious experience.
Whipped cream offers a lighter alternative that won’t overwhelm the apple flavors. Fresh whipped cream, lightly sweetened and perhaps flavored with vanilla or rum extract, creates an elegant presentation.
Gourmet Serving Options
Cinnamon ice cream amplifies the warm spice notes while providing that essential temperature contrast. Many artisanal ice cream makers offer cinnamon flavors, or you can make your own by steeping cinnamon sticks in cream before churning.
Bourbon or rum sauce drizzled over warm apple crisp creates sophisticated adult desserts perfect for dinner parties. These sauces complement the apple flavors while adding complexity and richness.
Caramel sauce, either homemade or high-quality store-bought, creates indulgent presentations that feel special. The caramel’s butterscotch notes enhance the brown sugar in the topping beautifully.
Beverage Pairings
Coffee pairs wonderfully with apple crisp, particularly dark roasts that can stand up to the dessert’s sweetness. The bitter notes in coffee provide perfect balance to the fruit and sugar.
Tea service works beautifully, especially chai or spiced black teas that echo the cinnamon flavors. Earl Grey’s bergamot oil creates interesting citrus notes that complement the apples.
Dessert wines like late-harvest Riesling or ice wines provide elegant pairings for special occasions. The wine’s sweetness matches the dessert while adding complexity and sophistication.
Presentation Techniques
Individual serving dishes create elegant presentations perfect for dinner parties. Ramekins or small gratin dishes allow portion control while making each guest feel special.
Family-style serving from the baking dish encourages communal dining and creates that homey atmosphere that apple crisp represents. Make sure to have a large serving spoon for easy portioning.
Special Occasion Adaptations
Holiday presentations might include garnishes like sugared cranberries, candied pecans, or edible flowers depending on the season. These small touches transform simple apple crisp into special occasion desserts.
Potluck presentations require transportation considerations. Choose sturdy baking dishes with tight-fitting lids, and bring serving utensils and small plates if needed.
Storage & Reheating Mastery
Proper storage and reheating techniques ensure your apple crisp recipe maintains its delicious qualities for days after baking. Understanding these methods means you can make this dessert ahead or enjoy leftovers without compromising quality.
Immediate Storage Protocol
Cool completely before covering to prevent condensation that makes toppings soggy. This usually takes about 2 hours at room temperature. Rushing this process by refrigerating while warm creates texture problems.
Airtight covering prevents the topping from absorbing moisture and becoming soft. Plastic wrap works, but foil provides better protection against humidity while allowing easier reheating later.
Refrigeration Guidelines
Properly stored apple crisp maintains quality for 4-5 days in the refrigerator. The apples actually improve in flavor as they continue to absorb the cinnamon and sugar, while the topping may soften slightly but remains perfectly edible.
Individual portions store better than whole pans because they cool faster and reheat more evenly. Transfer portions to smaller containers if you don’t expect to finish the entire pan quickly.
Freezing Strategies
Unbaked apple crisp freezes beautifully for up to 3 months. Assemble completely, then wrap tightly in plastic wrap and aluminum foil. Bake directly from frozen, adding 15-20 minutes to the cooking time.
Baked apple crisp can be frozen for up to 2 months, though the topping texture changes slightly upon reheating. Freeze in the baking dish or transfer to freezer-safe containers for easier storage.
Reheating Techniques
Oven reheating produces the best results for maintaining crispy topping texture. Cover loosely with foil and heat at 350°F for 15-20 minutes, removing foil for the last 5 minutes to re-crisp the topping.
Microwave reheating works for individual portions but won’t restore crispiness to the topping. Use 50% power to prevent hot spots and check every 30 seconds until warmed through.
Make-Ahead Strategies
Apple preparation can be done several hours ahead if you store the prepared apples in the refrigerator with lemon juice to prevent browning. Drain any excess liquid before assembly.
Complete assembly can be done up to 24 hours ahead if you cover tightly and refrigerate. This actually improves flavors as everything melds together, though you may need to add 5-10 minutes to the baking time.
Apple Nutrition Powerhouse
Apples provide substantial fiber, particularly pectin, which supports digestive health and helps regulate blood sugar. The skin contains most of the fiber, making peeled apples less nutritious than unpeeled versions.
Antioxidants in apples, particularly quercetin and vitamin C, support immune function and may provide anti-inflammatory benefits. These compounds are highest in the skin and just beneath it.
Natural sugars in apples provide quick energy while the fiber helps moderate blood sugar spikes. This makes apple crisp a more balanced dessert choice than many alternatives that rely solely on refined sugars.
Oat Benefits
Rolled oats contribute beta-glucan fiber, which supports heart health by helping lower cholesterol levels. This soluble fiber also promotes feelings of fullness, making apple crisp more satisfying than desserts without whole grains.
Complex carbohydrates in oats provide sustained energy release rather than the quick spike and crash associated with refined sugar desserts. This makes apple crisp a more balanced treat.
Healthy Modifications
Reducing sugar doesn’t significantly impact texture or flavor if you don’t go below about 75% of the original amount. The natural apple sweetness compensates for modest sugar reductions.
Increasing oats relative to flour boosts fiber content while maintaining the essential crispy texture. Try using 1-1/4 cups oats and reducing flour to 1/2 cup for a more nutritious version.
Adding nuts increases protein and healthy fats while contributing important minerals like magnesium and zinc. This also enhances satiety and makes the dessert more nutritionally complete.
Portion Awareness
Standard servings of apple crisp tend to be quite large, contributing to higher calorie intake than necessary. Smaller portions with generous dollops of vanilla ice cream can be just as satisfying while reducing overall calories.
Pairing with protein-rich accompaniments like Greek yogurt instead of ice cream can help balance blood sugar and increase satiety from smaller portions.
Frequently Asked Questions
How do I know when my apple crisp is perfectly done? Look for bubbling juices around the edges and golden-brown topping that feels firm when lightly touched. Apples should be tender when pierced with a knife but not mushy. The internal temperature should reach about 200°F if you want to be precise.
Can I make apple crisp ahead of time for entertaining? Absolutely! Assemble it completely up to 24 hours ahead and refrigerate, then bake when needed. You might need to add 5-10 minutes to the cooking time since it’s starting cold. Bake it completely and reheat before serving.
What’s the best way to prevent soggy bottom crust? Make sure your apples aren’t releasing too much liquid by letting the sugar mixture sit for 10-15 minutes, then draining excess juices. Also, don’t cover the dish while baking, as this traps steam and creates sogginess.
Can I use quick-cooking oats instead of old-fashioned oats? Quick oats will work but create a different texture that’s less distinct and more porridge-like. Old-fashioned oats maintain their shape better and provide that characteristic chewy texture that makes apple crisp special.
My topping always comes out too sweet. How can I fix this? Reduce the brown sugar to 1/2 cup instead of 3/4 cup, and make sure you’re using tart apples like Granny Smith to balance the sweetness. You can also add a pinch more salt to the topping mixture.
What apple varieties work best for crisp? Granny Smith apples are essential for tartness and shape retention. Honeycrisp adds sweetness and interesting texture. Braeburn, Jonagold, and Northern Spy also work wonderfully. Avoid Red Delicious, which turn mushy and have little flavor.
Can I double this recipe for a crowd? Yes, but use a larger pan or two 9×13 pans rather than making the layer thicker. Thicker layers don’t cook evenly and may result in undercooked centers or burnt edges.
How do I store leftover apple crisp? Cover tightly and refrigerate for up to 5 days. Reheat in the oven at 350°F for best texture, though individual portions can be microwaved. The topping won’t be as crispy after reheating, but it’s still delicious.
Can I freeze apple crisp? Both unbaked and baked versions freeze well for up to 3 months. Unbaked freezes better, bake directly from frozen with about 15-20 minutes added to cooking time. Baked versions should be thawed before reheating.
Why did my topping turn out hard instead of crispy? This usually happens from too much mixing, which develops gluten in the flour, or using butter that wasn’t cold enough. Mix just until you get coarse crumbs, and keep butter refrigerated until use.
Can I make this gluten-free? Yes! Substitute the flour with almond flour, gluten-free flour blend, or even ground oats. If using a flour blend without xanthan gum, add 1/4 teaspoon to help with binding.
What’s the difference between apple crisp and apple crumble? The terms are often used interchangeably, but traditionally apple crisp contains oats in the topping while crumble uses just flour, butter, and sugar. This recipe is technically a crisp because of the oats.
Advanced Troubleshooting Guide
Even experienced bakers encounter unexpected problems when making apple crisp recipe variations. Understanding how to diagnose and fix these issues ensures consistently successful results regardless of variables like oven differences, ingredient substitutions, or environmental factors.
Texture Problems and Solutions
Mushy apples that lose their shape completely usually result from overcooking, using soft apple varieties, or cutting pieces too small. Prevention involves choosing firm apples, cutting uniform 1/4-inch slices, and checking for doneness at the minimum cooking time.
If your apples are already overcooked, you can still serve the dessert but call it “apple sauce crisp” and embrace the different texture. Serve over pound cake or use as a topping for pancakes or yogurt.
Topping that stays pale and never browns properly indicates oven temperature issues or excessive moisture. Check your oven temperature with a thermometer, and make sure you’re not covering the dish during baking. Increase temperature by 25 degrees and extend cooking time if necessary.
Topping that burns before apples cook through means your oven runs hot or you’re using too high a temperature. Tent with foil once browning is achieved, and consider reducing temperature by 25 degrees for future batches.
Flavor Balance Issues
Overly sweet results can be corrected next time by reducing brown sugar, using more tart apples, or adding a pinch more salt to balance flavors. For the current batch, serve with unsweetened whipped cream or plain Greek yogurt to provide contrast.
Bland, one-dimensional flavor usually means insufficient spicing or using only sweet apples. Next time, ensure you have some tart apples in the mix and don’t be afraid of the cinnamon. A pinch of nutmeg or vanilla can also add complexity.
Structural Problems
Topping that falls through to the bottom happens when the butter is too warm or the mixture is too fine. Cold butter and proper mixing technique prevent this. If it’s already happened, you can carefully remove the topping, remix it with additional cold butter, and redistribute over the apples.
Excessive liquid pooling around edges indicates your apples released more juice than expected. This commonly happens with very ripe fruit or previously frozen apples. Drain the excess liquid carefully with a spoon, or embrace it as natural apple syrup for serving.
Environmental Factors
High altitude baking requires adjustments because lower air pressure affects rising and moisture evaporation. Reduce sugar slightly, increase flour by 2 tablespoons, and reduce baking time by 5-10 minutes. The dry air also means ingredients may need slight moisture adjustments.
Humid weather can affect ingredient performance, particularly with the topping mixture. Flour absorbs moisture from the air, potentially making the mixture too wet. Store flour in airtight containers and consider reducing liquid ingredients slightly on very humid days.
Oven variations create different results even when following identical recipes. Convection ovens cook faster and may over-brown toppings, so reduce temperature by 25 degrees and check earlier than specified times. Older ovens may have hot spots requiring pan rotation halfway through baking.
Seasonal Adaptations & Holiday Variations
Apple crisp recipe flexibility makes it perfect for adapting to different seasons and special occasions throughout the year. These variations maintain the essential character while celebrating seasonal ingredients and holiday traditions.
Autumn Harvest Celebrations
Thanksgiving versions might incorporate traditional holiday spices like nutmeg, allspice, and ginger along with the standard cinnamon. Adding 1/4 cup of chopped crystallized ginger to the apple mixture creates sophisticated flavor that complements turkey dinner beautifully.
Halloween presentations can include orange food coloring in the topping for festive color, though this is purely aesthetic. More meaningfully, adding pumpkin pie spice blend instead of plain cinnamon creates seasonal flavor that children and adults both enjoy.
Winter Holiday Adaptations
Christmas morning versions benefit from make-ahead assembly, allowing hosts to focus on other preparations. Consider adding dried cranberries and chopped pecans for festive color and texture that photographs beautifully for holiday memories.
New Year entertaining calls for elegant presentations using individual ramekins, perhaps garnished with gold leaf or star anise for sophisticated visual appeal. These portion-controlled servings help with resolution-minded guests while still providing indulgent satisfaction.
Spring Renewal Options
Easter celebrations can incorporate early spring rhubarb mixed with apples for interesting tartness and beautiful pink color. Use about 2 cups diced rhubarb with 4 cups apples, and increase sugar slightly to compensate for rhubarb’s tartness.
Mother’s Day brunches benefit from individual portions served with coffee or tea, perhaps accompanied by fresh berries and light whipped cream for elegant presentation that honors the occasion’s special nature.
Summer Substitutions
July Fourth gatherings can feature mixed berry and apple combinations using fresh summer berries. Blueberries work particularly well, creating patriotic colors while maintaining the essential apple crisp character.
Late summer transitions allow for early apple varieties combined with late stone fruits like peaches or plums. These combinations bridge summer and fall flavors while utilizing whatever fruits are at peak ripeness.
Professional Presentation & Plating Techniques
Understanding how professional kitchens present apple crisp can transform your home desserts into restaurant-quality experiences. These techniques require no special equipment but create impressive results that wow dinner guests.
Individual Portion Mastery
Ramekin presentations create elegant individual servings perfect for dinner parties. Use 6-ounce ramekins and adjust cooking time to 25-30 minutes since smaller portions cook faster. The individual presentations allow for creative garnishing and portion control.
Mason jar layering creates rustic charm perfect for casual gatherings or outdoor entertaining. Layer components in wide-mouth jars, ensuring even distribution, and bake uncovered. These portable presentations work wonderfully for potlucks or picnics.
Garnishing Excellence
Fresh herb accents like mint sprigs or edible flowers add unexpected elegance without overwhelming apple flavors. Choose garnishes that complement rather than compete with the dessert’s essential character.
Sauce drizzling techniques create professional-looking plates using caramel, butterscotch, or even simple powdered sugar glazes. Practice consistent drizzling patterns that enhance rather than obscure the main dessert.
Temperature Contrast Management
Ice cream placement timing affects both visual appeal and eating experience. Add ice cream just before serving to prevent melting that creates messy presentations. Consider chilling serving spoons to maintain ice cream integrity longer.
Warm plate techniques help maintain optimal serving temperatures for the apple crisp while preventing ice cream from melting too quickly. Warm plates in a 200°F oven for 2-3 minutes before plating.
Photography-Worthy Presentations
Natural lighting utilization showcases the golden-brown topping and rich apple colors most effectively. Avoid harsh artificial lighting that flattens colors and creates unappealing shadows.
Styling considerations include wiping plate edges clean, ensuring even topping distribution, and adding garnishes with purpose rather than randomly. Professional presentations look intentional and carefully considered.
Recipe Scaling & Batch Cooking
Understanding how to properly scale this apple crisp recipe allows you to accommodate different crowd sizes while maintaining the quality and texture that makes this dessert so special.
Doubling and Tripling Guidelines
Large batch considerations require multiple pans rather than deeper layers. Apple crisp relies on proper heat penetration, and overly thick layers result in uneven cooking with raw centers and burnt edges.
Equipment scaling means having adequate mixing bowls, preparation space, and oven capacity. Consider your kitchen limitations when planning large batches, and don’t hesitate to work in stages if necessary.
Reduction Techniques
Half-batch adaptations work beautifully for smaller households using 8×8 or 9×9 pans. Reduce cooking time by 5-10 minutes and watch carefully for proper browning since smaller pans cook faster.
Single-serving experiments help perfect flavor balances and technique without committing to large batches. Individual ramekins allow for experimentation with different apple varieties or spice combinations.
Commercial Kitchen Applications
Large-scale institutional cooking requires understanding proper food safety temperatures and holding procedures. Maintain serving temperatures above 140°F in warming units, and never leave at room temperature for extended periods.
Catering considerations include transport logistics, reheating procedures, and serving equipment needs. Plan for proper insulation and heating capabilities at serving locations.
Final Thoughts & Culinary Legacy
Apple crisp recipe mastery represents so much more than simply following instructions to create dessert. This humble dish connects us to generations of home cooks who understood that comfort food serves essential roles in building family memories, celebrating seasons, and creating the warm hospitality that makes houses feel like homes.
What makes this particular apple crisp recipe so enduringly popular isn’t just its reliable results or adaptable nature, though both qualities certainly contribute to its success. The real magic lies in how this dessert brings people together, creating those precious moments when busy families actually sit around the same table, sharing stories and laughter over something homemade and delicious.
Every time someone makes this recipe, they’re participating in this wonderful tradition of comfort food that spans cultures and generations. The basic concept of sweetened fruit topped with buttery, crispy elements appears in cuisines worldwide, suggesting something fundamental about human desires for warmth, sweetness, and the satisfaction of creating something nourishing with our own hands.
The skills you develop making perfect apple crisp translate to countless other recipes and cooking situations. Understanding how different apple varieties behave during cooking, mastering butter incorporation techniques, and learning to read visual and aromatic cues for doneness all contribute to becoming a more confident, intuitive cook.
Don’t worry about achieving perfection on your first attempt. Great cooking develops through practice, experimentation, and learning from both successes and failures. Each apple crisp you make teaches you something new about ingredients, techniques, or your own preferences and capabilities.
Most importantly, remember that cooking should bring joy, not stress. This apple crisp recipe forgives mistakes, adapts to substitutions, and delivers delicious results even when things don’t go exactly according to plan. Focus on the process, enjoy the aromas filling your kitchen, and celebrate the simple pleasure of creating something wonderful for people you care about.
The legacy of this recipe isn’t really about the dessert itself, it’s about the memories created around it. The children who learn to peel apples, the friends who gather for impromptu dinners, the holidays made special by familiar comfort foods, these experiences become the stories families tell for generations.
Now go preheat that oven, select some beautiful apples, and start creating your own apple crisp memories. Your kitchen is about to smell absolutely incredible, and everyone lucky enough to share your table is in for a truly special treat.