- Preheat the Oven
Preheat your oven to 350°F (175°C). Grease and flour two 9-inch round cake pans.
- Mix Dry Ingredients
In a large bowl, whisk together flour, cocoa powder, sugar, baking powder, baking soda, and salt.
- Add Wet Ingredients
Add eggs, milk, oil, and vanilla to the dry ingredients. Beat on medium speed for 2 minutes. Stir in boiling water until well combined.
- Bake
Pour the batter evenly into the prepared pans. Bake for 30-35 minutes or until a toothpick inserted into the center comes out clean.
- Cool
Allow the cakes to cool in the pans for 10 minutes, then remove from pans to cool completely on a wire rack.
- Calories:250 kcals
- Fat:10 grams
- Protein:4 grams
- Carbohydrates:39 grams
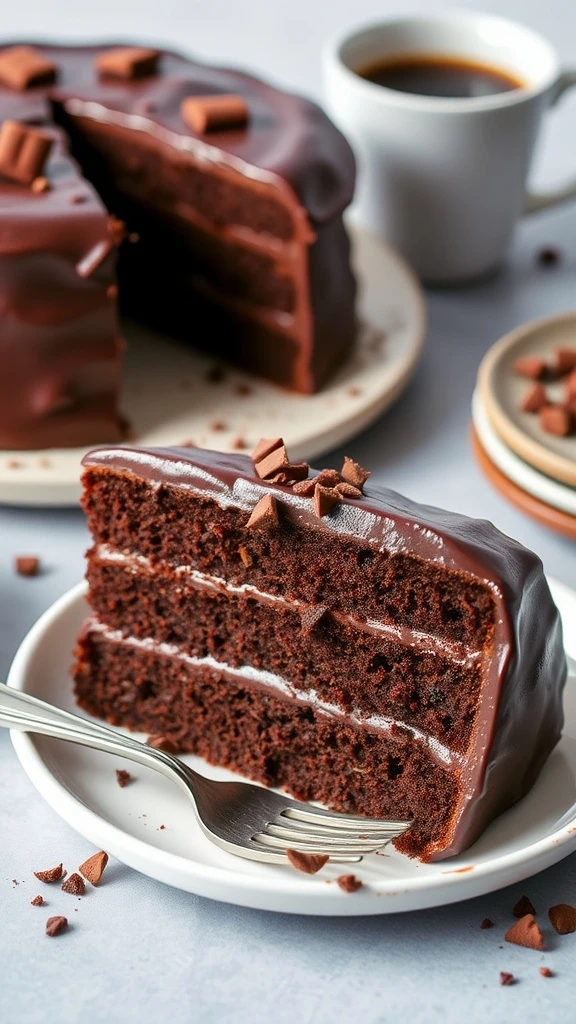
Easy chocolate cake sounds like an oxymoron, right? Most homemade chocolate cakes require seventeen ingredients you’ve never heard of, techniques that would challenge a pastry chef, and the kind of precision that makes rocket science look casual. But this easy chocolate cake recipe throws all that nonsense out the window and delivers something that tastes like you spent three days in culinary school.
We’re talking about a cake so moist it practically melts on your tongue, rich enough to satisfy the most serious chocolate cravings, and simple enough to make on a Tuesday night when you suddenly realize life needs more chocolate. The kind of cake that makes people stop mid-conversation to ask what bakery you bought it from.
This isn’t just another “easy” recipe that cuts corners and hopes you won’t notice. This is legitimately the best chocolate cake you’ll ever make at home, and it happens to be ridiculously simple. One bowl, basic ingredients, and results that’ll have you questioning why you ever bought cake mix when real chocolate cake is this achievable.
The secret ingredient? Boiling water. Sounds crazy, but it’s the game changer that transforms ordinary cocoa powder into deep, complex chocolate flavor that rivals expensive European chocolate cakes.
Why This Recipe Will Revolutionize Your Baking Game
Let me tell you why most chocolate cake recipes fail spectacularly. They either produce dry, flavorless disappointments that taste like chocolate-flavored cardboard, or they’re so complicated you need a chemistry degree and three days of prep time. This easy chocolate cake solves both problems with one brilliant technique.
The boiling water method is what professional bakers use to “bloom” cocoa powder, releasing compounds that intensify chocolate flavor exponentially. Most home recipes skip this step because it sounds scary, but it’s literally just stirring hot water into batter. The result is chocolate flavor so deep and rich, people assume you used expensive Belgian cocoa.
But here’s what makes this version truly special: the texture is absolutely perfect. Not dense and fudgy like brownies, not light and airy like vanilla cake trying to be chocolate. This hits that sweet spot of moist, tender crumb that holds together beautifully but practically dissolves in your mouth.
The one-bowl method means minimal cleanup, which is crucial when you’re craving chocolate cake but don’t want to destroy your kitchen in the process. Everything mixes together effortlessly, creating a batter that’s almost foolproof. Even if you’re the person who burns water, you can master this recipe.
Versatility is incredible too. This base recipe works for layer cakes, sheet cakes, cupcakes, or even bundt cakes. Change the pan, adjust the time slightly, and you’ve got dessert solutions for every occasion from birthday parties to potluck dinners.
The 250 calories per slice means you can actually enjoy chocolate cake without the dessert guilt spiral that ruins most indulgent moments. It’s rich enough to satisfy in reasonable portions, unlike those artificial-tasting low-fat disasters that leave you eating half the cake because nothing hits the spot.
The Story Behind Easy Chocolate Cake
Chocolate cake as we know it is surprisingly modern, considering chocolate has been around for thousands of years. The Maya and Aztecs drank chocolate, but cake chocolate didn’t exist until the 1764 when Dr. James Baker started processing cocoa beans in Massachusetts, creating the first American chocolate company.
The breakthrough came in 1828 when Dutch chemist Coenraad van Houten invented the cocoa press, separating cocoa butter from cocoa solids and creating cocoa powder. This made chocolate baking accessible to home cooks instead of just wealthy Europeans who could afford solid chocolate bars.
Early American chocolate cakes were dense, heavy affairs that bore little resemblance to modern versions. They used grated chocolate, required hours of preparation, and often failed spectacularly because bakers didn’t understand how chocolate behaved under heat.
The game changer came during the Great Depression when resourceful home cooks started experimenting with hot liquid additions to stretch ingredients and improve texture. Adding hot coffee or water to chocolate batters became a necessity-driven innovation that accidentally created superior results.
I discovered the power of this technique during my own chocolate cake disaster story. Picture this: surprise birthday party for my best friend, fancy three-layer cake planned, and complete baking failure at 2 AM the night before. The first attempt was dry and flavorless, the second collapsed in the middle, and I was ready to drive to the 24-hour grocery store for emergency cake mix.
Then my grandmother called. She was a Depression-era baker who could make magic from flour, sugar, and whatever else happened to be available. When I explained my chocolate cake crisis, she laughed and told me about the “boiling water trick” her mother used during rationing.
That hot water transformed everything. The batter looked terrifyingly thin, like chocolate soup, but it baked up into the most incredible cake I’d ever made. Moist, rich, deeply chocolatey, and so tender it practically fell apart in your mouth. My friend’s party was saved, and I became the person everyone calls when they need serious chocolate cake.
This technique spread through home baking communities because it worked so reliably. Professional bakers had known about blooming cocoa for years, but home cooks discovered it through necessity and word-of-mouth sharing. It’s the perfect example of how the best cooking techniques often come from resourcefulness rather than formal training.
Different regions developed their own variations. Southern bakers added buttermilk for tang, Midwestern cooks often included coffee instead of plain water, and West Coast bakers started experimenting with different cocoa types. But the core principle remained the same: hot liquid transforms cocoa powder into something magical.
Essential Equipment & Kitchen Tips
Your mixing bowls matter more than you think. You need one large enough to hold all ingredients plus the boiling water without overflowing. Glass or stainless steel bowls work best because they don’t retain flavors or odors that might interfere with your chocolate perfection.
Two 9-inch round cake pans are standard, but make sure they’re good quality with straight sides and heavy bottoms. Cheap, thin pans create uneven baking and hot spots that ruin texture. If you’re investing in one piece of baking equipment, make it quality cake pans.
Proper greasing technique is crucial for easy release. Butter every surface thoroughly, then dust with cocoa powder instead of flour. The cocoa prevents that white residue on your finished cake that screams “homemade” in the worst way. Some bakers swear by parchment paper circles in the bottom for extra insurance.
Your oven’s accuracy determines success or failure. Most home ovens run 25 degrees off in either direction, which completely changes baking times and results. Invest in an oven thermometer and adjust accordingly. Chocolate cake is forgiving, but not infinitely so.
Wire cooling racks are non-negotiable for proper cooling. Leaving cakes in pans or on solid surfaces creates steam that makes bottoms soggy. Air circulation is essential for maintaining that perfect texture you worked so hard to create.
An electric mixer makes everything easier, but don’t overmix once you add the boiling water. Hand mixing is actually preferable for that final step because you can feel the batter consistency and avoid overworking the gluten, which creates tough cake.
Measuring accuracy matters with baking chemistry. Use dry measuring cups for flour and liquid measuring cups for milk and oil. The difference seems minor but affects texture significantly. Weight measurements are even better if you have a kitchen scale.
The Life-Changing Easy Chocolate Cake Recipe That’ll Make You Forget Boxed Mixes Forever
Easy chocolate cake sounds like an oxymoron, right? Most homemade chocolate cakes require seventeen ingredients you’ve never heard of, techniques that would challenge a pastry chef, and the kind of precision that makes rocket science look casual. But this easy chocolate cake recipe throws all that nonsense out the window and delivers something that tastes like you spent three days in culinary school.
We’re talking about a cake so moist it practically melts on your tongue, rich enough to satisfy the most serious chocolate cravings, and simple enough to make on a Tuesday night when you suddenly realize life needs more chocolate. The kind of cake that makes people stop mid-conversation to ask what bakery you bought it from.
This isn’t just another “easy” recipe that cuts corners and hopes you won’t notice. This is legitimately the best chocolate cake you’ll ever make at home, and it happens to be ridiculously simple. One bowl, basic ingredients, and results that’ll have you questioning why you ever bought cake mix when real chocolate cake is this achievable.
The secret ingredient? Boiling water. Sounds crazy, but it’s the game changer that transforms ordinary cocoa powder into deep, complex chocolate flavor that rivals expensive European chocolate cakes.
Why This Recipe Will Revolutionize Your Baking Game
Let me tell you why most chocolate cake recipes fail spectacularly. They either produce dry, flavorless disappointments that taste like chocolate-flavored cardboard, or they’re so complicated you need a chemistry degree and three days of prep time. This easy chocolate cake solves both problems with one brilliant technique.
The boiling water method is what professional bakers use to “bloom” cocoa powder, releasing compounds that intensify chocolate flavor exponentially. Most home recipes skip this step because it sounds scary, but it’s literally just stirring hot water into batter. The result is chocolate flavor so deep and rich, people assume you used expensive Belgian cocoa.
But here’s what makes this version truly special: the texture is absolutely perfect. Not dense and fudgy like brownies, not light and airy like vanilla cake trying to be chocolate. This hits that sweet spot of moist, tender crumb that holds together beautifully but practically dissolves in your mouth.
The one-bowl method means minimal cleanup, which is crucial when you’re craving chocolate cake but don’t want to destroy your kitchen in the process. Everything mixes together effortlessly, creating a batter that’s almost foolproof. Even if you’re the person who burns water, you can master this recipe.
Versatility is incredible too. This base recipe works for layer cakes, sheet cakes, cupcakes, or even bundt cakes. Change the pan, adjust the time slightly, and you’ve got dessert solutions for every occasion from birthday parties to potluck dinners.
The 250 calories per slice means you can actually enjoy chocolate cake without the dessert guilt spiral that ruins most indulgent moments. It’s rich enough to satisfy in reasonable portions, unlike those artificial-tasting low-fat disasters that leave you eating half the cake because nothing hits the spot.
The Story Behind Easy Chocolate Cake
Chocolate cake as we know it is surprisingly modern, considering chocolate has been around for thousands of years. The Maya and Aztecs drank chocolate, but cake chocolate didn’t exist until the 1764 when Dr. James Baker started processing cocoa beans in Massachusetts, creating the first American chocolate company.
The breakthrough came in 1828 when Dutch chemist Coenraad van Houten invented the cocoa press, separating cocoa butter from cocoa solids and creating cocoa powder. This made chocolate baking accessible to home cooks instead of just wealthy Europeans who could afford solid chocolate bars.
Early American chocolate cakes were dense, heavy affairs that bore little resemblance to modern versions. They used grated chocolate, required hours of preparation, and often failed spectacularly because bakers didn’t understand how chocolate behaved under heat.
The game changer came during the Great Depression when resourceful home cooks started experimenting with hot liquid additions to stretch ingredients and improve texture. Adding hot coffee or water to chocolate batters became a necessity-driven innovation that accidentally created superior results.
I discovered the power of this technique during my own chocolate cake disaster story. Picture this: surprise birthday party for my best friend, fancy three-layer cake planned, and complete baking failure at 2 AM the night before. The first attempt was dry and flavorless, the second collapsed in the middle, and I was ready to drive to the 24-hour grocery store for emergency cake mix.
Then my grandmother called. She was a Depression-era baker who could make magic from flour, sugar, and whatever else happened to be available. When I explained my chocolate cake crisis, she laughed and told me about the “boiling water trick” her mother used during rationing.
That hot water transformed everything. The batter looked terrifyingly thin, like chocolate soup, but it baked up into the most incredible cake I’d ever made. Moist, rich, deeply chocolatey, and so tender it practically fell apart in your mouth. My friend’s party was saved, and I became the person everyone calls when they need serious chocolate cake.
This technique spread through home baking communities because it worked so reliably. Professional bakers had known about blooming cocoa for years, but home cooks discovered it through necessity and word-of-mouth sharing. It’s the perfect example of how the best cooking techniques often come from resourcefulness rather than formal training.
Different regions developed their own variations. Southern bakers added buttermilk for tang, Midwestern cooks often included coffee instead of plain water, and West Coast bakers started experimenting with different cocoa types. But the core principle remained the same: hot liquid transforms cocoa powder into something magical.
Ingredients You’ll Need
- All-purpose flour
- Cocoa powder
- Sugar
- Baking powder
- Baking soda
- Salt
- Eggs
- Milk
- Oil
- Vanilla extract
- Boiling water
Pro tip: The quality of your cocoa powder makes a massive difference in the final result. Don’t cheap out on the one ingredient that determines your chocolate flavor.
Essential Equipment & Kitchen Tips
Your mixing bowls matter more than you think. You need one large enough to hold all ingredients plus the boiling water without overflowing. Glass or stainless steel bowls work best because they don’t retain flavors or odors that might interfere with your chocolate perfection.
Two 9-inch round cake pans are standard, but make sure they’re good quality with straight sides and heavy bottoms. Cheap, thin pans create uneven baking and hot spots that ruin texture. If you’re investing in one piece of baking equipment, make it quality cake pans.
Proper greasing technique is crucial for easy release. Butter every surface thoroughly, then dust with cocoa powder instead of flour. The cocoa prevents that white residue on your finished cake that screams “homemade” in the worst way. Some bakers swear by parchment paper circles in the bottom for extra insurance.
Your oven’s accuracy determines success or failure. Most home ovens run 25 degrees off in either direction, which completely changes baking times and results. Invest in an oven thermometer and adjust accordingly. Chocolate cake is forgiving, but not infinitely so.
Wire cooling racks are non-negotiable for proper cooling. Leaving cakes in pans or on solid surfaces creates steam that makes bottoms soggy. Air circulation is essential for maintaining that perfect texture you worked so hard to create.
An electric mixer makes everything easier, but don’t overmix once you add the boiling water. Hand mixing is actually preferable for that final step because you can feel the batter consistency and avoid overworking the gluten, which creates tough cake.
Measuring accuracy matters with baking chemistry. Use dry measuring cups for flour and liquid measuring cups for milk and oil. The difference seems minor but affects texture significantly. Weight measurements are even better if you have a kitchen scale.
Step-by-Step Instructions
- Preheat the Oven: Preheat your oven to 350°F (175°C). Grease and flour two 9-inch round cake pans.
- Mix Dry Ingredients: In a large bowl, whisk together flour, cocoa powder, sugar, baking powder, baking soda, and salt.
- Add Wet Ingredients: Add eggs, milk, oil, and vanilla to the dry ingredients. Beat on medium speed for 2 minutes. Stir in boiling water until well combined.
- Bake: Pour the batter evenly into the prepared pans. Bake for 30-35 minutes or until a toothpick inserted into the center comes out clean.
- Cool: Allow the cakes to cool in the pans for 10 minutes, then remove from pans to cool completely on a wire rack.
Pro Chef Secrets & Advanced Techniques
The boiling water technique requires confidence and understanding. When you add that hot water, the batter becomes alarmingly thin, like chocolate soup. This is exactly what you want. Thin batter creates steam during baking, which keeps the cake incredibly moist while developing complex chocolate flavors.
Temperature of ingredients matters tremendously. Room temperature eggs and milk incorporate more easily and create better texture than cold ingredients straight from the refrigerator. Plan ahead and take eggs and milk out 30-60 minutes before baking.
The two-minute beating time isn’t arbitrary. This develops gluten structure just enough to provide stability without creating toughness. Stop at exactly two minutes, then gently fold in the boiling water by hand. Overmixing at this stage creates dense, heavy cake.
Cocoa powder quality dramatically affects results. Dutch-processed cocoa creates deeper, more mellow flavor, while natural cocoa provides brighter, more acidic chocolate notes. Both work in this recipe, but they create different flavor profiles. Experiment to find your preference.
Pan preparation technique determines easy release. After greasing with butter, dust with cocoa powder instead of flour. Tap out excess cocoa just like you would flour. This prevents white residue on your finished cake and adds extra chocolate flavor to the crust.
Oven positioning affects baking evenness. Center rack produces the most even results. If you’re baking both layers simultaneously, stagger them on the rack so air can circulate freely around each pan. Swap positions halfway through baking for absolutely even results.
The toothpick test needs interpretation. Clean toothpick means done, but a few moist crumbs clinging is actually perfect. Completely clean often means slightly overbaked, especially with chocolate cake where the dark color makes doneness harder to judge visually.
Cooling technique prevents soggy bottoms and cracked tops. Cool in pans for exactly 10 minutes, then turn out onto wire racks. Too long in pans creates steam and soggy bottoms. Too short doesn’t give structure time to set, leading to broken cakes.
Common Mistakes to Avoid
Using expired or low-quality cocoa powder. Cocoa powder can go rancid and lose potency over time. Fresh, high-quality cocoa is the foundation of great chocolate flavor. If you can’t remember when you bought yours, replace it before making this cake.
Adding the boiling water too quickly or with the mixer running. Pour slowly while stirring gently by hand. High-speed mixing creates a mess and can actually deflate the batter, affecting rise and texture.
Not measuring flour correctly. Scooping directly from the bag compacts flour, creating heavy cake. Spoon flour into measuring cups and level with a knife for accurate measurements. Better yet, weigh ingredients if you have a scale.
Opening the oven door repeatedly during baking. Each door opening releases heat and extends baking time. Resist the urge to peek until at least 25 minutes have passed. The cake needs consistent heat to rise properly.
Skipping the cooling time between pan and wire rack. Turning out immediately leads to broken layers. The 10-minute rest allows structure to firm up while preventing soggy bottoms from prolonged pan contact.
Frosting warm cake layers. Warm cake melts buttercream and creates sliding layers. Wait until completely cool, even if it takes longer than you’d like. Patience creates better results.
Not sifting cocoa powder when it’s lumpy. Lumpy cocoa creates bitter spots and uneven chocolate flavor. A quick sift eliminates lumps and ensures even distribution throughout the batter.
Alternatives & Substitutions
Flour alternatives work with adjustments. Cake flour creates more tender results but isn’t necessary for success. All-purpose flour is perfectly fine and probably what you have available. Gluten-free flour blends work too, though texture will be slightly different.
Oil versus butter creates different results. Oil produces more moist cake, butter adds flavor. You can substitute melted butter for oil using a 1:1 ratio, but expect slightly different texture. Neutral oils like canola work best when sticking with oil.
Milk substitutions are endless. Buttermilk adds tang and tenderness, though you’ll need to adjust baking soda accordingly. Non-dairy milks work perfectly for vegan versions. Coconut milk adds richness, while almond milk keeps things lighter.
Sugar alternatives require understanding. Brown sugar adds moisture and molasses flavor but can make cake slightly denser. Coconut sugar or maple sugar work too, each bringing unique flavor notes. Artificial sweeteners need recipe adjustments and often produce different textures.
Egg substitutes for vegan baking include flax eggs, commercial egg replacers, or even applesauce. Each creates slightly different texture, but all can work. Flax eggs add nuttiness, applesauce adds moisture, commercial replacers mimic eggs most closely.
Coffee instead of water amplifies chocolate flavor without making the cake taste like coffee. Use strong, cooled coffee for incredible depth. This is a professional pastry chef trick that home bakers often overlook.
Flavor Variations & Creative Twists
The espresso chocolate version uses strong coffee instead of water and adds instant espresso powder to the dry ingredients. Coffee enhances chocolate without overpowering it, creating incredibly sophisticated flavor that tastes like expensive European chocolate cake.
Spiced chocolate cake adds warmth and complexity. Cinnamon, cayenne, or chili powder in small amounts create interesting heat and depth. Start with 1/4 teaspoon and adjust to taste. Mexican hot chocolate inspired versions are particularly delicious.
Orange chocolate combines citrus zest with cocoa for bright, complex flavor. Add zest of two oranges to dry ingredients and replace some milk with orange juice. The combination is classic for good reason.
Mint chocolate lovers should add peppermint extract instead of vanilla, starting with 1/2 teaspoon and adjusting to preference. Be careful not to overdo it, as peppermint can quickly overwhelm chocolate rather than complement it.
Peanut butter chocolate swirl involves dropping spoonfuls of peanut butter into batter before baking and swirling gently with a knife. The combination is practically irresistible and creates beautiful marbled appearance.
German chocolate version adds coconut and pecans to the batter itself, creating texture and flavor complexity. Fold in 1/2 cup each of chopped pecans and shredded coconut after adding the boiling water.
Serving Suggestions & Pairings
Frosting options are limitless, but classic chocolate buttercream is hard to beat. Cream cheese frosting adds tang that balances sweetness, while peanut butter frosting creates dessert heaven. Simple chocolate ganache lets the cake flavor shine without competition.
Fresh fruit provides beautiful color contrast and flavor balance. Strawberries are classic with chocolate, while raspberries add tartness that cuts through richness. Even simple powdered sugar dusting can be elegant for less formal occasions.
Ice cream pairings enhance the chocolate experience. Vanilla ice cream is traditional and perfect, but consider salted caramel, mint chip, or even coffee ice cream for more adventurous combinations. The temperature contrast makes everything better.
Beverage pairings matter with rich chocolate cake. Coffee is obvious but excellent, particularly darker roasts that complement rather than compete. Red wine like Cabernet or Port creates sophisticated adult dessert. Cold milk remains the childhood favorite for good reason.
Presentation techniques can elevate simple cake. Layer with frosting and fresh berries for special occasions. Dust with cocoa powder through a stencil for elegant patterns. Individual slices on nice plates with garnishes look restaurant-worthy.
Storage & Reheating Guide
Proper storage maintains moisture and prevents staling. Unfrosted cake layers wrap tightly in plastic wrap and store at room temperature for up to three days. Frosted cakes need covering to prevent frosting from forming a skin but can also stay at room temperature if consumed within 2-3 days.
Refrigeration works for longer storage but can dry out cake if not properly covered. Bring refrigerated cake to room temperature before serving for best texture and flavor. Cold chocolate cake doesn’t taste as rich or moist as room temperature versions.
Freezing extends storage up to three months. Wrap unfrosted layers individually in plastic wrap, then foil for best protection against freezer burn. Frosted cakes freeze well too but need careful wrapping to protect decoration.
Thawing requires patience for best results. Room temperature thawing takes several hours but preserves texture better than microwave defrosting. Individual slices thaw faster than whole cakes if you need quick portions.
Reheating isn’t usually necessary, but slightly warm cake can be lovely. Ten seconds in microwave per slice warms without cooking. Oven warming at 200°F for a few minutes works for larger portions.
Nutritional Benefits & Health Notes
Chocolate contains flavonoids and antioxidants that provide actual health benefits beyond pure pleasure. Dark cocoa powder has higher concentrations than milk chocolate products, making this cake a better choice than many chocolate desserts.
Cocoa powder is surprisingly nutrient-dense, providing iron, magnesium, and zinc along with those beneficial plant compounds. You’re getting some nutrition along with your indulgence, unlike purely artificial desserts.
Moderate portions satisfy chocolate cravings effectively. At 250 calories per slice, this cake provides substantial chocolate satisfaction without the caloric overload of bakery cakes that often exceed 400-500 calories per serving.
Homemade cake lets you control ingredients and quality. No preservatives, artificial colors, or mystery chemicals that appear in commercial cakes. You know exactly what you’re eating, which matters for people with allergies or dietary restrictions.
Sharing enhances the emotional benefits of chocolate cake. Baking for others releases endorphins and creates social connections that contribute to overall wellbeing. The act of creating something delicious is therapeutic beyond just eating it.
FAQ (Frequently Asked Questions)
Why does the batter look so thin after adding boiling water? This is exactly right! The thin batter creates steam during baking, which keeps the cake incredibly moist. Don’t worry about the consistency, it bakes up perfectly despite looking like chocolate soup.
Can I make this as cupcakes instead of layer cake? Absolutely! Fill cupcake liners about 2/3 full and bake for 18-22 minutes. Check with a toothpick starting at 18 minutes since cupcakes bake faster than full cakes.
What’s the best cocoa powder to use? Both natural and Dutch-processed cocoa work well but create different flavors. Natural cocoa is brighter and more acidic, Dutch-processed is mellower and richer. Hershey’s, Ghirardelli, or Valrhona are all excellent choices.
Can I make this cake ahead of time? Unfrosted layers actually improve after a day, becoming more moist and flavorful. Wrap tightly and store at room temperature. Frosted cakes can be made 2-3 days ahead and stored covered.
Why did my cake sink in the middle? Usually from opening the oven door too early or temperature that’s too low. Don’t peek before 25 minutes, and verify your oven temperature with a separate thermometer.
Can I double this recipe? Doubling works perfectly for larger gatherings. Use four 9-inch pans or make a large sheet cake. Baking time may need slight adjustments depending on pan size and depth.
How do I know when it’s perfectly done? Toothpick inserted in center should come out with just a few moist crumbs. Completely clean often means slightly overbaked. The cake should spring back lightly when touched in the center.
What if I don’t have boiling water available? Heat water in microwave until bubbling or use very hot tap water if your water heater runs hot enough. The heat activates compounds in cocoa powder, so temperature matters for flavor development.
Can I use this batter for bundt cake? Yes, but increase baking time to 45-55 minutes depending on your bundt pan size. Check doneness with a long skewer since bundt cakes are thicker than layer cakes.
How long does homemade chocolate cake stay fresh? 3-4 days at room temperature when properly covered. Cake actually improves on day two as flavors meld and moisture distributes evenly throughout.
Troubleshooting Guide
My cake came out dry despite following the recipe exactly. Your oven likely runs hot, or you slightly overbaked. Check oven temperature with a separate thermometer and reduce baking time by 5 minutes next attempt. Also verify you’re measuring flour correctly by spooning and leveling rather than scooping.
The layers stuck to the pans even though I greased them. Pan preparation is crucial for easy release. Use butter instead of cooking spray, and dust with cocoa powder after greasing. Let cakes cool exactly 10 minutes before turning out, not longer or shorter.
My batter was lumpy even after mixing. Lumpy cocoa powder is usually the culprit. Sift cocoa powder before adding to other dry ingredients. Also ensure all wet ingredients are at room temperature for easier incorporation.
The cake rose unevenly or had a domed top. Oven hot spots cause uneven rising. Rotate pans halfway through baking time. Also check that your oven racks are level and pans are positioned in the center of the oven.
My chocolate flavor isn’t strong enough. Use higher quality cocoa powder and make sure it’s fresh. Coffee instead of water intensifies chocolate flavor without adding coffee taste. Don’t skip the boiling liquid step, as it’s crucial for flavor development.
The cake fell apart when I tried to frost it. Make sure layers are completely cool before handling. Brush off loose crumbs before frosting. A thin “crumb coat” of frosting applied first helps seal the surface before final decoration.
My frosting is sliding off the cake. The cake is still too warm. Wait until layers are completely cool to room temperature before applying any frosting. Warm cake melts buttercream and creates disasters.
Advanced Baking Science & Techniques
Understanding the chemistry behind this recipe helps you troubleshoot and modify successfully. Baking soda and baking powder work together to create lift, while the acid in cocoa powder activates the leavening agents. This is why you can’t simply substitute ingredients without understanding their roles.
The boiling water technique works through several mechanisms. Heat releases aromatic compounds locked in cocoa powder, similar to how blooming spices in hot oil intensifies their flavors. The steam created during baking keeps the cake moist, while the thin batter allows for even mixing without overdeveloping gluten.
Gluten development affects texture dramatically. The initial two-minute mixing develops just enough gluten for structure without creating toughness. Gentle hand-stirring when adding boiling water prevents overdevelopment that would make the cake heavy and dense.
Fat choice impacts both flavor and texture. Oil creates more tender, moist crumb because it doesn’t solidify at room temperature like butter does. However, butter adds flavor complexity that oil lacks. The choice depends on your priorities: maximum moisture versus maximum flavor.
Sugar does more than just sweeten. It tenderizes by interfering with gluten formation, adds moisture through hygroscopic properties, and contributes to browning reactions that develop flavor and color. Reducing sugar significantly affects texture and appearance, not just sweetness level.
Egg function is multifaceted in cake chemistry. Eggs provide structure through protein coagulation, moisture through water content, and richness through fat content. They also act as emulsifiers, helping oil and water-based ingredients combine smoothly.
Professional Finishing Techniques
Creating perfectly level layers starts with proper baking. Even oven temperature and proper pan preparation prevent doming. If layers do dome, use a long serrated knife to level tops before frosting for professional appearance.
Crumb coating technique ensures smooth final frosting. Apply thin layer of frosting to seal surface and trap crumbs. Refrigerate 30 minutes to firm up, then apply final frosting layer. This prevents dark crumbs from showing through light-colored frosting.
Piping techniques elevate simple cake to bakery quality. Basic star tips create beautiful borders and rosettes. Round tips work for writing and simple decorations. Even basic piping skills dramatically improve cake appearance.
Temperature control affects frosting success. Room temperature butter creates smooth buttercream, while cold butter creates lumpy disasters. Conversely, too-warm butter creates soup instead of frosting. Proper temperature is crucial for professional results.
Ganache technique offers elegant finishing option. Equal parts heavy cream and chocolate create glossy coating that looks incredibly sophisticated. Pour over completely cooled cake for mirror-like finish that impresses every time.
Final Thoughts
This easy chocolate cake represents everything beautiful about home baking done right. It’s the perfect intersection of simple technique and spectacular results, proving that the best recipes often come from understanding ingredients rather than complicating processes.
What makes this cake truly special is its reliability. Once you master the basic technique, you can make perfect chocolate cake every time without stress or guesswork. The confidence this brings to your baking game is invaluable, whether you’re making birthday cakes for family or impressing dinner guests.
The versatility factor means you’re really learning one recipe that solves multiple dessert needs. Layer cake, sheet cake, cupcakes, or even bundt cake all use this same base with minor adjustments. Master this foundation and you’ve got chocolate covered for life.
Don’t be intimidated by the thin batter or the boiling water technique. Trust the process, follow the steps, and prepare to be amazed by results that taste like professional bakery quality. The first time you make this cake successfully, you’ll understand why homemade always beats boxed mix when done properly.
The real magic happens when you share this cake with people you care about. There’s something deeply satisfying about creating joy through food, especially something as universally beloved as perfect chocolate cake. The smiles, the compliments, the requests for the recipe, all of it validates the time and care you put into creating something special.
Now go impress someone (or yourself) with your new culinary skills. You’ve earned it!