- Preheat the Oven
Preheat your oven to 325°F (163°C).
- Make the Crust
In a mixing bowl, combine the graham cracker crumbs, melted butter, and 1/4 cup sugar. Press the mixture into the bottom of a 9-inch springform pan to form a crust. Bake for 10 minutes and set aside to cool.
- Prepare the Filling
In a large bowl, beat the softened cream cheese until smooth. Gradually add 1 cup of sugar and vanilla extract, mixing until well combined. Add the eggs one at a time, mixing well after each addition. Finally, mix in the sour cream and flour until the mixture is creamy and smooth.
- Bake the Cheesecake
Pour the filling over the cooled crust in the springform pan. Bake for about 55-60 minutes, or until the center is set but slightly jiggly. Turn off the oven and let the cheesecake cool in the oven with the door slightly open for about an hour.
- Chill
Once cooled, refrigerate the cheesecake for at least 4 hours, preferably overnight, to set completely.
- Serve
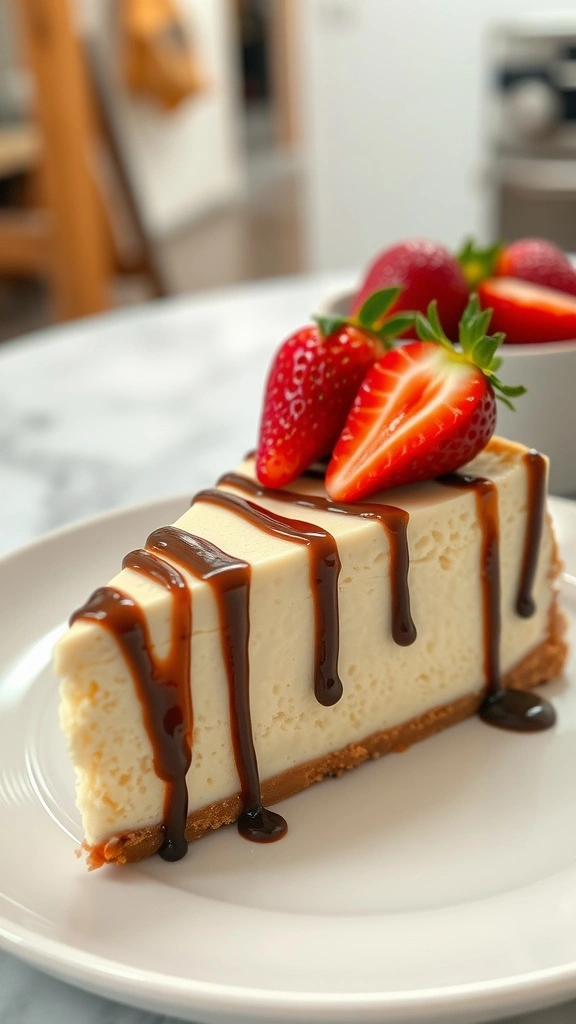
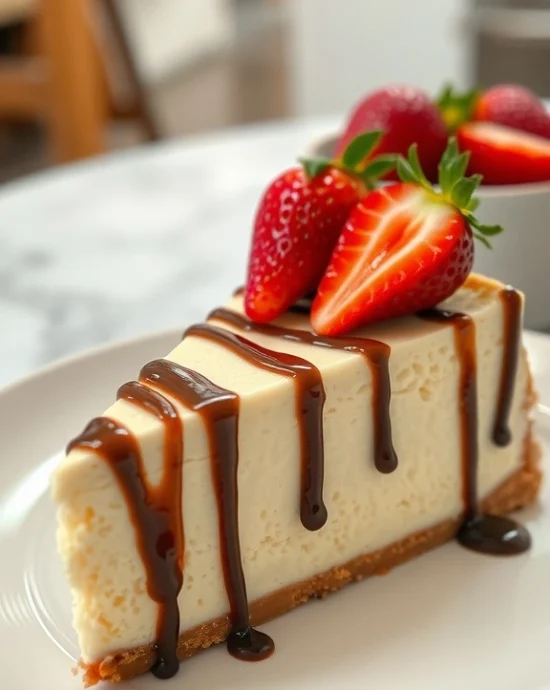
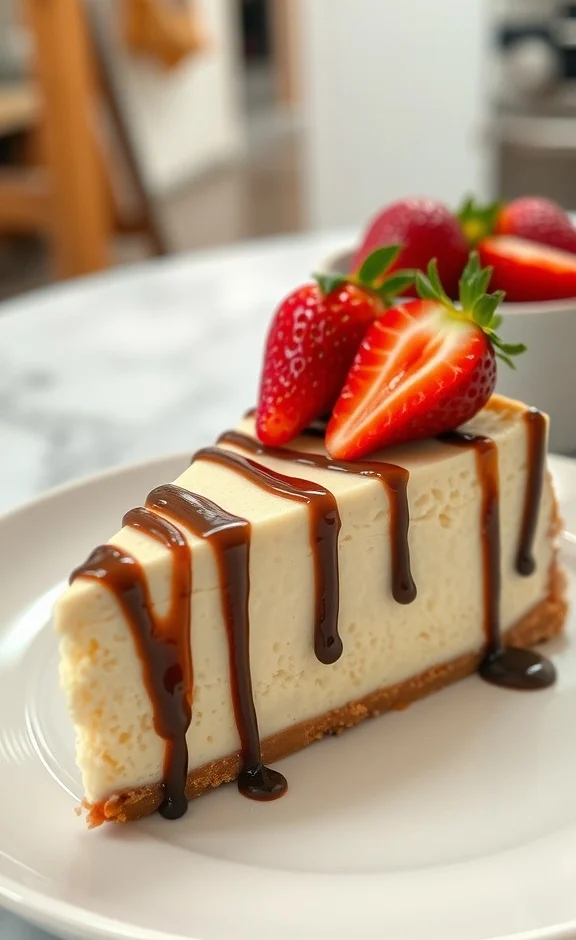
Remove the sides of the springform pan and slice the cheesecake. Top with your choice of fruits, whipped cream, or chocolate sauce before serving.
- Calories:350 kcal
- Fat:25 grams
- Proteins:6 grams
- Carbohydrates:30 grams
Let me tell you about the easy cheesecake recipe that completely changed my relationship with baking. We’re talking about a dessert so creamy, so perfectly balanced, and so ridiculously simple that you’ll wonder why you ever bought expensive cheesecake from restaurants. This isn’t just another dessert recipe – it’s your ticket to becoming the person everyone begs to bring dessert to every gathering.
You know that moment when you take your first bite of really good cheesecake and everything else just melts away? That’s exactly what this recipe delivers, every single time. The texture is pure silk, the flavor is rich but not overwhelming, and the best part? You probably already have most of these ingredients sitting in your kitchen right now.
I’ve made this cheesecake probably a hundred times over the years, and it never fails to impress. Whether it’s a fancy dinner party or just a random Tuesday when you need something sweet, this recipe transforms simple ingredients into pure dessert magic. Get ready to become everyone’s favorite baker.
Why This Recipe Will Become Your Go-To Dessert Forever
Here’s what makes this easy cheesecake recipe so special: it’s basically foolproof. Most cheesecake recipes make you jump through all these hoops – water baths, specific temperatures, complicated timing. This one? You mix, you bake, you chill, you eat. Done.
The secret is in the simplicity and the technique. We’re using full fat cream cheese because that’s where the magic lives. Low fat cream cheese is the enemy of good cheesecake – it creates a grainy texture and lacks that luxurious mouthfeel that makes cheesecake special. Trust me, this is not the time to count calories.
What really sets this recipe apart is how forgiving it is. I’ve made this when my cream cheese wasn’t perfectly room temperature, when I accidentally added eggs too fast, even when I got distracted and left it in the oven a few minutes too long. It still turned out incredible every single time.
The graham cracker crust situation is pure genius too. No complicated pastry techniques, no rolling pins, no stress. You literally just crush, mix, and press. Even if you’ve never baked anything in your life, you can master this crust in about five minutes.
The texture of this cheesecake hits different than those heavy, dense versions you sometimes get. This one is creamy and light but still substantial enough to satisfy that cheesecake craving. It’s like eating a cloud made of pure indulgence.
The Story Behind My Perfect Easy Cheesecake Recipe
My cheesecake obsession started about fifteen years ago when I had the most incredible slice at a tiny bakery in Brooklyn. The owner, Rosa, had been making cheesecakes for decades, and hers was so perfect it literally made me emotional. I’m not even exaggerating – I sat there taking tiny bites, trying to make it last forever.
When I asked Rosa for her secret, she laughed and said the best cheesecakes are the simplest ones. She told me that too many people overthink it, adding complicated ingredients or fancy techniques when what you really need is quality ingredients and patience. That conversation changed everything for me.
I came home determined to recreate that perfect cheesecake experience. My first attempt was a disaster – I tried to get fancy with different flavors and ended up with something that tasted like sweet scrambled eggs. The second attempt cracked so badly it looked like a desert landscape. But slowly, through lots of trial and error, I started understanding what Rosa meant.
The breakthrough came when I realized that room temperature ingredients aren’t just a suggestion, they’re essential. Cold cream cheese creates lumps no matter how long you beat it, and lumpy batter makes dense, heavy cheesecake. Once I started being patient with the temperature situation, everything changed.
I also learned that the cooling process is just as important as the baking. Cheesecake that cools too quickly will crack from the temperature shock. The gradual cooling method I use now – turning off the oven and letting it cool with the door cracked – prevents those heartbreaking cracks that can ruin your presentation.
The final piece of the puzzle was understanding that cheesecake actually improves with time. The flavors meld and develop, the texture becomes even more silky, and any minor imperfections seem to smooth out overnight. This is one of those rare desserts that’s actually better the next day.
Over the years, I’ve made this cheesecake for birthdays, holidays, potlucks, and random weeknight cravings. Every single time, people ask for the recipe, and every single time they’re shocked by how simple it is. That’s the beauty of great cooking – the best recipes often hide their genius behind simplicity.
The most important piece of equipment for this easy cheesecake recipe is a 9-inch springform pan. Regular cake pans make it nearly impossible to remove the cheesecake cleanly, and you’ll end up with a beautiful dessert that looks like it went through a blender when you try to serve it.
A stand mixer or hand mixer is essential for getting that silky smooth texture. Mixing by hand just won’t give you the consistency you need, and under-mixed filling leads to dense, lumpy cheesecake. However, be careful not to overmix once you add the eggs – that incorporates too much air and can cause cracking.
Room temperature ingredients are non-negotiable. I keep a kitchen thermometer handy to check – cream cheese should be around 65-70°F, soft enough that you can easily press your finger into it but not warm or melty. Eggs should feel neutral to the touch, not cold from the fridge.
For crushing graham crackers, a food processor works best, but you can also put them in a zip-top bag and crush them with a rolling pin. Just make sure the crumbs are fine and even – big chunks will make your crust lumpy and uneven.
Parchment paper isn’t essential, but it makes life so much easier. Cut a circle for the bottom of your springform pan and it’ll help with clean removal later. Some people grease the sides too, but I find it unnecessary if you’re using a quality springform pan.
An oven thermometer is worth the investment because oven temperatures can be wildly inaccurate. Cheesecake bakes low and slow, so being off by even 25 degrees can affect your results. Most home ovens run hot or cold, and knowing your actual temperature helps you adjust accordingly.
Step-by-Step Instructions
Preheat the Oven Preheat your oven to 325°F (163°C).
Make the Crust In a mixing bowl, combine the graham cracker crumbs, melted butter, and 1/4 cup sugar. Press the mixture into the bottom of a 9-inch springform pan to form a crust. Bake for 10 minutes and set aside to cool.
Prepare the Filling In a large bowl, beat the softened cream cheese until smooth. Gradually add 1 cup of sugar and vanilla extract, mixing until well combined. Add the eggs one at a time, mixing well after each addition. Finally, mix in the sour cream and flour until the mixture is creamy and smooth.
Bake the Cheesecake Pour the filling over the cooled crust in the springform pan. Bake for about 55-60 minutes, or until the center is set but slightly jiggly. Turn off the oven and let the cheesecake cool in the oven with the door slightly open for about an hour.
Chill Once cooled, refrigerate the cheesecake for at least 4 hours, preferably overnight, to set completely.
Serve Remove the sides of the springform pan and slice the cheesecake. Top with your choice of fruits, whipped cream, or chocolate sauce before serving.
Pro Chef Secrets and Advanced Techniques
The real secret to incredible cheesecake isn’t just following the recipe – it’s understanding the science behind what makes it work. When you beat the cream cheese, you’re not just mixing, you’re breaking down the protein structure to create smoothness. This is why room temperature matters so much – cold cream cheese resists this breakdown.
Temperature control throughout the entire process is crucial. I always use an oven thermometer because cheesecake is sensitive to temperature fluctuations. Too hot and you’ll get a dry, cracked surface. Too cool and the center won’t set properly, leaving you with cheesecake soup.
Here’s something most recipes don’t tell you: the order you add ingredients matters enormously. Cream cheese first, beaten until completely smooth. Then sugar, which needs time to dissolve fully. Vanilla next, then eggs one at a time. Each egg needs to be fully incorporated before adding the next, but don’t overbeat once the eggs are in – that creates air bubbles that expand during baking and cause cracks.
The flour and sour cream go in last, mixed just until combined. Overmixing at this stage develops gluten in the flour, making your cheesecake tough instead of silky. I use the lowest speed on my mixer for this final stage and stop mixing the moment everything is combined.
The jiggle test is your best friend for determining doneness. The center should still have a slight wobble when you gently shake the pan, about the diameter of a silver dollar. It might seem underdone, but the residual heat will finish cooking it during the cooling process.
The cooling technique prevents cracking and ensures even texture throughout. Gradual temperature changes are key – turning off the oven but leaving the cheesecake inside with the door cracked allows it to cool slowly. Rapid cooling causes the filling to contract quickly, creating those unsightly cracks.
Common Mistakes That Will Ruin Your Easy Cheesecake Recipe
The biggest mistake I see people make is rushing the room temperature process. Cold cream cheese will not become smooth no matter how long you beat it. Those lumps will be in your final cheesecake, creating an unpleasant texture that screams “amateur baker.” Plan ahead and take your ingredients out early.
Overmixing after adding eggs is another killer. I get it, you want everything perfectly smooth, but once those eggs are in there, you’re working against time. Too much mixing incorporates air, which expands during baking and creates cracks. Mix just until combined, then stop.
Opening the oven door repeatedly is like sending an engraved invitation for your cheesecake to crack. The temperature fluctuations stress the delicate filling, causing it to split. Resist the urge to check on it – trust the timing and use the oven light if you must peek.
Using the wrong pan size throws off everything. This recipe is calibrated for a 9-inch springform pan. Smaller pans mean thicker filling that won’t cook evenly. Larger pans create thin cheesecake that might overcook. Stick to the specified size for best results.
Removing the cheesecake from the refrigerator too early is heartbreaking. I know you’re excited to try it, but cheesecake needs that full chilling time to set properly. Cut into it too soon and you’ll have beautiful but messy slices that fall apart on the plate.
Not running a knife around the edges before cooling is a subtle but important mistake. As cheesecake cools, it contracts slightly. If it’s stuck to the pan sides, this contraction causes cracks. A quick knife run releases it and prevents this problem.
Alternatives and Substitutions That Actually Work
If you can’t find sour cream, Greek yogurt works as a substitute, but use the full fat version and drain any excess liquid first. The tang and texture are similar, though the final result will be slightly different. Regular yogurt is too thin and will make your cheesecake loose.
For a lighter version, you can substitute half the cream cheese with mascarpone cheese. It creates a slightly different flavor profile – more delicate and sweet – but the texture remains luxurious. Don’t substitute more than half or the structure won’t hold.
Gluten-free folks can skip the flour entirely or use a gluten-free flour blend. The flour is mainly for insurance against cracking, so omitting it won’t dramatically change the recipe. Just be extra careful with your cooling process.
If you’re avoiding regular sugar, superfine sugar works beautifully and actually dissolves more easily than granulated. Avoid powdered sugar though – the cornstarch in it will affect the texture. Natural sweeteners like maple syrup can work but will change both flavor and color significantly.
For the crust, you can substitute graham crackers with vanilla wafers, gingersnaps, or even chocolate cookies for different flavor profiles. Just maintain the same ratio of crumbs to butter to sugar. Oreo crusts are particularly delicious with plain cheesecake filling.
Dairy-free cream cheese alternatives exist, but results vary wildly by brand. Kite Hill and Tofutti make versions that work reasonably well, but expect slightly different texture and flavor. You’ll also need to use coconut cream instead of sour cream.
Flavor Variations and Creative Twists
Once you’ve mastered the basic easy cheesecake recipe, the flavor possibilities are endless. For chocolate lovers, add 1/4 cup cocoa powder to the filling and reduce the flour by 1 tablespoon. The result is rich, chocolatey, and absolutely divine with fresh berries.
Lemon cheesecake is incredible – add 2 tablespoons fresh lemon juice and 1 tablespoon lemon zest to the filling. The citrus brightens the rich cream cheese beautifully. Just reduce the vanilla to 1/2 teaspoon so it doesn’t compete with the lemon.
For coffee addicts, dissolve 2 tablespoons instant espresso powder in 1 tablespoon hot water, then add to the filling. It creates this sophisticated coffee flavor that pairs perfectly with chocolate sauce or fresh whipped cream.
Pumpkin cheesecake is perfect for fall – replace 1/2 cup of the cream cheese with pumpkin puree and add 1 teaspoon cinnamon, 1/2 teaspoon nutmeg, and 1/4 teaspoon each of ginger and cloves. Use a gingersnap crust for extra flavor.
Berry swirl cheesecakes look professional but are surprisingly easy. Make the basic filling, then swirl in 1/2 cup of berry jam or fresh berry puree before baking. Use a knife to create beautiful swirl patterns on top.
For special occasions, try adding 2 tablespoons of your favorite liqueur to the filling. Amaretto, Kahlua, or Bailey’s all work beautifully. Just reduce the vanilla slightly to let the alcohol flavor shine through.
Serving Suggestions and Pairings That Elevate the Experience
Presentation matters with cheesecake because it’s such an elegant dessert. Use a sharp knife dipped in warm water between cuts to get clean, professional looking slices. Wipe the blade clean after each cut for the best results.
Fresh berries are the classic topping for good reason – their tartness cuts through the rich filling perfectly. Strawberries, blueberries, raspberries, or blackberries all work beautifully. Arrange them artfully on top or serve alongside each slice.
A drizzle of high quality chocolate sauce takes this from homemade to restaurant quality. Make your own by heating equal parts heavy cream and chopped dark chocolate until smooth, or use a premium store-bought version.
For coffee lovers, serve with espresso or strong coffee. The bitter notes complement the sweet, rich cheesecake incredibly well. A glass of dessert wine like port or moscato is also elegant for special occasions.
Whipped cream lightens each bite and adds visual appeal, but make it fresh if possible. Store-bought whipped topping has a artificial taste that competes with the clean flavors of good cheesecake.
During holidays, consider seasonal garnishes. Candied pecans for Thanksgiving, peppermint bark shavings for Christmas, or edible flowers for spring celebrations. These small touches make the dessert feel special and thoughtful.
Storage and Reheating Guide for Maximum Enjoyment
Cheesecake actually improves with time, so don’t feel pressured to serve it immediately. Store it covered in the refrigerator for up to 5 days, though it’s usually gone long before that in my house. The flavors meld and deepen, creating an even more luxurious experience.
Cover the cheesecake with plastic wrap, but don’t let it touch the surface. The condensation will create water spots on your beautiful dessert. I usually tent the plastic wrap over toothpicks inserted around the edges.
For longer storage, cheesecake freezes beautifully for up to 3 months. Wrap individual slices in plastic wrap, then aluminum foil, and freeze in a single layer. Thaw overnight in the refrigerator before serving.
Never try to speed thaw cheesecake at room temperature or in the microwave. The delicate texture will break down and become grainy. Patience is essential for maintaining that silky smoothness.
If you’re transporting cheesecake, keep it chilled until the last possible moment. A cooler with ice packs works perfectly for short trips. The filling can soften in warm temperatures, making it difficult to slice cleanly.
Leftover cheesecake makes incredible milkshakes when blended with vanilla ice cream and milk. It’s like having dessert for breakfast, which I absolutely support on weekends.
Frequently Asked Questions
Why did my cheesecake crack, and how can I prevent it? Cracking usually happens from temperature shock or overmixing. Make sure all ingredients are room temperature, don’t overbeat after adding eggs, and cool the cheesecake gradually in the oven with the door cracked. Also, don’t open the oven door during baking.
Can I make this easy cheesecake recipe without a springform pan? Technically yes, but it’s much harder to remove cleanly. If you must use a regular cake pan, line it with parchment paper with long overhangs that you can use to lift out the cheesecake. Expect some imperfection in the final presentation.
How do I know when my cheesecake is done baking? The center should still jiggle slightly when you gently shake the pan – about the size of a silver dollar. The edges should be set and slightly puffed. Don’t wait for the center to be completely firm or you’ll overbake it.
Can I substitute low-fat cream cheese to make it healthier? I really don’t recommend it. Low-fat cream cheese has less fat and more water, which creates a grainy texture and affects the structural integrity. If you must lighten it, substitute half the cream cheese with full-fat Greek yogurt instead.
Why is my cheesecake dense instead of creamy? This usually comes from cold ingredients that didn’t mix properly, or from overmixing the batter. Make sure your cream cheese and eggs are truly room temperature, and mix just until ingredients are combined, especially after adding the eggs.
How far in advance can I make this cheesecake? Cheesecake is actually better made ahead! You can make it up to 3 days in advance and store covered in the refrigerator. The flavors improve with time, making it perfect for entertaining when you want to prep dessert early.
What’s the best way to cut clean slices? Use a sharp knife dipped in warm water, and wipe it clean between each cut. This prevents the filling from sticking to the blade and dragging. A thin-bladed knife works better than a thick chef’s knife for this purpose.
Can I freeze individual slices of cheesecake? Absolutely! Wrap each slice individually in plastic wrap, then aluminum foil, and freeze for up to 3 months. Thaw overnight in the refrigerator before serving. The texture holds up remarkably well to freezing.
Troubleshooting Guide for Perfect Results Every Time
My cheesecake filling has lumps even though I mixed it thoroughly. This almost always means your cream cheese wasn’t room temperature enough. Next time, take it out 3-4 hours early, or cut it into cubes to speed softening. You can sometimes fix small lumps by pressing the filling through a fine mesh strainer before baking.
The center of my cheesecake is still jiggly after the recommended baking time. Every oven is different, so extend baking time in 5-minute increments until you get that silver-dollar sized jiggle in the center. Better to bake a few minutes longer than to have an underset center that won’t slice cleanly.
My crust is soggy instead of crispy. Make sure you’re pressing the crust firmly into the pan and prebaking it for the full 10 minutes. Also, let it cool completely before adding the filling. A soggy crust usually means insufficient prebaking or adding hot filling to a warm crust.
The cheesecake pulled away from the sides of the pan while cooling. This is normal and doesn’t affect taste, but for prevention, run a knife around the edges immediately after removing from the oven. This releases the cheesecake from the pan and prevents pulling as it contracts during cooling.
My cheesecake tastes eggy instead of creamy. This happens from overmixing after adding the eggs, which breaks down their structure and creates an unpleasant texture and flavor. Mix eggs just until incorporated, using the lowest speed on your mixer for the final mixing.
The top of my cheesecake is brown instead of pale. Your oven temperature is probably too high, or you baked it too long. Use an oven thermometer to verify temperature, and remember that cheesecake should look barely set when you remove it. The residual heat finishes the cooking.
Final Thoughts
This easy cheesecake recipe has honestly become one of my most treasured possessions in the kitchen. There’s something magical about taking simple ingredients and transforming them into something so elegant and delicious. Every time I make it, I’m reminded of Rosa and her wisdom about keeping things simple.
The beauty of this recipe is how it grows with you as a baker. Start with the basic version, then begin experimenting with different flavors, toppings, and presentations. Maybe try a chocolate version one week, or add fresh berries the next. Baking should be fun and creative, and this recipe gives you the perfect foundation to build on.
I love how this cheesecake makes any occasion feel special. Whether it’s a birthday, holiday, or just a random Tuesday when you want something indulgent, this dessert transforms an ordinary meal into something memorable. Your family and friends will be genuinely impressed, and you don’t have to tell them how easy it actually was.
The fact that it’s better made ahead makes it perfect for entertaining. You can have this gorgeous dessert ready and waiting while you focus on other parts of your meal. There’s something so satisfying about opening the refrigerator and seeing that perfect cheesecake waiting there, knowing you made it yourself.
Now go make this easy cheesecake recipe and prepare to become everyone’s favorite baker. Trust me, once people taste this silky, perfect cheesecake, you’ll be getting requests to make it for every special occasion. And honestly? You’ll be happy to oblige because it’s just that good.