- Make the Pie Crust
In a large bowl, combine flour, salt, and sugar. Cut in the butter until the mixture resembles coarse crumbs. Stir in the ice water, a tablespoon at a time, until the dough comes together. Divide the dough in half, shape into discs, wrap in plastic, and refrigerate for at least 1 hour.
- Prepare the Filling
In a large bowl, toss the sliced apples with sugar, flour, cinnamon, nutmeg, and lemon juice until well combined. Let sit for about 15 minutes to allow the flavors to meld.
- Preheat Oven
Preheat your oven to 425°F (220°C).
- Roll Out the Dough
On a floured surface, roll out one disc of pie dough to fit a 9-inch pie plate. Place it in the pie plate, and fill it with the apple mixture. Dot with butter.
- Cover with Second Crust
Roll out the second disc of dough and place it over the filling. Seal and flute the edges, then cut slits in the top to allow steam to escape. Brush with egg wash made from egg yolk and milk.
- Bake the Pie
Bake in the preheated oven for 15 minutes, then reduce the temperature to 350°F (175°C) and continue baking for another 35-45 minutes, or until the apples are tender and the crust is golden brown.
- Cool and Serve
Let the pie cool on a wire rack for at least 2 hours before slicing. Serve warm or at room temperature, and enjoy your homemade apple pie!
While apple pie isn't exactly healthy food, it does provide some nutritional benefits worth noting. Apples are packed with fiber, vitamin C, and antioxidants. The pectin in apples supports digestive health and may help lower cholesterol. The spices in apple pie, cinnamon, nutmeg, and allspice, contain antioxidants and may have anti-inflammatory properties. Cinnamon has been studied for its potential blood sugar benefits, though you'd need to eat a lot more than what's in a pie slice to see effects. The butter in the crust provides vitamin A and some healthy saturated fats that help with nutrient absorption. While not low-calorie, homemade pie lets you control ingredients and avoid preservatives found in commercial versions. For a lighter version, you can reduce sugar slightly without dramatically affecting taste, or use a mix of sugar and stevia. The natural apple sweetness carries much of the flavor.
- Calories:300 kcals
- Fat:15 grams
- Protein:2 grams
- Carbohydrates:40 grams
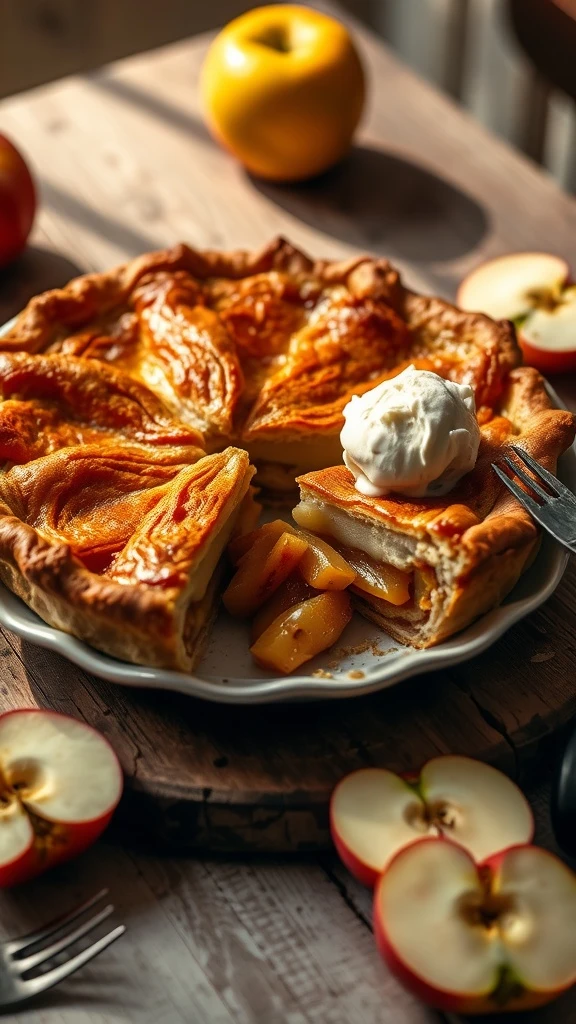
Picture walking into a kitchen where a homemade apple pie is cooling on the counter, filling the entire house with that intoxicating aroma of cinnamon, butter, and perfectly baked apples. That’s what this homemade apple pie recipe delivers every single time, pure comfort food magic that makes any day feel special. This isn’t just another pie recipe; it’s your passport to becoming the person everyone begs to bring dessert to family gatherings.
I’m talking about the kind of apple pie that makes people close their eyes on the first bite and immediately start reminiscing about childhood. The flaky, buttery crust that shatters perfectly when you cut into it, revealing tender, spiced apples that have been transformed into pure comfort. This recipe has been my go-to for years, and it never fails to impress.
The best part? While this tastes like something that took all day to make, the actual hands-on time is surprisingly manageable. Sure, there’s some waiting involved for chilling dough and cooling the finished pie, but the active work is totally doable, even if you’ve never made pie crust before. Get ready to become a pie legend.
Why This Apple Pie Recipe Will Become Your Signature Dessert
Here’s what makes this homemade apple pie recipe absolutely perfect: it strikes that ideal balance between traditional technique and modern convenience. The crust is made from scratch because that’s where the real magic happens, store-bought just can’t compare to the flavor and texture of homemade pastry.
The secret weapon in this recipe is the apple combination. Most people just grab whatever apples look good, but using a mix of tart and sweet varieties creates this incredible depth of flavor. Granny Smith apples hold their shape beautifully and provide that essential tartness, while Honeycrisp or Gala apples add sweetness and help create that perfect tender texture.
What really sets this apart is the spice blend and the technique for preventing a soggy bottom. Nobody wants a pie with a soggy crust, it’s the cardinal sin of pie making. This recipe includes foolproof methods for ensuring your bottom crust stays crisp and flaky, even with all those juicy apples on top.
The filling technique is genius too. Letting the apple mixture sit for 15 minutes before filling the pie allows the sugar to draw out some of the natural juices, which then get absorbed back into the apples along with all those warm spices. This creates incredibly flavorful filling that doesn’t turn watery during baking.
The double crust situation here is pure perfection. That top crust doesn’t just protect the filling, it becomes this golden, flaky crown that makes every slice look bakery-worthy. The steam vents aren’t just functional; they create these lovely little windows that let you peek at the bubbling filling underneath.
The Story Behind My Perfect Homemade Apple Pie Recipe
My relationship with apple pie started when I was about ten years old, visiting my great-aunt Margaret in upstate New York. She had this ancient apple tree in her backyard that produced the most incredible fruit, tart, crisp, and perfect for baking. Every fall, she’d make dozens of pies to freeze for the winter, and I was always her eager assistant.
Margaret taught me that great apple pie starts with great apples, but more importantly, it’s about understanding how different varieties behave when baked. She showed me how Granny Smiths keep their shape while McIntosh turn to mush, how a touch of lemon juice prevents browning and brightens the flavors, and why you should never skip the resting time for pie dough.
The biggest lesson came when I tried to rush the process during one visit. I was maybe twelve, impatient to get to the eating part, so I skipped chilling the dough and didn’t let the filling rest. The result was a disaster, the crust shrunk and got tough, and the filling was watery and bland. Margaret just laughed and said, “Pie teaches you patience, honey. Good things take time.”
When I moved out on my own, apple pie became my signature dessert. I started with Margaret’s basic technique but began experimenting with different apple combinations, spice ratios, and crust methods. Some attempts were spectacular failures, I remember one Thanksgiving where the bottom crust was so soggy it was basically apple soup with a hat.
The breakthrough came when I started pre-baking the bottom crust partially before adding the filling. This simple step eliminated the soggy bottom problem forever. I also discovered that mixing a tiny bit of cornstarch with the flour helps thicken those apple juices without making the filling gluey.
Over the years, I’ve made this pie for countless occasions, birthdays, holidays, potluck dinners, and random Tuesday nights when I needed comfort food. Each time, I’ve refined the recipe slightly, adjusting spice levels, perfecting the crust technique, and learning exactly how to tell when it’s perfectly done.
The version I’m sharing now represents probably fifty different iterations and feedback from hundreds of people who’ve tasted it. It’s the pie that made my neighbor offer to trade lawn mowing services for regular pie deliveries. It’s the dessert that convinced my skeptical mother-in-law that maybe I was worthy of her son after all.
Essential Equipment and Kitchen Tips That Make All the Difference
The most important piece of equipment for this homemade apple pie recipe is a good 9-inch pie plate. I prefer glass or ceramic because they conduct heat evenly and you can see the bottom crust to check for doneness. Metal pans work too, but they can create hot spots that burn the edges before the center is done.
A pastry blender or two knives are essential for cutting butter into flour properly. Food processors work, but they can overwork the dough quickly, resulting in a tough crust. Hand methods give you more control over the texture. You want the butter pieces to be about the size of peas, some smaller, some larger for maximum flakiness.
Rolling pins matter more than you might think. A good wooden rolling pin without handles gives you better control and more even pressure. If you don’t have one, a wine bottle works in a pinch, but make sure it’s clean and smooth.
Sharp knives are crucial for both peeling apples and cutting steam vents. Dull knives crush apple flesh instead of slicing cleanly, and they make it nearly impossible to cut clean vent holes in your top crust. Keep your knife sharp and your apples will thank you.
A kitchen scale isn’t essential, but it makes measuring flour much more accurate. Too much flour makes tough crust, while too little makes it impossible to roll out properly. If you don’t have a scale, spoon flour lightly into measuring cups and level off, don’t pack it down.
Plastic wrap is your friend for chilling dough. Wrap those dough discs tightly to prevent them from drying out in the refrigerator. Dry dough cracks when you roll it, creating frustration and patches that affect both appearance and texture.
Step-by-Step Instructions
Make the Pie Crust In a large bowl, combine flour, salt, and sugar. Cut in the butter until the mixture resembles coarse crumbs. Stir in the ice water, a tablespoon at a time, until the dough comes together. Divide the dough in half, shape into discs, wrap in plastic, and refrigerate for at least 1 hour.
Prepare the Filling In a large bowl, toss the sliced apples with sugar, flour, cornstarch, cinnamon, nutmeg, allspice, and lemon juice until well combined. Let sit for about 15 minutes to allow the flavors to meld.
Preheat Oven Preheat your oven to 425°F (220°C).
Roll Out the Dough On a floured surface, roll out one disc of pie dough to fit a 9-inch pie plate. Place it in the pie plate, and fill it with the apple mixture. Dot with butter.
Cover with Second Crust Roll out the second disc of dough and place it over the filling. Seal and flute the edges, then cut slits in the top to allow steam to escape. Brush with egg wash and sprinkle with coarse sugar.
Bake the Pie Bake in the preheated oven for 15 minutes, then reduce the temperature to 350°F (175°C) and continue baking for another 35-45 minutes, or until the apples are tender and the crust is golden brown.
Cool and Serve Let the pie cool on a wire rack for at least 2 hours before slicing. Serve warm or at room temperature.
Pro Chef Secrets and Advanced Techniques
The real secret to incredible apple pie isn’t just following the recipe, it’s understanding the science behind what makes it work. When you cut butter into flour, you create layers of fat that will steam during baking, resulting in those coveted flaky layers. This is why cold butter is non-negotiable.
Temperature control throughout the entire process is crucial. Cold ingredients, cold rolling surface, even chilling your rolling pin can help maintain that butter structure. Some bakers keep marble pastry boards in the refrigerator specifically for this purpose.
Here’s something most recipes don’t tell you: the order you add ingredients to your filling matters. Sugar draws moisture from the apples, so letting them sit together creates natural syrup that gets reabsorbed along with all those spices. This is why the 15-minute rest period is essential, not optional.
The blind baking technique I use involves partially pre-baking the bottom crust for about 10 minutes before adding the filling. This prevents the dreaded soggy bottom that ruins so many otherwise perfect pies. Line the crust with parchment paper, fill with pie weights or dried beans, and bake until just set.
Venting the top crust properly is both functional and aesthetic. Those slits allow steam to escape, preventing the filling from getting watery, but they also create beautiful patterns. I like to make decorative cuts that complement the fluted edges, maybe leaf shapes or simple geometric patterns.
The egg wash isn’t just for looks, though the golden color it creates is gorgeous. It also helps seal the top and bottom crusts together, preventing filling from bubbling out during baking. The coarse sugar adds textural interest and extra sweetness to each bite.
Common Mistakes That Will Destroy Your Apple Pie
The biggest mistake I see people make is working with warm ingredients. Room temperature butter creates greasy, tough crust instead of flaky layers. If your kitchen is warm, work quickly and consider chilling your bowl and utensils before starting.
Overworking the dough is another pie killer. Mix just until the dough comes together, it should look a bit shaggy, not smooth. Smooth dough means you’ve developed too much gluten, resulting in tough, chewy crust that shrinks during baking.
Using only one type of apple creates boring, one-dimensional filling. Different varieties bring different qualities – some hold their shape, others break down and create natural sauce. The combination is what creates complex, interesting texture.
Don’t you dare skip the resting time for the filling. I know you’re eager to get that pie in the oven, but those 15 minutes allow the sugar to start drawing out apple juices and the spices to bloom. Skip this step and you’ll have bland, watery filling.
Cutting steam vents too small or forgetting them entirely leads to disasters. The filling needs to release steam or it will bubble over and make a mess of your oven. Plus, trapped steam can make your bottom crust soggy.
Opening the oven door repeatedly to check on your pie is like sending an invitation for problems. Temperature fluctuations can cause the crust to crack or the filling to bubble over. Trust the timing and use the oven light to peek if necessary.
Alternatives and Substitutions That Actually Work
If you can’t make your own crust, high-quality store-bought pastry can work in a pinch. Look for all-butter crusts in the refrigerated section, they’re significantly better than the frozen ones. Just thaw completely before using and handle gently.
For gluten-free bakers, cup-for-cup flour blends work reasonably well in pie crust, though the texture will be slightly different. Adding an extra tablespoon of cold butter helps compensate for textural differences. The filling is naturally gluten-free as written.
Can’t find the apple varieties I recommend? Braeburn, Jonathan, or Northern Spy apples work beautifully too. The key is mixing tart apples that hold their shape with sweeter varieties that add complexity. Avoid Red Delicious or McIntosh, which turn to mush when baked.
If cornstarch isn’t available, you can increase the flour to 3 tablespoons total, but the thickening won’t be quite as clean. Tapioca starch also works well if you have it, use the same amount as cornstarch.
For a less sweet version, reduce the sugar to 1/2 cup and add an extra tablespoon of lemon juice. The natural apple sweetness will still shine through, and the tartness becomes more prominent.
Dairy-free bakers can substitute the butter in the crust with cold vegan butter or even cold coconut oil. The texture will be slightly different but still delicious. Skip the egg wash or use plant milk instead.
Flavor Variations and Creative Twists
Once you’ve mastered the basic homemade apple pie recipe, the flavor possibilities are endless. For caramel apple pie, drizzle 1/4 cup caramel sauce over the apples before adding the top crust. The caramel melts into the filling during baking, creating incredible richness.
Cranberry apple pie is perfect for fall, add 1/2 cup dried cranberries to the apple mixture. The tartness complements the apples beautifully and adds gorgeous color contrast. Fresh cranberries work too, but add an extra 2 tablespoons of sugar to balance their intense tartness.
For bourbon lovers, add 2 tablespoons of good bourbon to the apple mixture. The alcohol cooks off, leaving behind deep, complex flavor that pairs incredibly with the warm spices. It’s sophisticated comfort food at its finest.
Cheddar cheese and apple pie is a traditional combination that sounds weird but tastes incredible. Grate sharp cheddar into your bottom crust dough or serve slices with aged cheddar on the side. The salty, tangy cheese contrasts beautifully with sweet apples.
Maple apple pie brings autumn flavors to the forefront. Replace 1/4 cup of the granulated sugar with pure maple syrup, and add a pinch of ground ginger to the spice mix. The maple flavor intensifies during baking, creating something truly special.
For crumb top lovers, skip the second crust and make a streusel topping with flour, brown sugar, butter, and oats. It creates different texture but equally delicious results, plus you only need to make one crust.
Serving Suggestions and Pairings That Complete the Experience
Apple pie is incredible on its own, but the right accompaniments can elevate it to legendary status. Vanilla ice cream is the classic pairing for good reason, the cold, creamy sweetness contrasts perfectly with warm, spiced filling and flaky crust.
For something more sophisticated, try serving with cinnamon whipped cream or caramel sauce. Both complement the apple flavors without overwhelming them. A drizzle of heavy cream is simple but elegant too.
Coffee and apple pie are made for each other. The bitter notes in coffee balance the sweet filling beautifully, while the warmth of both creates the ultimate comfort food experience. Hot cider works wonderfully too, doubling down on apple flavor.
For wine lovers, a glass of dessert wine like late harvest Riesling or port pairs beautifully. The sweetness complements rather than competes, while the acidity cuts through the rich crust.
During holidays, consider garnishing with candied nuts, a sprinkle of cinnamon, or even edible flowers for special presentations. These small touches make homemade pie feel even more special and thoughtful.
A cheese plate featuring sharp cheddar, aged gouda, or creamy brie creates an interesting sweet and savory contrast that’s perfect for entertaining. It sounds fancy but it’s just good flavor pairing.
Storage and Reheating Guide for Maximum Enjoyment
Fresh apple pie keeps at room temperature for 2 days, covered loosely with foil or plastic wrap. Don’t seal it completely or the crust will get soggy from trapped moisture. The filling actually improves slightly as it sits and the flavors meld.
For longer storage, refrigerate for up to 5 days. Let it come to room temperature before serving, or warm individual slices in a 350°F oven for about 10 minutes to restore that fresh-baked texture.
Apple pie freezes beautifully, either before or after baking. To freeze unbaked, assemble completely but don’t cut steam vents or add egg wash. Wrap tightly and freeze for up to 3 months. Bake directly from frozen, adding 15-20 minutes to the baking time.
For baked pies, cool completely, then wrap tightly and freeze for up to 4 months. Thaw overnight in the refrigerator, then warm in a 350°F oven for 15-20 minutes to refresh the crust.
Individual slices can be frozen separately for quick single servings. Wrap each slice in plastic wrap, then foil, and freeze for up to 2 months. Thaw at room temperature or warm directly from frozen.
Never microwave whole pie slices, it makes the crust soggy and heats unevenly. Oven reheating maintains texture and ensures even warming throughout.
Frequently Asked Questions
Why did my pie crust shrink during baking? This usually happens from overworking the dough or not chilling it long enough. Gluten development causes shrinkage, so mix just until combined and always rest the dough for at least an hour. Also, don’t stretch the dough when placing it in the pan.
How do I prevent a soggy bottom crust? Pre-bake the bottom crust for 10 minutes before adding filling, use a glass or ceramic pie plate so you can see the bottom, and make sure your oven is fully preheated. Placing the pie on the lowest oven rack also helps crisp the bottom.
Can I make the crust ahead of time? Absolutely! Wrapped dough keeps in the refrigerator for up to 3 days or frozen for up to 3 months. Thaw frozen dough overnight in the fridge before rolling. You can also roll out crusts and freeze them in pie plates.
What’s the best way to tell when my pie is done? The crust should be golden brown and the filling should be bubbling through the steam vents. If you insert a knife through a vent, the apples should be tender. The internal temperature should reach 175°F if you have a thermometer.
Why did my apple pie bubble over in the oven? This usually happens from overfilling, not cutting adequate steam vents, or using very juicy apples. Make sure vents are large enough for steam to escape, don’t pack apples too tightly, and place a baking sheet on the rack below to catch drips.
Can I use frozen apples for pie? Fresh is always better, but thawed frozen apples can work in a pinch. Drain any excess liquid and add an extra tablespoon of flour to compensate for additional moisture. The texture won’t be quite as firm as fresh.
How do I get perfectly fluted edges on my pie crust? Practice makes perfect, but the basic technique is to place your index finger on the inside edge and pinch the dough around it with your other thumb and index finger. Work around the entire pie, overlapping slightly for even spacing.
What if my top crust cracks during baking? Small cracks are normal and don’t affect taste. For large cracks, you can patch with small pieces of dough mixed with a little water, or simply embrace the rustic look. It’s homemade, not perfect, and that’s part of its charm.
Troubleshooting Guide for Perfect Results Every Time
My crust turned out tough instead of flaky. This usually means the butter got too warm or the dough was overworked. Next time, keep everything cold and mix just until the dough comes together. It should look slightly shaggy, not smooth.
The filling is watery and the bottom crust is soggy. Too much liquid in the filling or not enough thickener. Make sure you’re using the cornstarch and flour as specified, and consider pre-baking the bottom crust next time. Very juicy apples may need an extra tablespoon of thickener.
My pie crust edges burned before the center was done. Cover the edges with foil strips or a pie shield once they reach golden brown color. This allows the center to finish cooking without burning the edges. Reducing oven temperature slightly can also help.
The top crust looks pale even though the pie seems done. Brush with egg wash if you haven’t already, and move the pie to a higher oven rack for the last 10-15 minutes. You can also increase temperature to 425°F briefly to brown the top.
My apple slices are mushy instead of tender. You likely used apples that break down during cooking, like McIntosh or Red Delicious. Stick to firmer varieties like Granny Smith, Honeycrisp, or Braeburn. Overcooking can also cause this issue.
The filling tastes bland despite using the spice amounts listed. Taste your filling before baking and adjust seasoning as needed. Apple sweetness varies, so you might need extra spices or lemon juice. Don’t be afraid to add a pinch more cinnamon or nutmeg to suit your taste.
Final Thoughts
This homemade apple pie recipe has honestly become one of my most treasured culinary possessions. There’s something magical about the process of making pie from scratch, the meditative quality of peeling apples, the satisfaction of creating flaky pastry, and the incredible anticipation as it bakes and fills your home with those warm, comforting aromas.
The beauty of this recipe is how it connects you to generations of bakers who’ve found comfort and joy in this simple but perfect dessert. Every time I make it, I think about my great-aunt Margaret and the lessons she taught me about patience and quality ingredients. Those lessons apply to so much more than just pie making.
I love how this pie brings people together. Whether it’s a holiday gathering, a casual dinner with friends, or just a quiet evening at home, homemade apple pie creates moments of connection and happiness. There’s something about sharing a slice that breaks down barriers and creates instant warmth.
The fact that you can make this ahead and it actually improves with time makes it perfect for entertaining or meal planning. Having a homemade pie waiting in your kitchen feels like having a little bit of magic on standby, ready to transform any ordinary moment into something special.
Now go make this homemade apple pie recipe and prepare to become a legend in your own kitchen. Trust me, once people taste your homemade pie with its flaky crust and perfectly spiced filling, you’ll be getting requests for every special occasion. And honestly? You’ll be happy to oblige because making pie this good is just as rewarding as eating it.